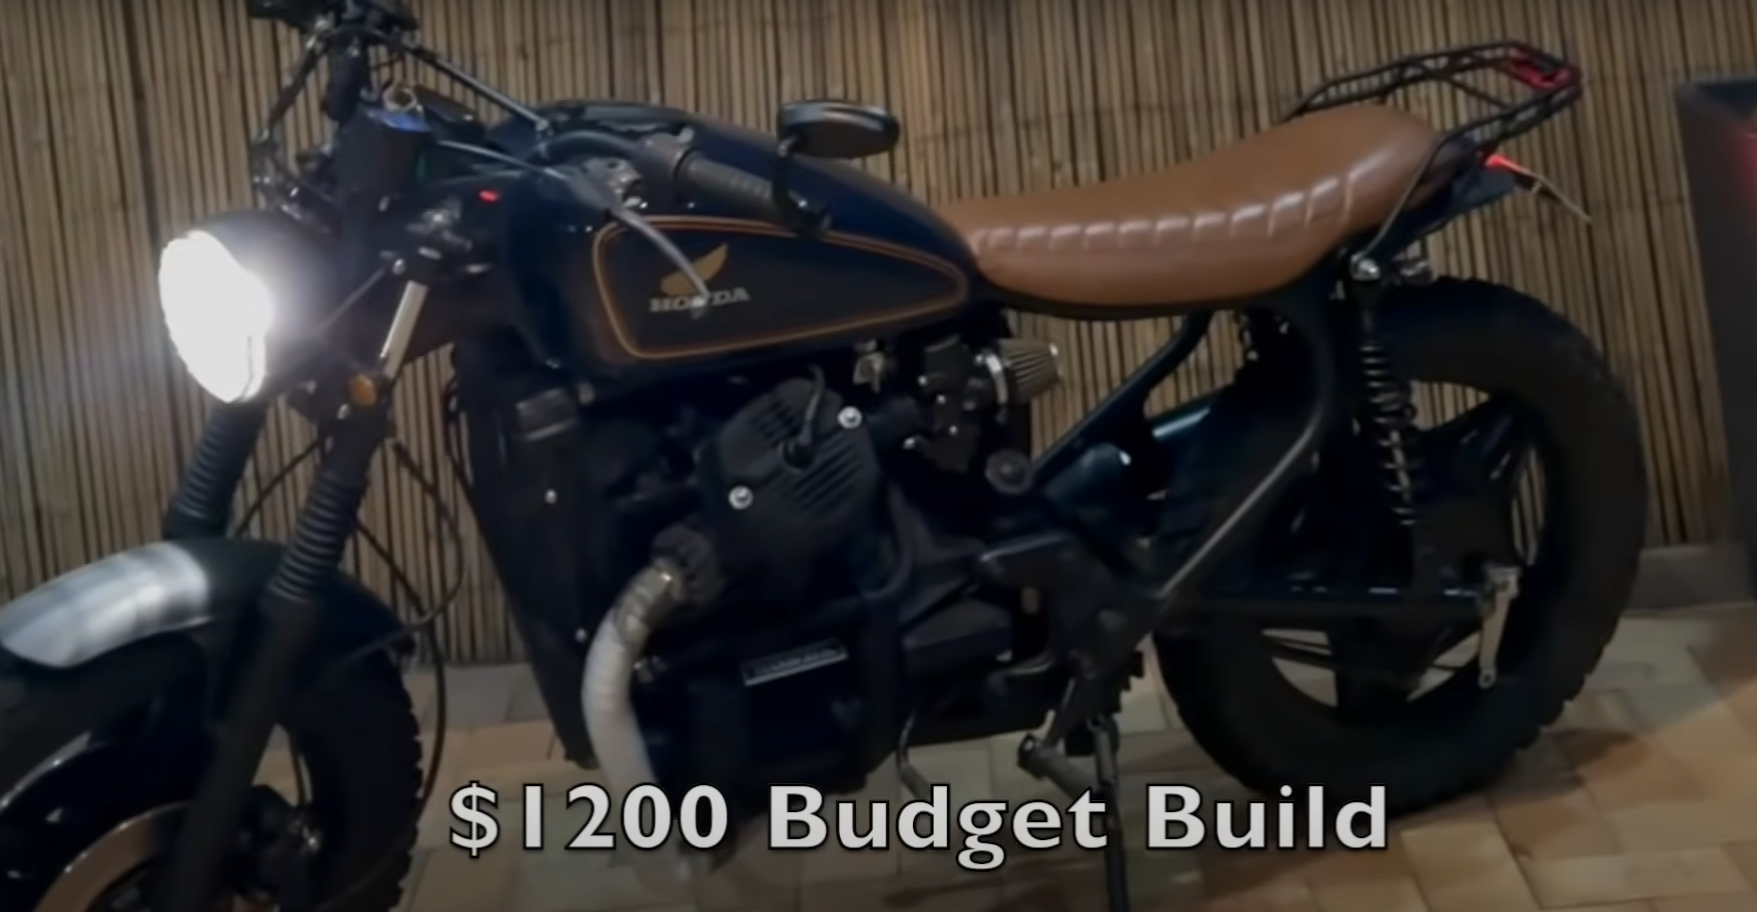
Taking a neglected Honda CX500 and turning it into a standout motorcycle doesn’t have to break the bank. With some simple restoration work and creative, cost-effective customization, a rider can give new life to an old bike. The process covers everything from deep cleaning, engine and carburetor care, to upgrading the suspension and reshaping the fuel tank for a better look.
Focusing on practical changes like replacing the bulky seat, adjusting the front end, and making sure the fuel tank is rust-free can lead to major improvements. Each step is designed to keep costs low, while using tools and materials that are easy to find. These changes make the motorcycle more personal and stylish without spending a lot of money.
Key Takeaways
- Prep and restore key parts before starting custom work
- Smart design updates can transform a basic bike on a budget
- Tracking costs throughout helps manage the entire project
Checking and Getting the Honda CX500 Ready
Buying the Bike and Its Starting State
The Honda CX500 was bought in 2017 for $500 and served as a daily ride for several years. After that, it was covered and put into long-term storage. The bike showed signs of being a standard, well-used motorcycle, but it had strong potential for improvements.
General Upkeep and Storage Steps
When the bike was not in use, it remained under a cover to protect it from the elements. Before any major work began, the owner started by performing routine cleaning and some minor maintenance tasks. This included draining old fuel, assessing rust inside the tank, and checking for any visible damage or worn parts.
To keep rust at bay, a rust removal product was poured into the tank and swirled around, following up with a tank sealer to keep future rust from forming. The value of keeping parts dry and protected became clear after seeing how well the fuel tank responded to treatment.
Maintenance Checklist:
- Drained old fuel
- Treated for rust in the tank
- Protected surfaces from moisture
- Covered and stored the bike when not in use
Starting with Cleaning and Taking the Bike Apart
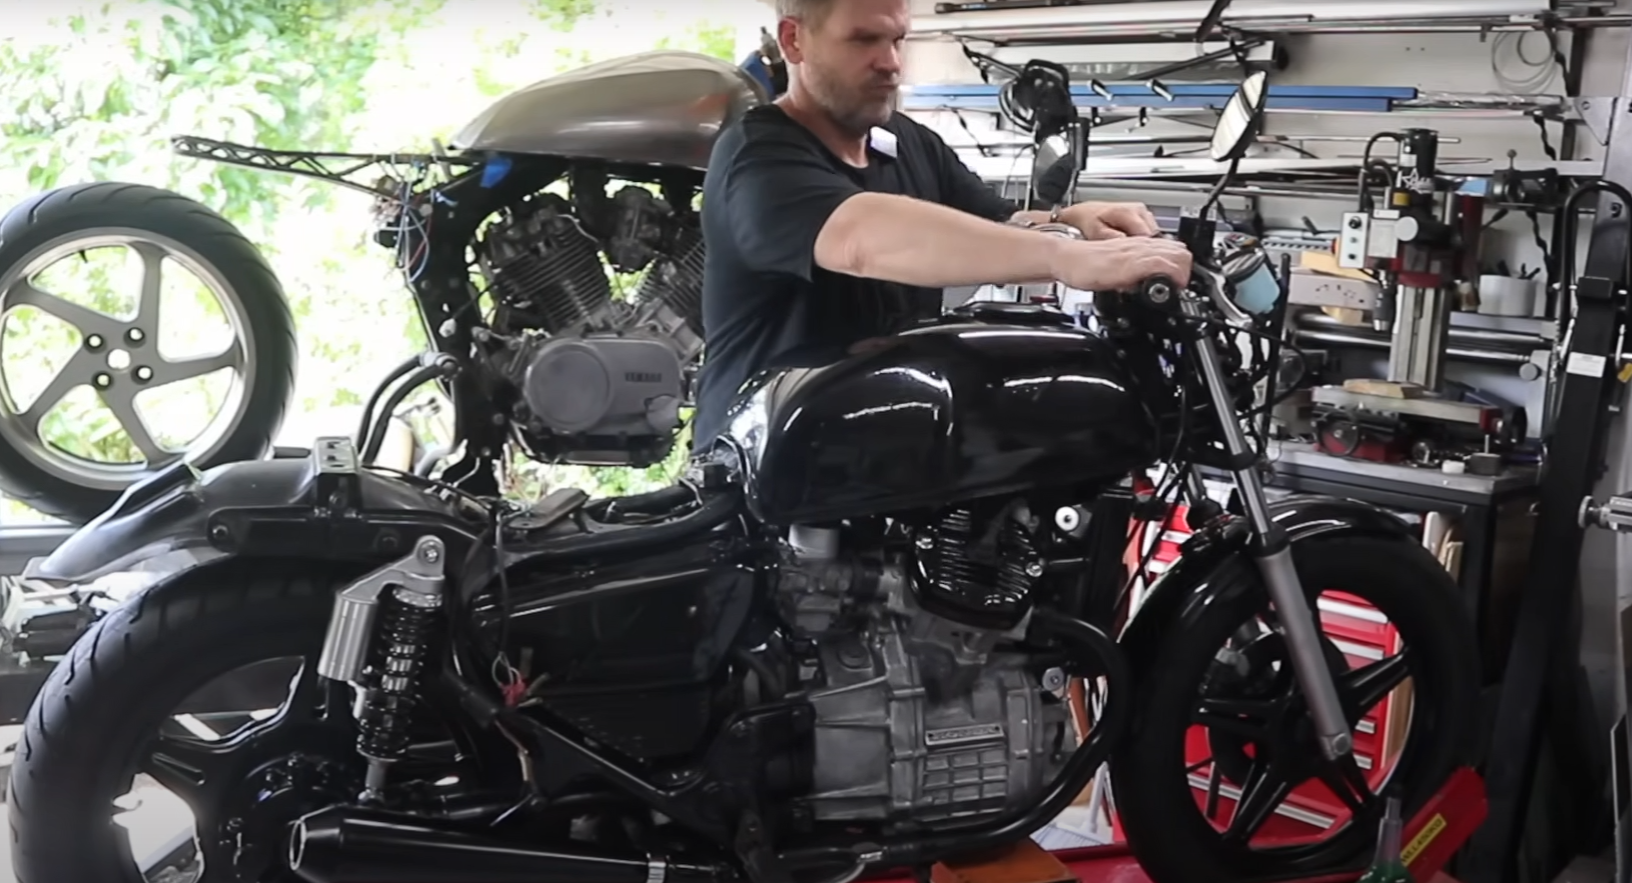
The first step in preparing the CX500 for modifications was a detailed cleaning. Key components such as carburetors were removed and rebuilt to ensure clean operation. Parts like covers and sections of the tail and seat were stripped off to reveal the frame and allow for easier access.
Main tasks in this stage:
- Cleaned all visible dirt and debris
- Removed and rebuilt carburetors
- Started vapor blasting and painting select parts
- Took off bulky seat and tail section for a slimmer appearance
Tip: Smaller tasks, like managing bolts and washers, help keep everything tidy and prevent future issues with reassembly. Using the right techniques for handling plastic, steel, and foam—like gentle heating and proper adhesives—helped shape components for a precise fit.
A thorough approach to cleaning and disassembly set the foundation for all future custom work on the bike.
Motor Maintenance and Carburetor Work
Surface Treatment and Fresh Paint
The team removed key engine parts for vapor blasting. This made old metal surfaces clean and restored their appearance. After blasting, they applied a new layer of paint to give these components a fresh look. This process can be repeated for many types of motorcycles, making worn parts look almost new.
Tools Used:
- Vapor blasting machine
- Paint and brushes or spray cans
Steps Followed:
- Detach engine parts.
- Vapor blast each piece.
- Let parts dry fully.
- Paint and let cure before reassembly.
Rebuilding the Fuel Mixer
The carburetors were taken off the bike. They were fully disassembled and cleaned out to remove dirt and buildup. New parts were put in, and then the carburetors were assembled again and placed back onto the engine.
Carburetor Rebuild Checklist:
- Remove and inspect all parts
- Clean jets and passages
- Replace worn gaskets and seals
- Reassemble with care
- Re-install on engine
Engine First Start After Repairs
Once the engine and carburetors were back in place, the team tried to start the bike. This was the first start after all the cleaning and rebuilding. If you work on your own motorcycle, expect to test and check for smooth engine running after similar repairs. If there are problems, use a basic checklist to find what might be wrong.
| Step | What to Check |
|---|---|
| Turn on engine | Listen for smooth idling |
| Rev throttle | Watch for clean acceleration |
| Watch exhaust | Make sure smoke is minimal |
Use these steps to help get your motorcycle running again after repairs.
Low-Cost Ways to Personalize Your Motorcycle
Budget-Friendly Upgrade Methods
They started their project with an older Honda CX500, purchased for just $500. After cleaning, blasting, and repainting some parts, they focused on removing bulky sections like the stock tail, lights, and seat to create a sleeker look.
Here are some simple and affordable steps they used:
- Front fork lowering: Instead of buying new parts, loosen the triple clamp bolts and slide the forks up. They recommend upgrading the fork springs for better performance, but the basic change is nearly free.
- Reusing old parts: Removed seats and other components from previous builds can be reused for the new bike, saving money.
- Minimalist modifications: Just chopping the back end and adding a slimmer seat gave the motorcycle a much cleaner appearance with low extra cost.
They often made design changes along the way to keep things both good-looking and low-priced.
Tips for Making Custom Parts Yourself
For homemade fabrication, they relied on easy-to-find tools and supplies. Using simple cuts and welds, they reshaped the frame and body to achieve their preferred style.
Some tips they shared:
- Frame cutting techniques: Cut the rear of the frame in clean lines. When working with seams, only remove what’s needed and use TIG welding for neat joints.
- Heat for shaping: Heat plastic seat bases in an oven for big bends, then use a heat gun for detail shaping. This helps get a custom fit without expensive tools.
- Use seat clip kits: Attaching the seat with clip sets makes it easy to remove or adjust. Rivets or small screws work well for fixing the clips onto metal parts.
They recommend using high-density foam for seats and glue for shaping. Burnt areas from heating plastic are not a problem since they get covered with foam.
Mixing and Matching Parts from Other Models
They showed that many of these steps work on a range of bikes, not just the CX500. For example, seats and certain hardware can fit several models if you know where to look.
Quick suggestions for cross-model swaps:
- Measure before reusing parts like seats or brackets to check fitment.
- Universal hoops and tail lights can be adapted to fit different frames with minor changes.
- Reusable seat clips and foam come in various sizes to fit several bikes.
They pointed out that careful planning and basic skills let you transfer methods and parts from one project to many others, keeping things affordable.
Rear Frame and Custom Seat Work
Taking Off Stock Components
The original rear end comes with a large seat and bulky lighting. These parts get removed first to start the transformation. By taking them off, the frame is more open and ready for modification. The new look becomes much cleaner right away.
Steps:
- Take off the old seat.
- Remove the tail light and indicators.
- Set aside smaller pieces for later, such as washers or rubber mounts.
Cutting and Adjusting the Frame
To make room for a slimmer seat and better lines, the frame needs to be shortened and reshaped. The cut is measured from the end of the original frame, making sure the new back end is neat. Sometimes, seams and welds need special attention.
Frame Cutting Details:
| Action | Measurement/Note |
|---|---|
| Measuring cut | About 160 mm or more |
| Dealing with seams | Cut top, tie bottom in with new parts |
| Weld type | TIG welding recommended |
It is important to double-check cut lines before making any changes. Cutting is usually done with the frame drained and cool for safety, especially around the fuel tank.
Installing a New Hoop and Integrated Tail Light
After cutting, a new hoop is fitted to the back of the frame. Many hoops have a tail light built into them for a sleeker look. These pieces can be painted before final installation.
Installation Tips:
- Test-fit the hoop before welding.
- Use triangular brackets if needed to support the hoop.
- Cap and paint any exposed edges.
For the seat, use a thermal plastic base and high-density foam. Attach the seat with clips, using rivets or screws, and mark holes carefully to line up with the frame. The finished result is a neat back end with a firm, light-weight seat and integrated lighting.
Adjusting the Front Suspension
Lowering the Front Forks
To give the bike a better stance, it helps to bring the front end down a bit. This can be done by loosening the bolts on the triple clamps. Once loose, the front forks can be slid upward to the desired height. Many riders use this method because it does not require any special tools and can be done fairly quickly.
Steps:
- Use the correct size tools to loosen the triple clamp bolts.
- Carefully slide each fork up to the same height on both sides.
- Retighten all bolts securely.
Tip: Check fork alignment before riding.
Installing Better Fork Springs
If the front end has been lowered, installing stronger springs inside the forks is a good idea. Progressive fork springs can be a big upgrade over old or worn-out stock springs. These give the front forks better support and make the suspension feel more controlled.
Upgrading Fork Springs:
- Reduces front dive when braking
- Gives smoother handling over bumps
- Works well with the lowered stance
Using higher quality springs makes a big difference, especially after changing the height of the front end.
How Changes Affect Ride Comfort
Lowering the front does make the bike look better, but it also changes how the suspension works. When the forks are moved up in the triple clamps, the amount of travel is reduced. This means there is less space for the forks to move up and down over bumps, which can make the ride feel stiffer.
Possible Effects:
| Change | Result |
|---|---|
| Lowered front forks | Less suspension travel |
| Progressive fork springs | More support and less harsh bottoming out |
| Stiffer suspension | Smoother ride, but less cushion over bumps |
It is important to think about these changes so the ride quality matches how the bike looks. Upgrading the fork springs can help balance the comfort and handling.
Fuel Tank Updates and Rust Protection
Methods for Raising the Tank
Raising the back of the fuel tank changes the motorcycle’s look. There are a few ways to do this. A common method is to cut the tank at a certain spot and add metal pieces to raise it. Using the original rubber mounts saves time and effort.
Some people use steel washers as spacers, but this can look untidy. A cleaner solution is to make custom mounts to lift the tank about 20 mm. The key is keeping a nice flow from the tank to the new seat base. This helps the seat fit better and look more professional.
Tip: Before modifying the tank, always drain the fuel and fill it with water to avoid fire risks.
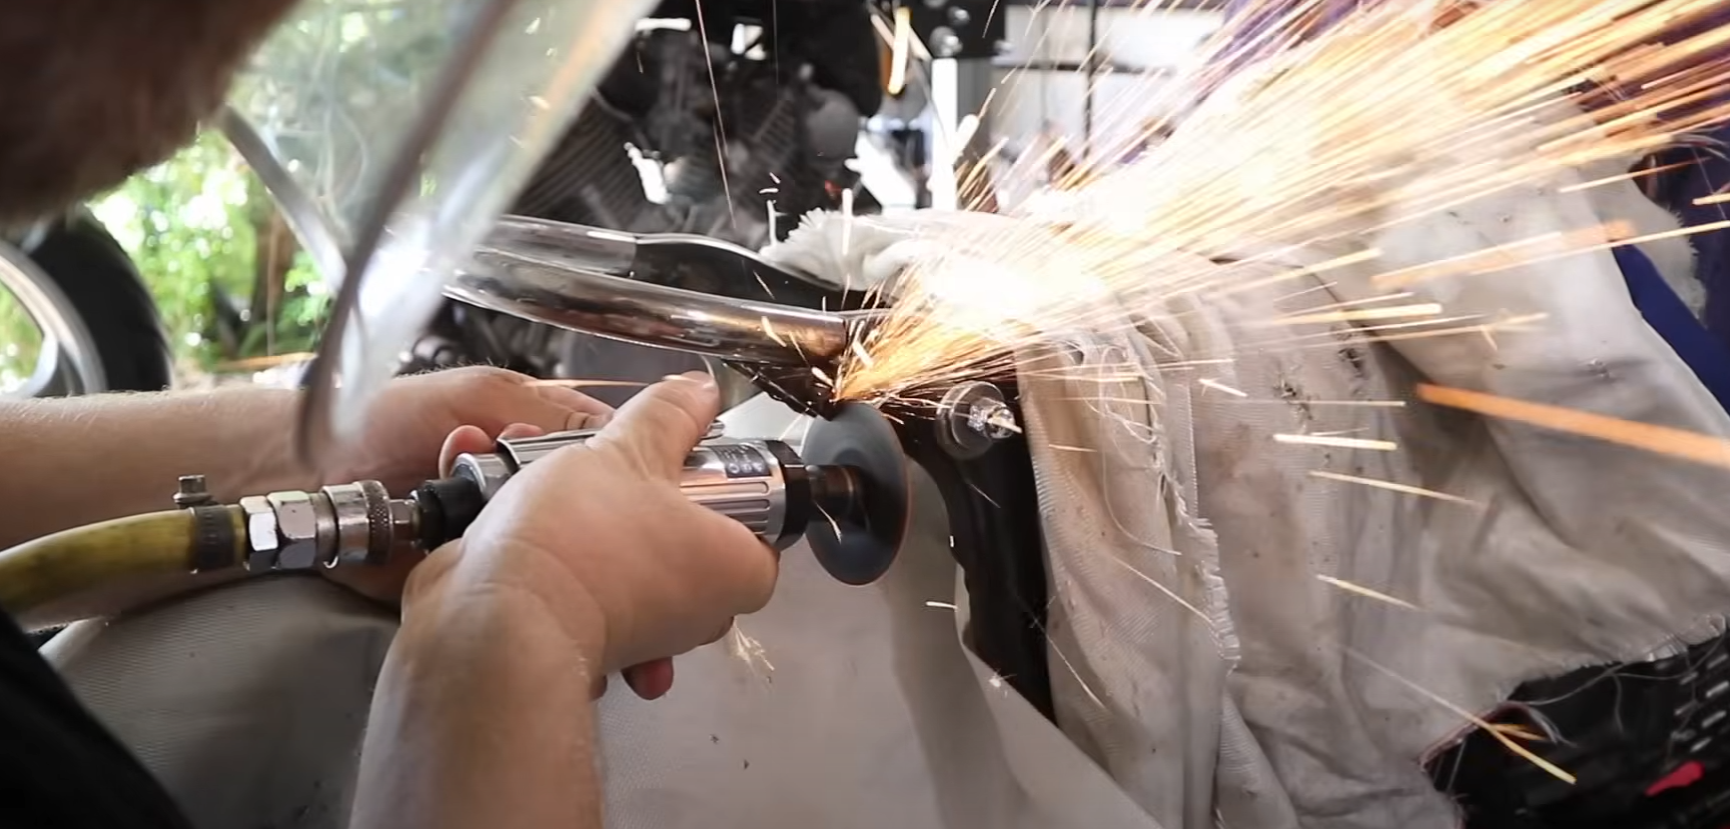
Steps for Cutting and Welding Safely
When working with tank seams, especially on older models, look for spot welds. These are often spaced around 40 mm apart. Cutting the seam in line with the rest of the frame gives a neat finish. After cutting, TIG welding is a good choice for strong, clean joints.
While welding, keep the area cool. Using a wet rag around the work zone helps protect paint, plastic, or rubber from heat damage. If any plastic does get scorched, it can be sanded down later.
Quick List:
- Drain and fill tank with water before starting.
- Plan your cuts on the tank using tape for a visual guide.
- TIG weld for strong and neat results.
- Protect everything around with water or a wet towel.
Removing Rust and Sealing the Tank
To tackle rust inside the tank, use a quality rust remover like KBS Rust Blast. Pour it in, slosh it around, and let it sit as long as needed based on the rust level. This product can be reused many times.
After cleaning out the rust, apply a tank sealer kit. This seals the inside and keeps rust from coming back. Following the kit instructions makes a big difference and means you won’t have to worry about tank rust later on.
| Product | Purpose |
|---|---|
| Rust Blast | Removes rust from inside |
| Tank Sealer | Seals interior to prevent rust |
Best Practice: Always seal the tank after cleaning for long-lasting results.
Building and Attaching the Seat Base
Shaping the Main Seat Panel
To start, they carefully shape the main part of the seat panel to match the lines of the motorcycle frame. Using an oven for larger bends, they adjust the material to get smooth curves. For smaller areas and fine-tuning, a heat gun or blow torch works best. The goal is to make sure the seat base covers all needed sections and fits tightly against the bike.
Picking and Adding Cushion Material
High-density foam is chosen for its comfort and support. The foam comes in different thicknesses to match the design and type of seat wanted. After cutting the foam to size, it’s glued to the formed seat base. At this stage, it’s easy to shape the top and add any hump or styling features needed.
Attaching the Seat Fasteners
They use a set of four seat fasteners, with two at the front and two at the back. The clips include a male part (added to the seat panel) and a female part (attached to the motorcycle frame). To place the front clips accurately:
- Find existing holes in the motorcycle frame.
- Drill out these holes to the right size.
- Use double-sided tape to stick the clip in place while test fitting the seat.
- Mark and drill holes in the bottom of the seat base after aligning.
Mounting the clips depends on the base material. For metal, rivets are preferred. For other materials, small screws can be used. Each clip is fixed with two rivets for security. This approach helps achieve a clean, sturdy seat installation.
Project Cost Breakdown
The initial cost for this Honda CX500 was $500.
Most work focused on cleaning, painting, and rebuilding parts like the carburetors. No major engine parts were replaced. The project used existing materials where possible to keep spending low.
Custom fabrication included a new seat and rear section. The seat foam, seat base, and mounting clips were chosen for their good value and were easy to adapt to different bike models. Some welding and painting materials were needed along with basic tools.
A general list of expenses:
| Item | Estimated Cost (USD) |
|---|---|
| Honda CX500 motorcycle | $500 |
| Seat foam | Low |
| Thermoplastic seat base | Low |
| Seat mounting clips (pack of 4) | Low |
| Paint and primer | Low |
| Welding supplies | Low |
| Rust removal and tank sealer kit | Low |
Other fittings, like tail light hoops and seat clips, were easy to source and install. Many small parts could be reused or modified to fit.
All main changes were made with cost-effectiveness in mind, leaving expensive replacements or upgrades out. These steps help keep the project affordable and accessible.