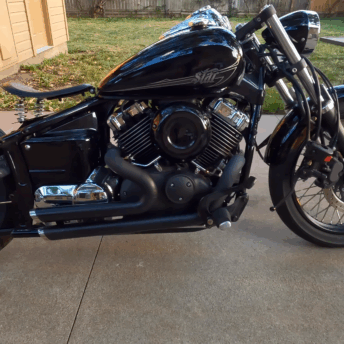
You see how these upgrades changed the way your Scrambler looks, feels, and rides after two years of use. You walk through the key changes you made, why you chose them, and how each part fits your riding style and daily needs.
You focus on practical upgrades that improve control, comfort, safety, and sound. You also share how smart part choices and careful installs helped you balance cost with real performance.
Key Takeaways
- You improved ride height, balance, and comfort through suspension and wheel changes.
- You boosted grip, control, and sound with tire and exhaust upgrades.
- You refined daily use with better lighting, controls, and storage options.
Motorcycle Upgrade Overview
Upgrade Timeline and Spending
You completed these changes over time, starting about two years ago. You focused on suspension, wheels, tires, controls, lighting, and exhaust parts, with many items bought secondhand or during online sales.
| Upgrade Item | Source | Cost (PHP) |
|---|---|---|
| Inverted fork (Z200 Explorer) | Secondhand | 3,000 |
| Fork conversion and repaint | Custom shop | ~2,500 |
| Adjustable monoshock (Rizoma) | Online | 3,000 |
| Front rim 1.85×19 (Cafe 400) | Secondhand | 500 |
| Rear rim 3.0×17 (SPD) | Online | 1,200 |
| Front tire Shinko 804 (110/80/19) | — | 4,500 |
| Rear tire Shinko (130/80/17) | — | 5,500 |
| Small LED turn signals (4 pcs) | Online | 600 |
| Quick throttle (Nibbi) | Online | 700 |
| Slim handlebar switch | Online | 350 |
| Digital speedometer | Online | 900 |
| LED headlight | Online | 1,450 |
List of Installed Modifications
You replaced the stock front end with an inverted fork and kept the stock caliper by swapping fork tubes. You paired this with a fully adjustable monoshock to balance height and stance.
You changed the swingarm to a Sniper 150 unit and resized the wheels to lift the front. You installed dual sport Shinko tires for on- and off-road use and improved grip in rain, sand, and mud.
You added a twisted elbow to deepen the exhaust sound and kept the same bottle pipe with a custom heat shield. You raised the seat frame, added a saddle bag bracket that also works as a grab bar, and kept the stock frame look.
You upgraded to small LED turn signals with replaceable bulbs, a slim right-side switch, and a quick throttle. You finished with a digital speedometer and an LED headlight, with wiring handled by a trusted mechanic.
Front Suspension Enhancements
Upside-Down Fork Upgrade
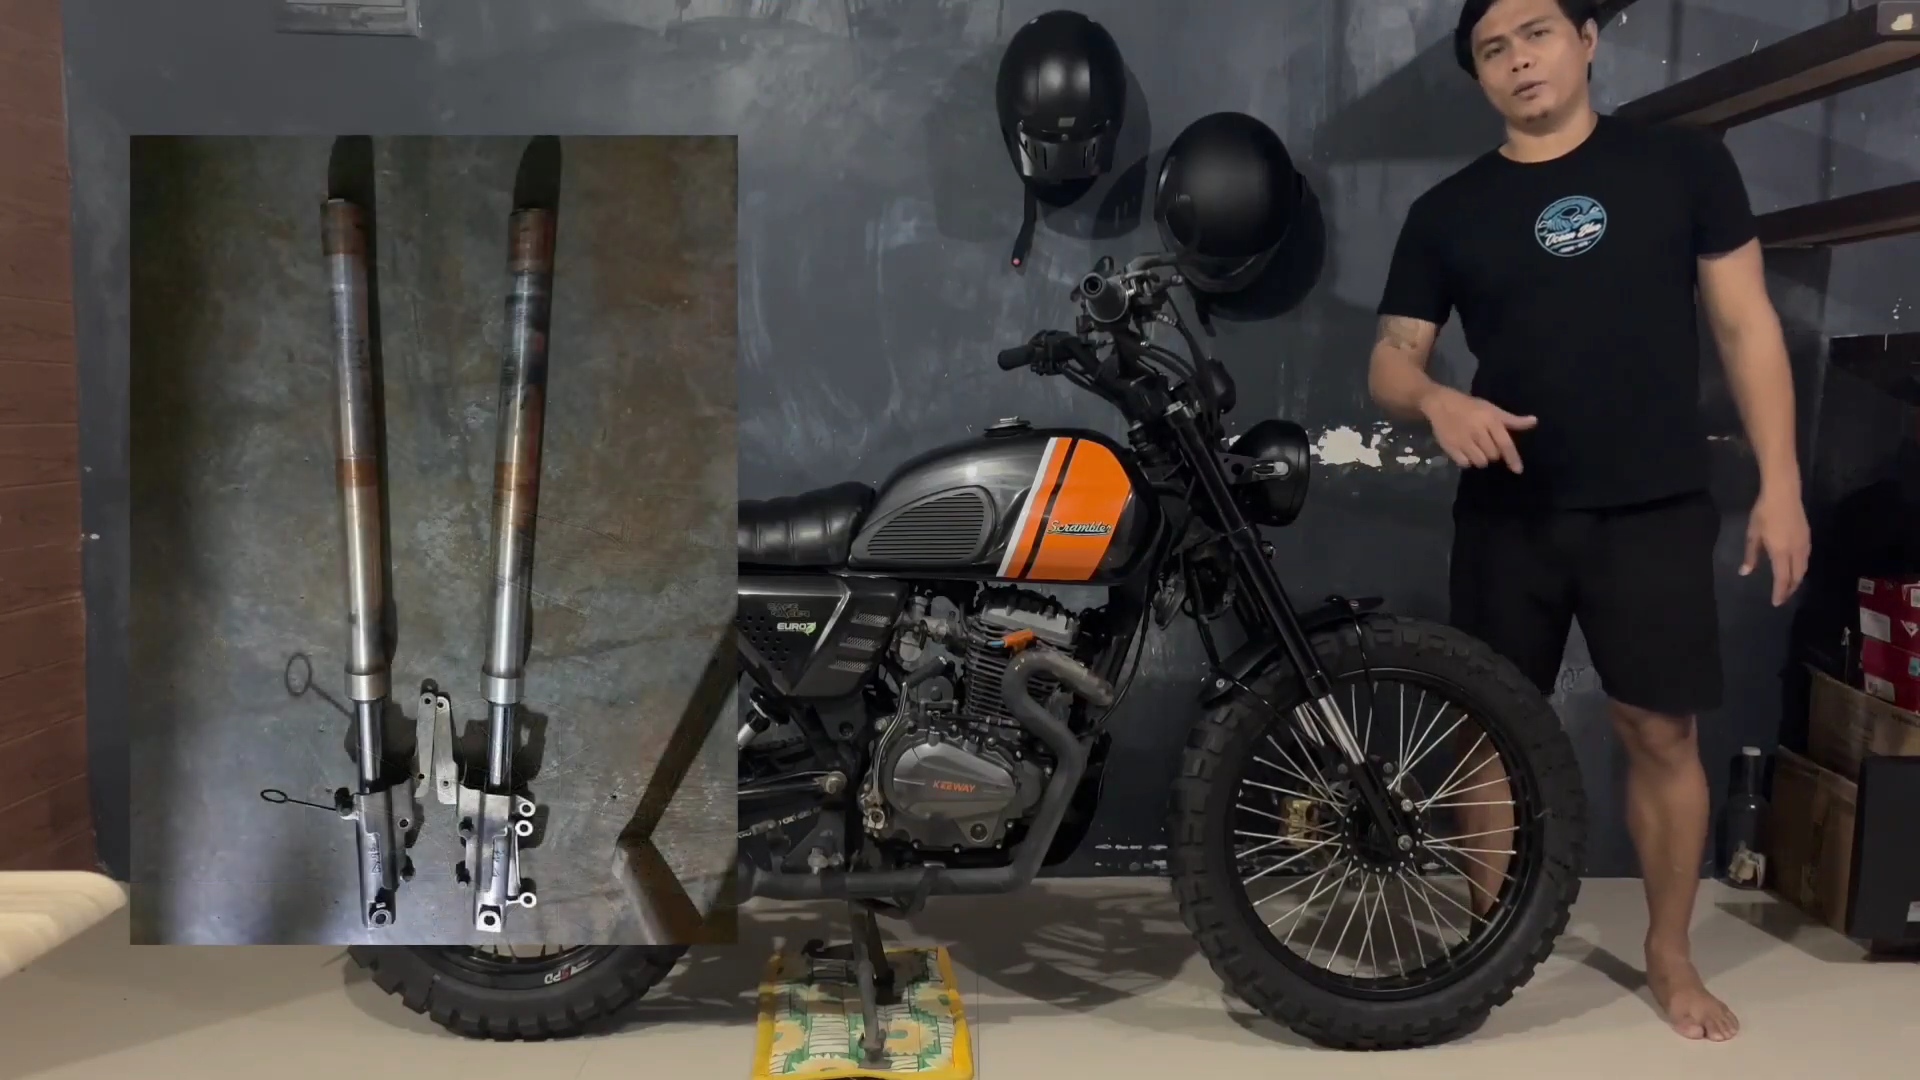
You switched to an upside-down fork from a Z200 Explorer. You bought it secondhand for ₱3,000, which kept the cost low. The fork height sits around 32–33 inches, giving your bike a taller front stance.
Conversion Work and Refinish
You had the full conversion done by a local shop for about ₱2,500. The work covered machining, custom brackets for the headlight, wiring changes, fender adjustment, and a full repaint. You chose repainting because the fork came in worn gold and needed a cleaner look.
Included in the conversion:
- Machine shop work
- Headlight bracket fabrication
- Headlight wiring
- Fender alignment
- Fork repaint
Brake Caliper Positioning
You adjusted the fork tubes to keep using the stock brake caliper. Since the Z200 Explorer caliper mounts on the right, you swapped the left and right tubes. This change let you retain the original caliper without buying a new one.
Rear Suspension Improvements
Adjustable Rizoma Rear Shock Setup
You replaced the stock rear shock with a Rizoma mono shock that you ordered online for about ₱3,000. This shock lets you tune rebound, compression, and spring stiffness, so you can match it to your riding style and road conditions.
You noticed a clear difference right away. The bike stays stable over sudden bumps, and the rear feels more controlled. The shock height also helped balance the bike after you installed the taller inverted fork, since you can adjust it up to 330 mm.
Key adjustments you use:
- Rebound control for smoother movement
- Compression tuning to keep the oil stable
- Coil preload to set how stiff the rear feels
Sniper 150 Swingarm Swap
You also changed the rear swingarm to one from a Sniper 150. You did this after installing the inverted fork and the new monoshock, so the rear setup could match the front upgrade.
This swap supported the new suspension height and helped the bike feel more planted. The rear end now fits better with the overall stance, especially after raising the front and dialing in the rear shock.
Wheel and Tire Modifications
Updated Front and Back Rim Sizes
You noticed the bike looked small when both rims stayed at 17 inches, especially with your height at 5’7″. You switched the front to a 19-inch rim to raise the stance and improve balance.
- Front rim: 1.85 x 19
- Source: Cafe 400
- Condition: Secondhand
- Cost: 500 pesos
You found it through a local Cafe 400 group, where a new owner sold it after downsizing.
SPD-Branded Rear Wheel
You also replaced the rear rim to match the new setup and support wider tires. You chose an SPD rim for the rear.
- Rear rim size: 3.0 x 17
- Brand: SPD
- Purchase price: 1,200 pesos
- Where you bought it: Shopee
This change helped keep the bike proportional after lifting the front.
Shinko Dual‑Purpose Tires
You changed to Shinko dual sport tires because a scrambler needs grip on and off the road. You picked knobby-style tires with thick tread for durability and traction.
| Position | Model | Size | Price |
|---|---|---|---|
| Front | Shinko 804 | 110/80/19 | 4,500 pesos |
| Rear | Shinko | 130/80/17 | 5,500 pesos |
You tested these tires on long rides with your wife. They held well on rain-soaked roads, curves, sand, and mud. You felt no skids and noticed strong grip and weight, which showed the tire quality.
Exhaust and Performance Mods
Twisted Header Setup
You installed a twisted exhaust header to improve balance and flow. You chose this setup not only for looks, but also to reduce vibration and smooth out how the exhaust feels during riding.
You kept the same muffler can and paired it with the new header. A local muffler shop handled the work, and you showed the cost on screen since you did not recall the exact amount.
Key points:
- Same muffler can retained
- Twisted header added for smoother exhaust behavior
- Work done by a dedicated muffler shop
Exhaust Tone and Heat Guard Build
The twisted header gave your bike a deeper exhaust sound without changing the muffler. The tone became fuller while staying controlled during normal riding.
You also added a custom-made heat shield. The shield improved safety and gave the exhaust a cleaner look instead of leaving it bare.
Changes made:
- Deeper exhaust sound from the new header
- Custom heat shield fabricated
- Better appearance and protection around the exhaust area
Seating and Storage Customization
You adjust the seat area to improve comfort and make room for luggage. These changes keep the bike clean and functional without adding bulky parts.
Raised Seat Base Tuning
You lift the seat frame slightly to change the riding position. A custom shop cuts, bends, and welds the stock frame to raise it without using a U-bend.
What you gain
- Better seat height balance
- Cleaner look using the original frame
- No change to the LED strip under the seat
Side Bag Mount Installation
You add a metal mount on one side to hold a saddle bag. You also use it as a grab point for a passenger when needed.
Why it works
- Holds a saddle bag securely
- Doubles as a simple grab bar
- Keeps the bike’s rear area uncluttered
| Feature | Result |
|---|---|
| Saddle bag support | Stable and easy to mount |
| Passenger use | Extra handhold |
| Design | Simple and practical |
Lighting and Signal System Enhancements
Compact LED Turn Signal Upgrade
You replaced the stock turn signals with small LED units to keep the bike clean and proportional. You bought a full set of four from Shopee for about ₱600, taking advantage of sale pricing.
You choose online sales often and compare platforms so you can get the lowest price available at the time.
Eagle Eye LED Bulb Swap Method
You designed the turn signals so they are not disposable. When the LED fails, you pull it out and replace only the bulb.
You use Eagle Eye LED bulbs, which cost around ₱100–₱150 per pair. This setup makes repairs quick, cheap, and easy to source.
| Item | Purpose |
|---|---|
| Eagle Eye LED | Replacement bulb for turn signals |
| Cost | ₱100–₱150 per pair |
| Benefit | Simple swap, no full replacement |
LED Headlamp Conversion
You upgraded the main headlight to an LED unit for improved visibility. You bought it from Shopee for about ₱1,450, again during a sale.
The LED headlight matches the rest of the lighting upgrades and fits well with the bike’s custom setup.
Handlebar and Instrument Cluster Enhancements
Streamlined Right-Side Control Switch
You replaced the stock right handlebar switch with a slimmer unit to clean up the bar area. You bought it online for about 350 pesos, and it plugs in without cutting wires. The smaller size gives your handlebar a balanced look and leaves more room for other controls.
Key details:
- Slimmer than stock
- Plug-and-play wiring
- Installed with help from your trusted mechanic
Nibbi Quick Throttle Upgrade
You installed a Nibbi quick throttle to improve throttle response. You paid around 700 pesos, also online. The slimmer switch works better with the quick throttle, unlike the bulky stock setup that looks crowded.
You chose this setup so everything fits well without shifting parts like mirrors or levers. The result looks clean and feels natural when you twist the grip.
Digital Gauge Setup
You swapped the stock gauge for a digital speedometer that shows riding data clearly. You bought it for about 900 pesos during a sale. Your mechanic handled the wiring and installation to keep everything working properly.
Installation notes:
- Installed by Kulot Motorcycle Shop
- Clean digital display
- Budget-friendly upgrade during a sale