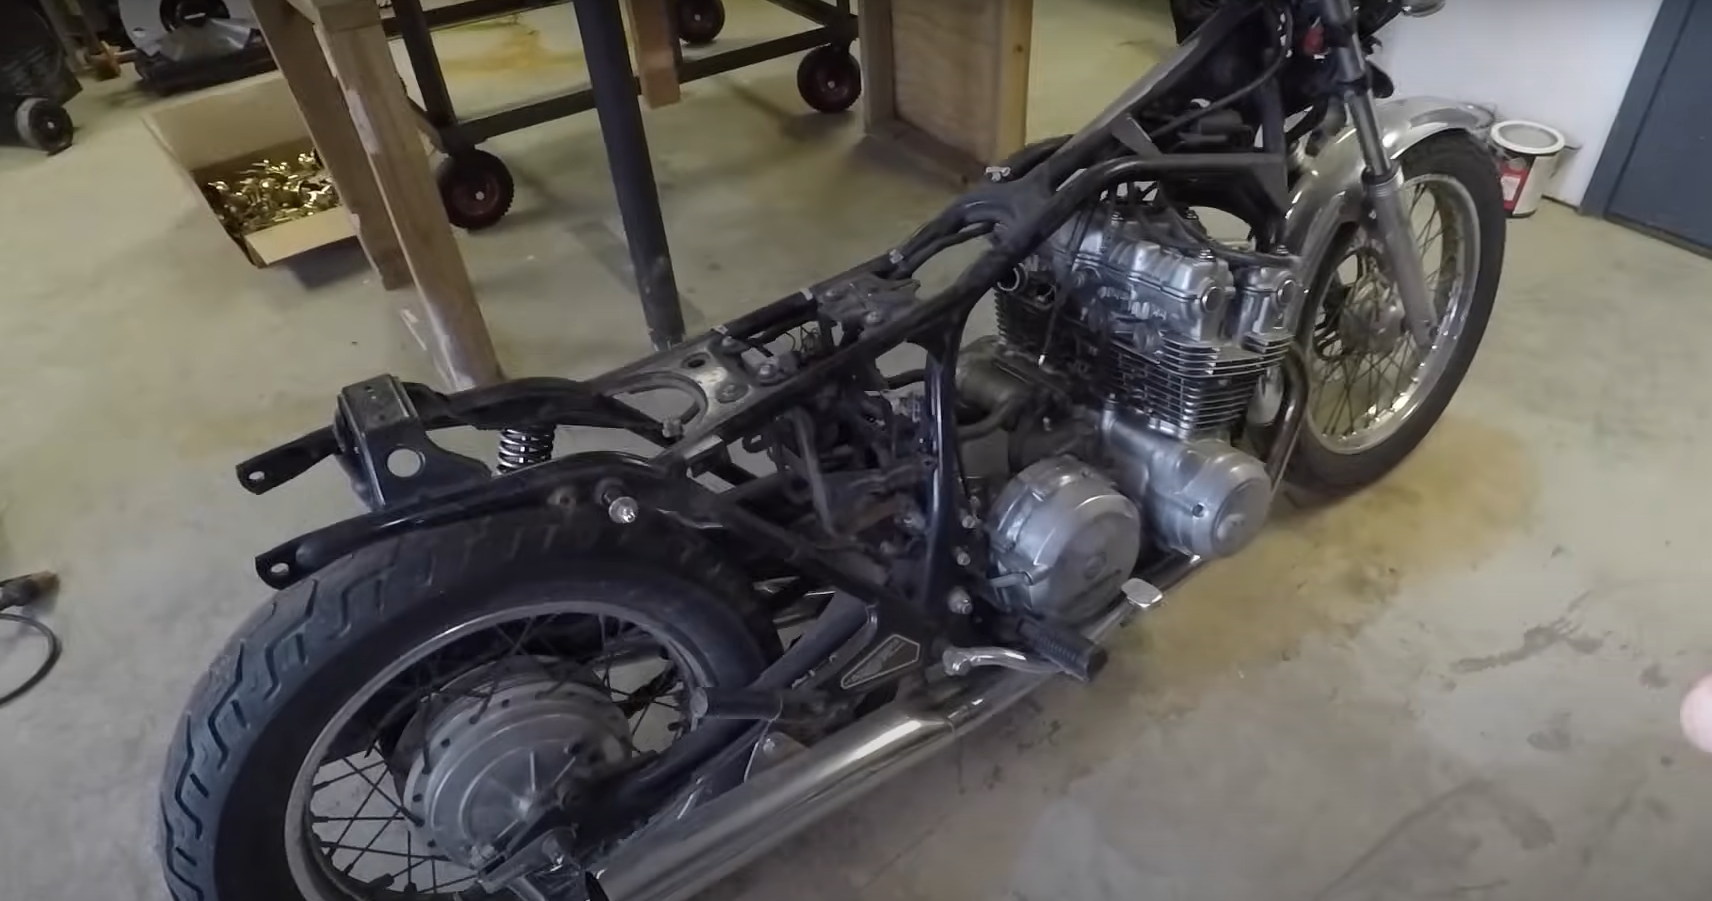
Restoring an old Honda CB750 into a cafe racer takes patience, planning, and a good understanding of motorcycle mechanics. The bike at the heart of this project, dating back to the late 70s or early 80s, was partly disassembled and needed attention to its carburetor, wiring, and fuel system before any major customizations could happen.
The process began with basic troubleshooting and preparing the main parts, like the battery, carburetor, and wiring. Each step, from fitting new gaskets to fixing small leaks in the fuel tank, helped the team move closer to turning this classic bike into a unique cafe racer. The progress includes modifications to the seat, frame, handlebars, and planning the exhaust system to match the owner’s vision.
Key Takeaways
- Careful assessment and setup are vital for restoring and customizing a motorcycle.
- Modifications to the bike’s body and controls give it a unique cafe racer style.
- Addressing electrical, fuel, and exhaust issues ensures safe and reliable performance.
Motorcycle Build Plan and Main Objectives
History and Features of the Honda CB750
The motorcycle for this build is a Honda CB750 from the late 1970s or early 1980s. It has a 750cc engine and sits between a street and sport bike in style. The current owner, Reggie, purchased it over two years ago and started some repairs. He removed the carburetors, replaced the gaskets, and rebuilt the carbs, but did not reinstall them due to challenges with old rubber gaskets between the cylinder head and carbs.
Some important work has included:
- Installing new, numbered rubber gaskets for proper carburetor alignment
- Addressing electrical problems, including battery charging and wiring repairs
- Fixing minor leaks and issues with the fuel tank and fuel delivery system
- Using a spare fuel tank for testing and maintenance
The CB750 uses a built-in generator instead of a standard alternator, and some connectors may wear out over time. The electronics and battery mounting are being carefully checked and updated as needed.
Owner’s Plan for the Cafe Racer Look
Reggie wants this Honda CB750 transformed into a cafe racer with a unique and personal style. Parts purchased for this project include a cafe racer seat, a single round headlight, and clamp-on handlebars for a lower, more aggressive look. Some items, like the rear seat and handlebars, are adapted from other bikes for a custom fit.
Distinctive customizations are in progress:
- A two-flag painted gas tank (U.S. and Brazilian flags displayed, with a flag-like pattern on top)
- A bracket to secure the cafe racer seat tightly to the frame and tank
- A fabricated rear section to finish the back end of the bike
- Plans for a low, reversed handlebar setup to further enhance the cafe racer appearance
The build is done with a practical, budget-minded approach, using available parts and custom fabrication where needed. The aim is to create a running cafe racer that captures Reggie’s personal style without excessive cost.
Checkup and Project Planning
Reviewing the Battery and Electrical Connections
To start, the battery was tested. Even though it was a couple of years old, it still held a charge of 11.5 volts. A charger was used to boost it further, making sure the battery could still be useful for testing. When connected, the key was turned to check if electrical power flowed to the bike.
A close look at the wires showed some were cut and not attached. These included connections likely going to the starter relay. Power was tested by attempting to crank the engine, and although the solenoid clicked, the starter needed more attention. There was also extra space around the installed battery, signaling it probably was not the exact match for the motorcycle.
Common electrical trouble spots like the connectors near the engine, which could dry out or crack with age, were inspected. The built-in generator and its linking wires were checked. Since some connections were uncertain, searching for a wiring diagram online and possibly using the motorcycle’s VIN to confirm the correct battery and electrical setup was considered.
| Step | Details |
|---|---|
| Battery Voltage Check | Measured at 11.5 volts, charged further |
| Connection Test | Turned key, checked for power |
| Visual Inspection | Noted cut wires and possible mismatches |
| Solenoid Test | Tried cranking, heard relay click |
| Battery Fit | Saw that current battery did not fit snugly |
| Connector Condition | Checked for dried or weak rubber connectors |
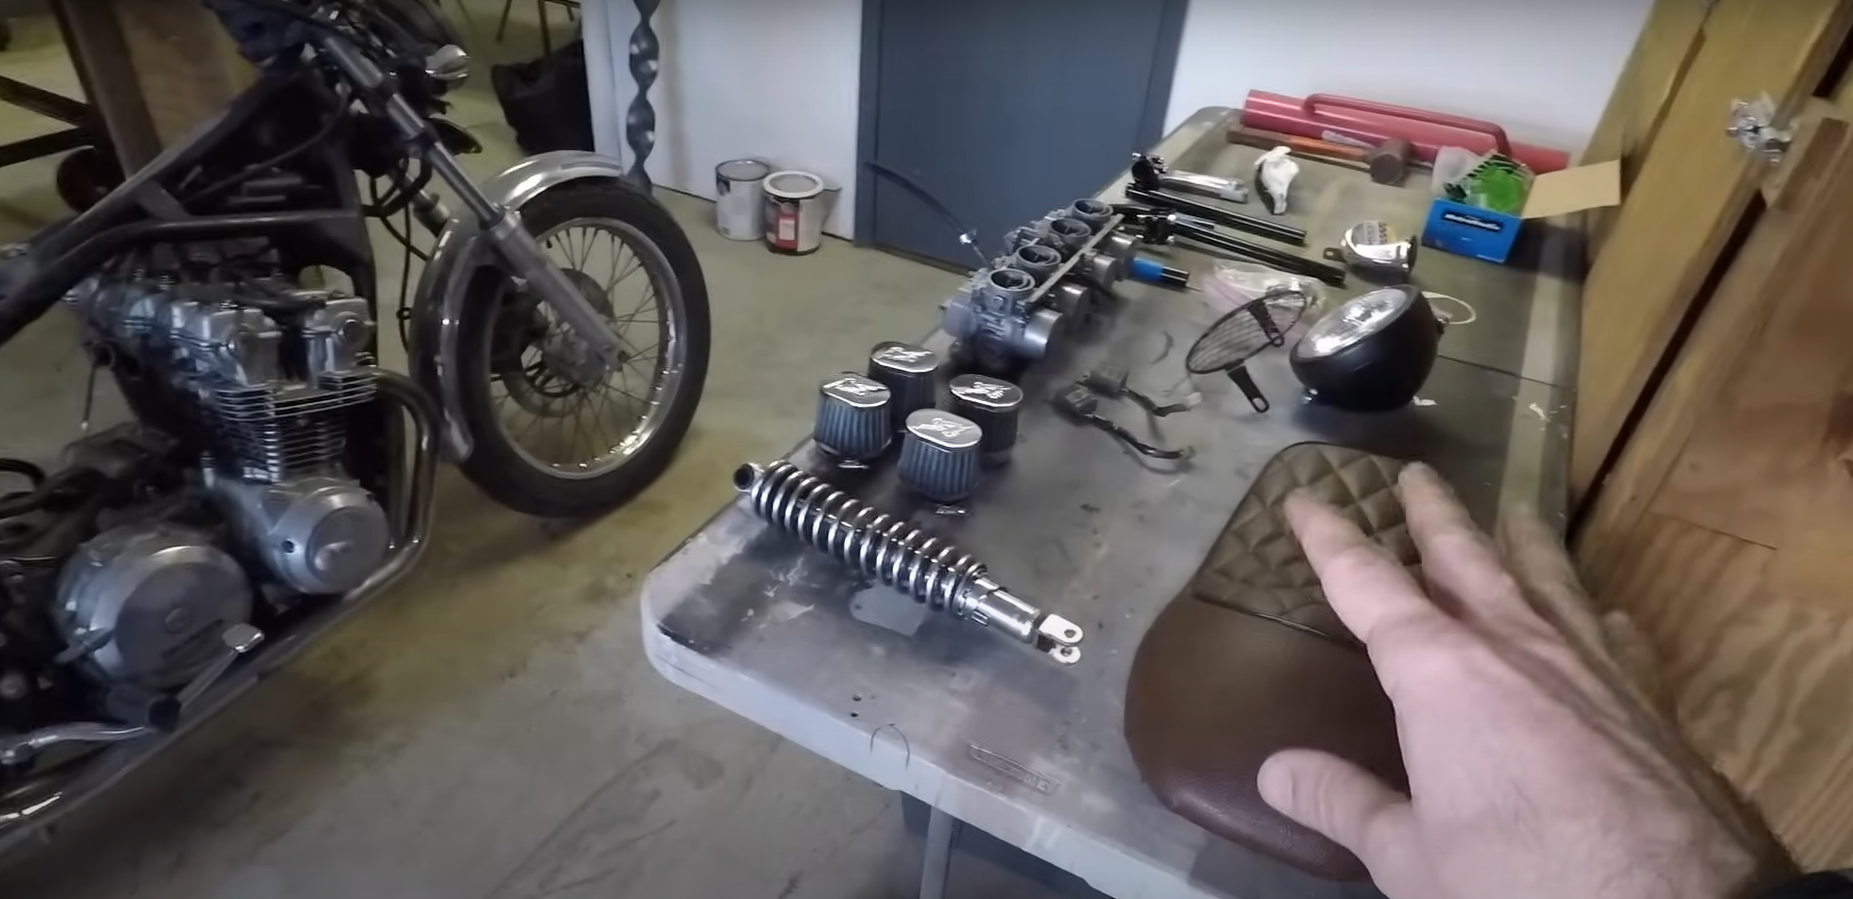
Finding and Gathering Needed Components
Before going further, the right rubber seals for the carburetors were put in place. Each seal was labeled with its matching cylinder, and care was taken to align them in order. A list of new and spare parts included fresh carburetor gaskets, a set of handlebars, a special seat, a single headlight, and mounting hardware—most bought online.
Other parts were checked and gathered, like a spare fuel tank from another project. The carburetor setup needed careful examination to make sure the fuel line matched the fuel tank’s valve, which is located on the left, for simple hose routing.
- Parts to Check and Prepare
- New rubber gaskets for carburetors
- Spare or custom fuel tank
- Cafe-style seat and mounting brackets
- Low-profile handlebars
- Wiring parts and starter relay
- Headlight and rear frame pieces
If parts did not fit or were missing, workarounds were planned, such as building custom brackets or looking up part numbers using the VIN. Online resources were used to source or crosscheck needed items before installation.
Restoring the Carburetor and Fuel Delivery System
Replacing Damaged Rubber Seals
The rubber seals that sit between the cylinder head and carburetors can be tricky. In this build, new ones labeled 1 to 4 were installed, making sure the numbers faced upward for a clean, even fit. Each seal is shaped a bit differently, so careful matching is important to avoid installation issues.
Fine-Tuning and Attaching the Carburetor
Before fitting the carburetor, the fuel inlet position was checked. It was found pointing down instead of aligning with the fuel tank petcock. The inlet and crossover tubes were swapped to move the fuel line higher, using an existing bracket for support. This allowed the fuel hose to reach the carb easily. Once swapped, the carburetor was mounted securely to the engine.
Improving Fuel Delivery and Inlet Placement
The stock fuel inlet and crossover tubes were reconfigured so the fuel line could be attached neatly from the tank’s left-side petcock. A spare fuel tank from another project was used. The petcock was fitted to let gas flow directly to the updated inlet, and the new setup ensured that all four carburetors received fuel evenly.
Spotting and Fixing Leaks
After hooking up the spare fuel tank, the fuel bowls were checked for leaks by tapping them and observing for drips. Early testing showed a couple of small leaks in the tank, traced to pinholes near a weld. To repair these, old sealant was removed, the metal was cleaned, and the spots were welded and resealed for a lasting fix. The tank was then tested again to make sure no fuel escaped, ensuring confidence in the rebuilt system.
Wiring and Electrical Troubleshooting
Working Around Cut and Disconnected Wires
It was clear that some of the wires on the bike were cut, with no clear spots to connect them. Some of these wires seemed to go to a starter component, possibly the main relay for starting. To sort this out, it helped to look up a wiring diagram online. This made it easier to figure out how to bypass damaged sections and reconnect the wires correctly.
Steps Followed:
- Located cut or loose wires.
- Matched wire colors to a wiring guide.
- Used insulated connectors to avoid metal-on-metal contact.
- Double-checked wires before testing any power.
Tip:
Always use a multimeter to test for voltage before moving forward.
Dealing With Starter and Charging System Problems
The starter solenoid showed some signs of life, but didn’t fully turn the engine. The battery held a charge at first, but did not fit the tray properly and was not making the best contact. The bike’s power system didn’t use a car-style alternator. Instead, it relied on a built-in generator, sometimes known as a stator and rotor setup.
Common Issues Noted:
- Old battery no longer fits right or provides good power.
- Connectors near the generator area can lose reliability if the rubber seals dry out.
- Electrical connectors can fail over time.
| Part | Problem | What Was Done |
|---|---|---|
| Battery | Too old, loose fit | Charged, tested, planned to replace |
| Starter Solenoid | Clicking, no start | Used jumper cables for direct contact |
| Generator Wiring | Aging connectors | Inspected for signs of wear |
Tip:
If the starter only clicks, check both the battery life and wire connections before moving to larger repairs.
Fuel Tank Refurbishment and Installation
Checking Tank Quality and Spotting Leaks
Before installing the fuel tank, it is important to inspect it for any damage or signs of leaking. Look for rust, old weld marks, or pinholes. If there is any rust near the welds or visible wet spots, these are often places where leaks can start.
Here’s a simple checklist:
| Inspection Step | What to Look For |
|---|---|
| Rust and Discoloration | Brown or reddish stains |
| Old Repairs | Lumpy welds, sealant flakes |
| Leaks or Damp Spots | Wetness under the tank |
If the tank has leaks, especially around old welds or seams, it should be fixed before moving forward.
Fixing Leaks and Resealing the Tank
When a leak is found, grinding down to clean metal creates a fresh surface for welding. Small holes or weak welds must be properly sealed. Use a welder to attach new metal where needed, then reseal the area with a fuel-resistant sealant for extra protection. This makes the tank stronger and less likely to leak again.
Wear safety gear when welding and allow enough time for any sealant to dry before putting fuel in the tank.
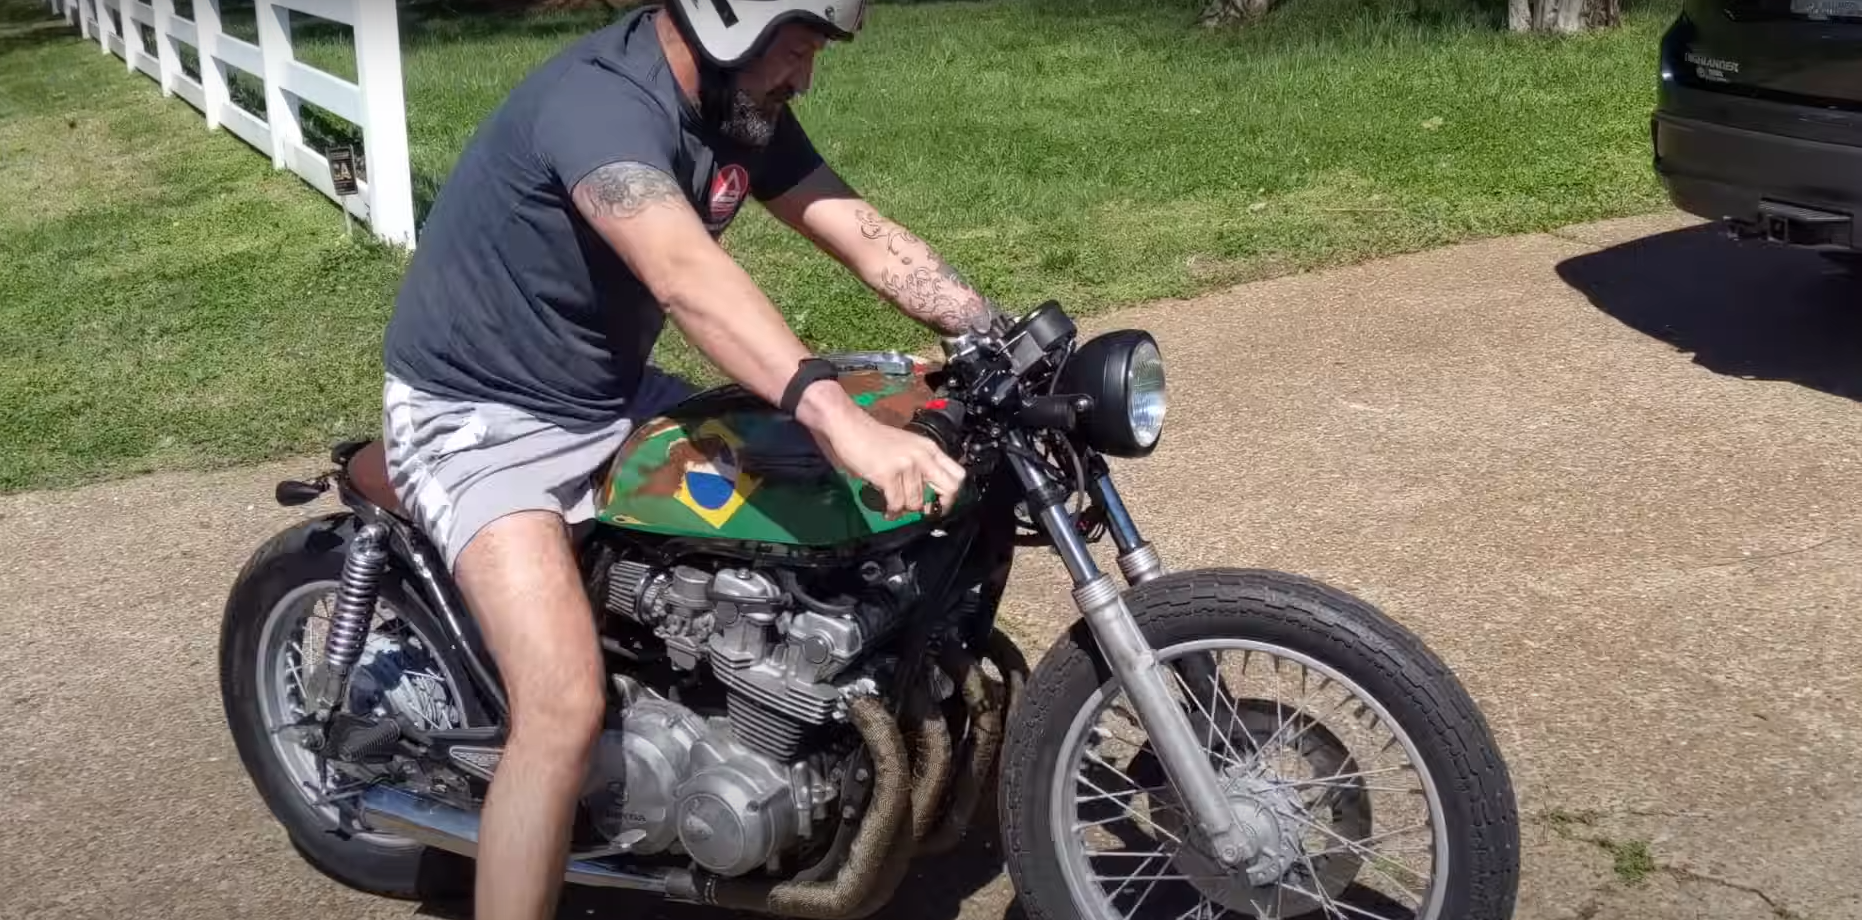
Custom Painting and Style Work
Once the tank is leak-free and solid, it can be painted. For this project, a custom paint job was chosen with the United States flag on one side and the Brazilian flag on the other side. The top also features colors that look similar to the Mexican flag. This makes the bike more personal and highlights its unique cafe racer style.
Painting Steps:
- Clean and prep the surface.
- Apply primer and let it dry.
- Paint the custom design.
- Wait for the paint to cure fully before handling.
After painting, the tank was placed on the bike to test fit and line up the rear seat. Brackets were either built or modified so everything lined up tightly, providing a secure fit for both the tank and the seat.
Modifying the Cafe Racer Seat and Frame
Installing the Seat and Making Custom Mounts
The cafe racer seat chosen for this project was not made for this specific motorcycle. Because of this, it did not line up with the original mounting points. To solve this, a custom bracket was planned for the front of the seat. This bracket will slide underneath the existing gas tank bracket and use the same mounting bolts.
At the back of the seat, new holes need to be drilled in the subframe. Bolts will be used to secure the rear of the seat from underneath, holding it in place. This setup keeps the seat firmly attached and stops it from moving around during riding.
Parts Needed:
- Custom front mounting bracket
- Bolts for rear subframe attachment
- Drill
- Wrenches
| Task | Tool/Part Needed |
|---|---|
| Make front seat bracket | Metal bracket |
| Drill holes in subframe | Drill, drill bits |
| Attach rear seat with bolts | Bolts, wrenches |
Shortening the Subframe and Rebuilding the Rear
The frame’s back section was too long for the clean look a cafe racer needs. The plan included cutting off the tail end of the subframe. Once chopped, a new metal support piece will be welded onto the end. This new piece sticks out just a little behind the seat, giving the bike a neat finish.
Cutting the frame must be carefully measured before marking and cutting. Welding on the new rear hoop takes some time, but it’s important for strength and looks. The finished rear section matches the streamlined cafe racer style.
Steps for Rear Frame Work:
- Mark the cut point on the subframe behind the seat.
- Use a saw to remove the unwanted section.
- Position the new support hoop.
- Weld the hoop to the subframe.
- Check that the seat and frame fit together smoothly.
Tools Used:
- Marker
- Saw or angle grinder
- Welding machine
- Measuring tape
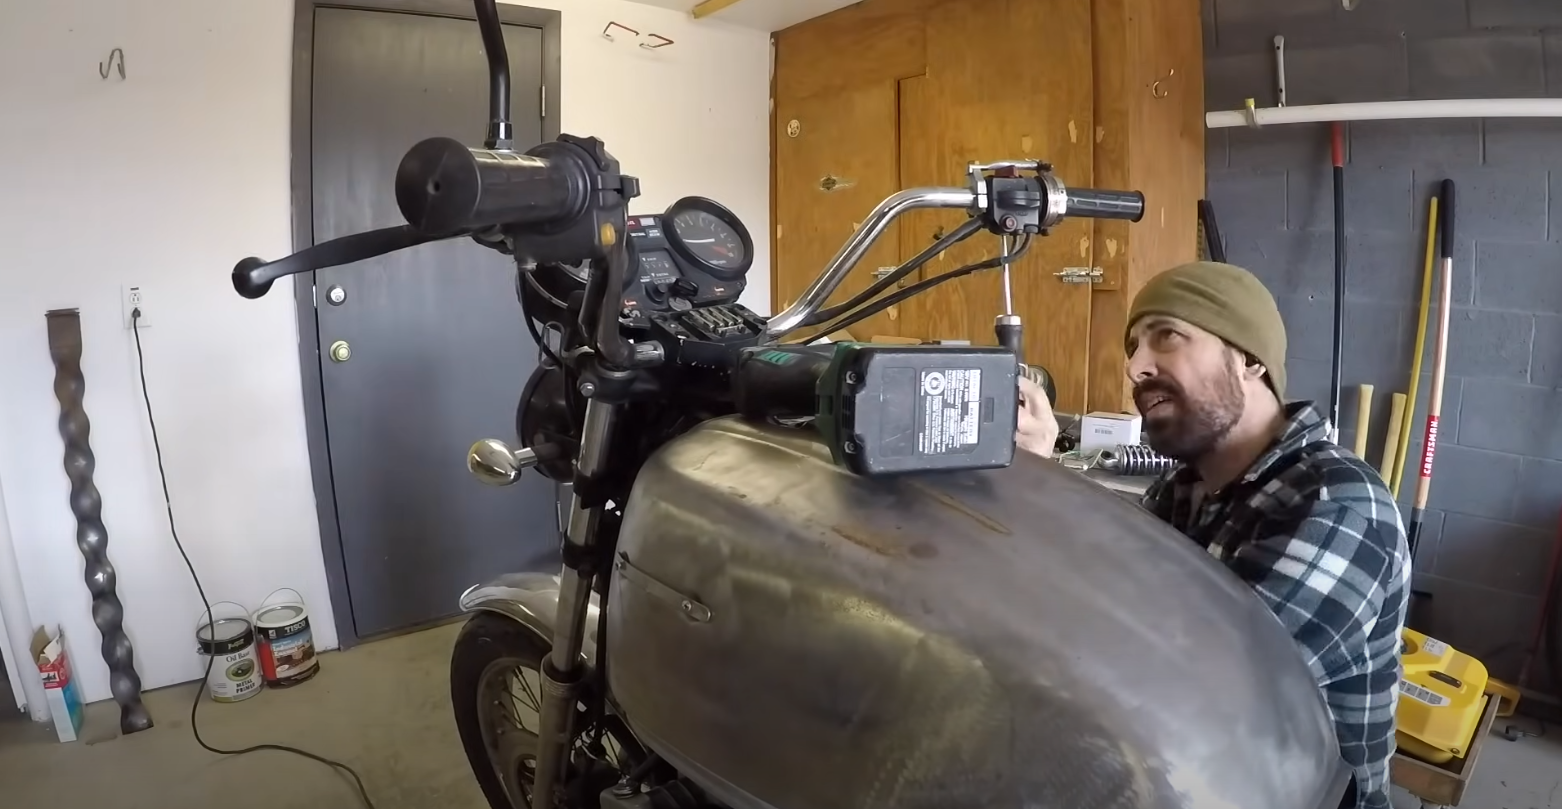
Upgrading the Bars and Controls
Adding Shorter, Sleek Handlebars
The original handlebars were removed to create a more aggressive and streamlined look. A set of dirt bike handlebars was used, but instead of mounting them in the standard direction, they were flipped and installed facing backwards. This change helps the bike sit lower and gives it a sportier appearance that fits the cafe racer style.
Below is a comparison of handlebar styles:
| Handlebar Type | Height | Riding Position | Style |
|---|---|---|---|
| Stock/Standard | Taller | Upright | Traditional |
| Modified (Flipped) | Lower | Leaned Forward | Cafe Racer |
Key steps in the upgrade:
- The existing bars were carefully unbolted and taken off.
- The new handlebars were positioned to sit lower and closer to the rider.
- This change improves the bike’s profile and brings the controls within easy reach.
These adjustments make the bike better suited for tight city riding and give it a fresh, classic look. The process is simple, but checking clearances and bolt tightness is important for safe riding.
Points to Think About for the Exhaust
Current Exhaust Setup
The bike’s exhaust system is not original. It was cut at one point and now has a different type of muffler. The setup looks unusual and is not a factory design. This affects the look and the sound of the motorcycle. The current system works, but it does not compete with a new or original exhaust in terms of appearance or quality.
Here’s a quick comparison:
| Stock Exhaust | Current Setup | |
|---|---|---|
| Style | Original | Modified |
| Fitment | Proper | Cut and adjusted |
| Quality | Factory-made | Makeshift |
Lower Cost Options
Buying a full replacement exhaust can cost about $300, which is too expensive for this kind of budget project. Because of this, more affordable choices are needed.
Some possible solutions include:
- Using the modified exhaust that is already fitted, with small adjustments if needed.
- Searching for used or leftover parts that might be cheaper than buying a brand new system.
- Trying minor repairs or patching up leaks in the current exhaust in order to save money.
These options help keep the build cost-friendly while still getting good results.