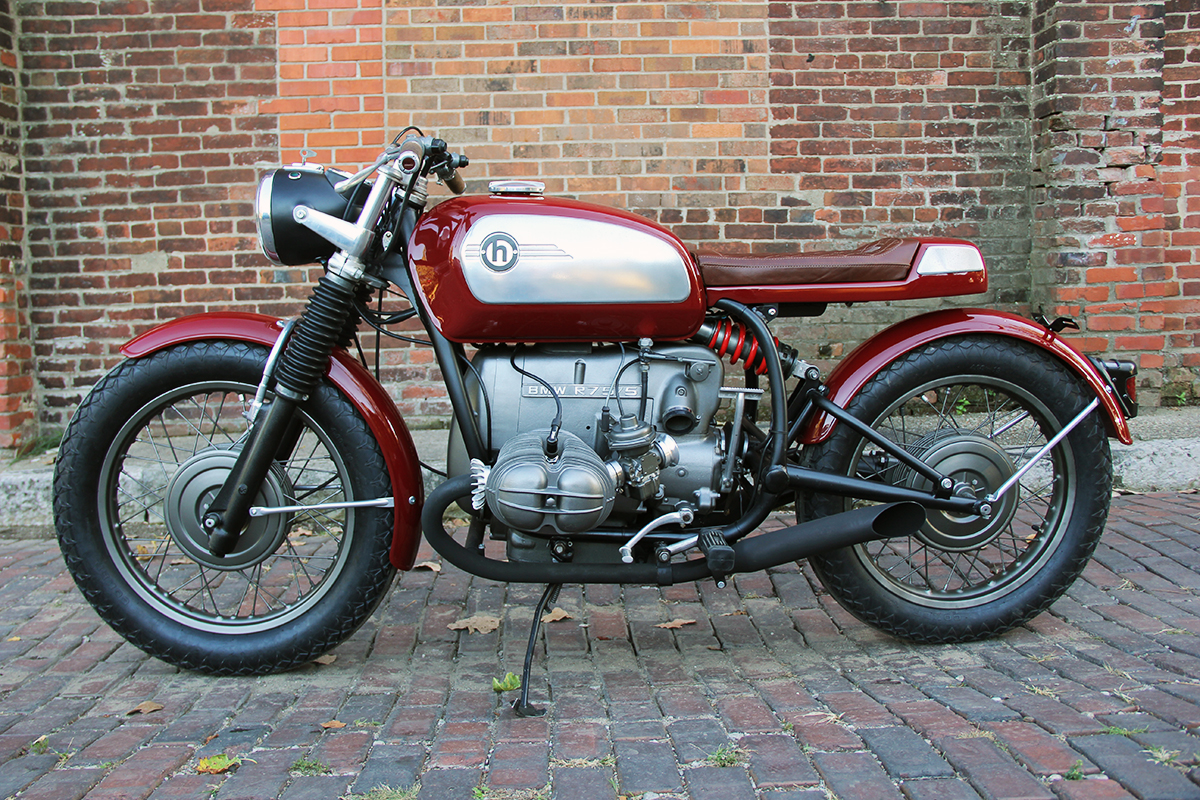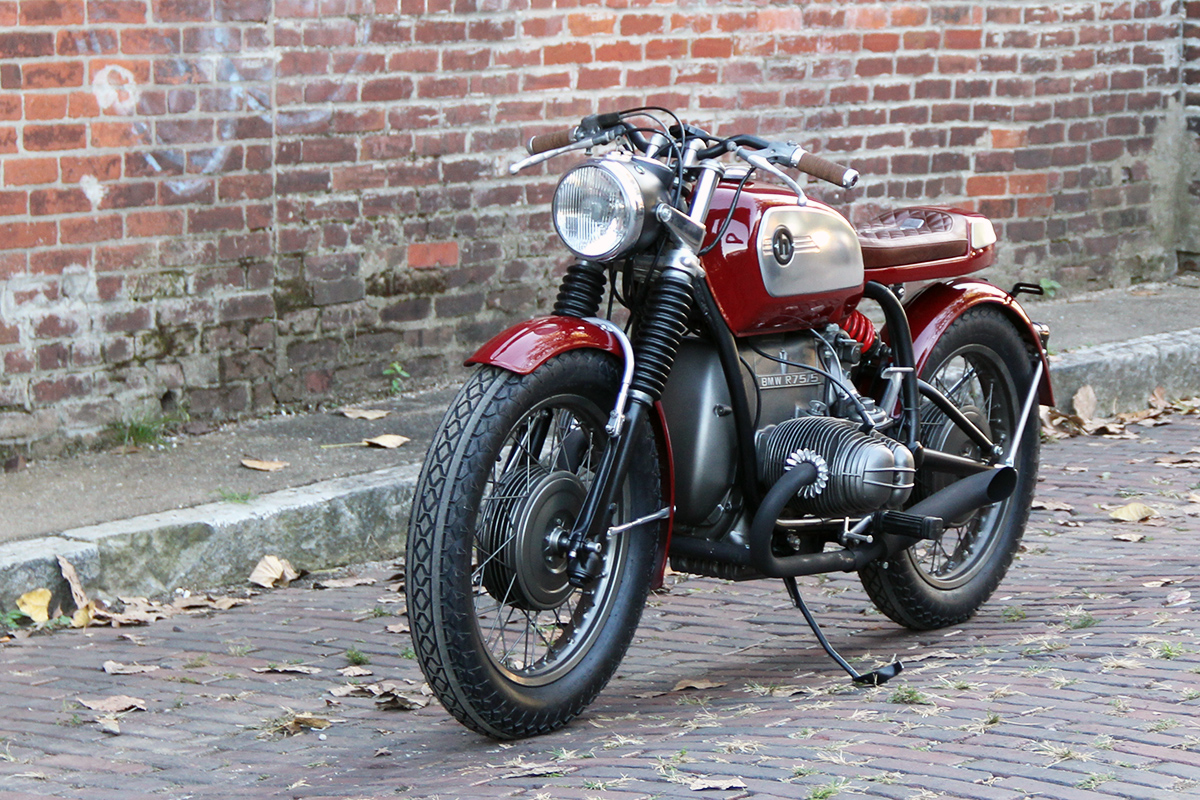
“A gentleman from Missouri contacted me through my H Garage website inquiring about a build using either a newer model Triumph or an older BMW airhead,” recalls Scott. “We discussed his needs and I told him I felt we could do something more drastic with the BMW based on his budget. Soon after he brought his 1973 BMW R75 to my garage. The deadline for the build was just three months and being knee-deep in planning for the Kentucky Kick Down, I had to get cracking.
The R75 was in really nice condition so I set off creating a few design concepts. The client had provided quite a bit of input, but his inspiration came from very different sources. I loved the look of the BMW, so the plan was to maintain a classic look, add some modern details and give it a decent serving of attitude. The project was a bit of a departure from what I usually undertake, but I was looking forward to the challenge.”
“The first step was a complete teardown of the bike. The motor and frame were then cleaned, prepped and painted. I sourced a long wheelbase swingarm, driveshaft and rear brake arm to replace the short version on the bike. Everything was then reassembled and delivered to Cliff Meyer at Meyerbuilt Metalworks. I’d found Cliff through a feature on Pipeburn in which he’d mono-shocked a similar BMW. I had originally thought I would do the mono shock myself, but as he was just a couple hours away and did amazing work, it was an easy decision to source the task out. I spent the next couple of weeks accumulating all the parts I would need.
Once the bike returned I worked with Chad Francis of Retrowrench to complete some mechanical upgrades including the install of a Dyna ignition and some rewiring. Chad then set off working his magic on the carbs. I sourced a wicked little battery from Speedcell that I was able to locate in the airbox along with the breather filter to keep things as clean as possible. We then dropped the front an inch and stiffened up the suspension for better handling.”
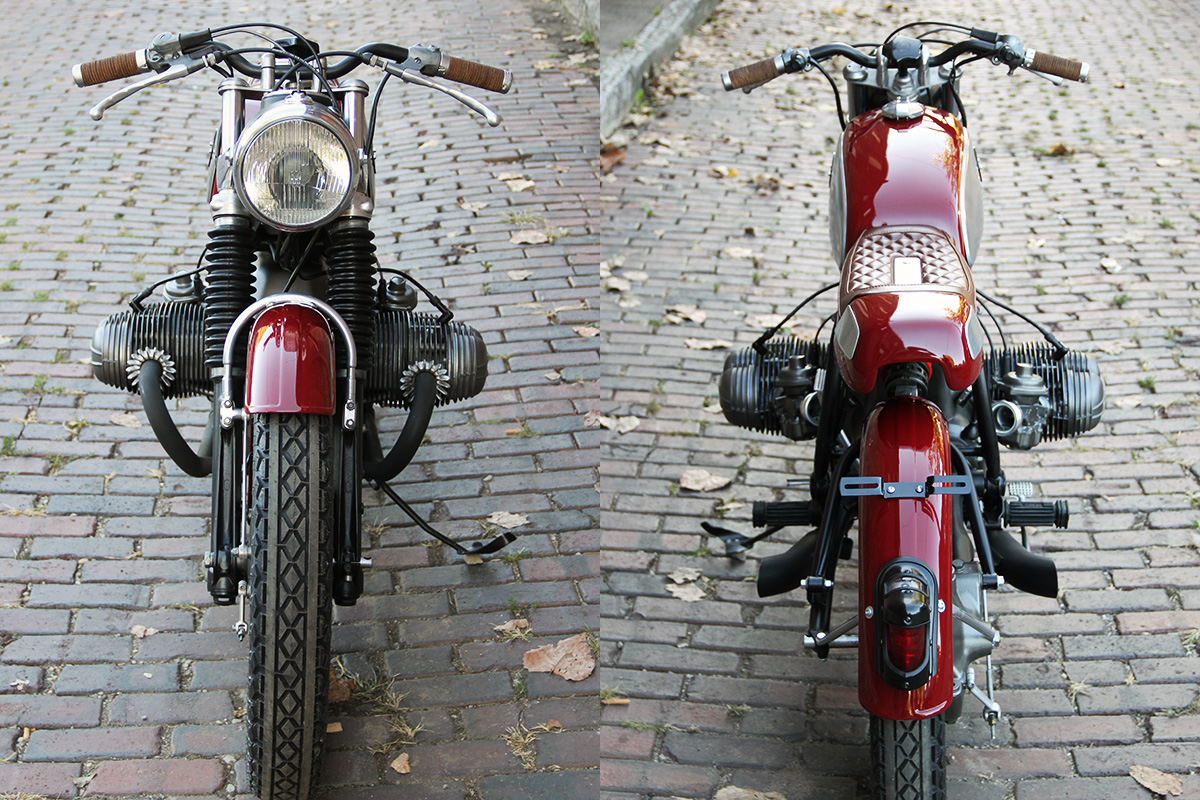
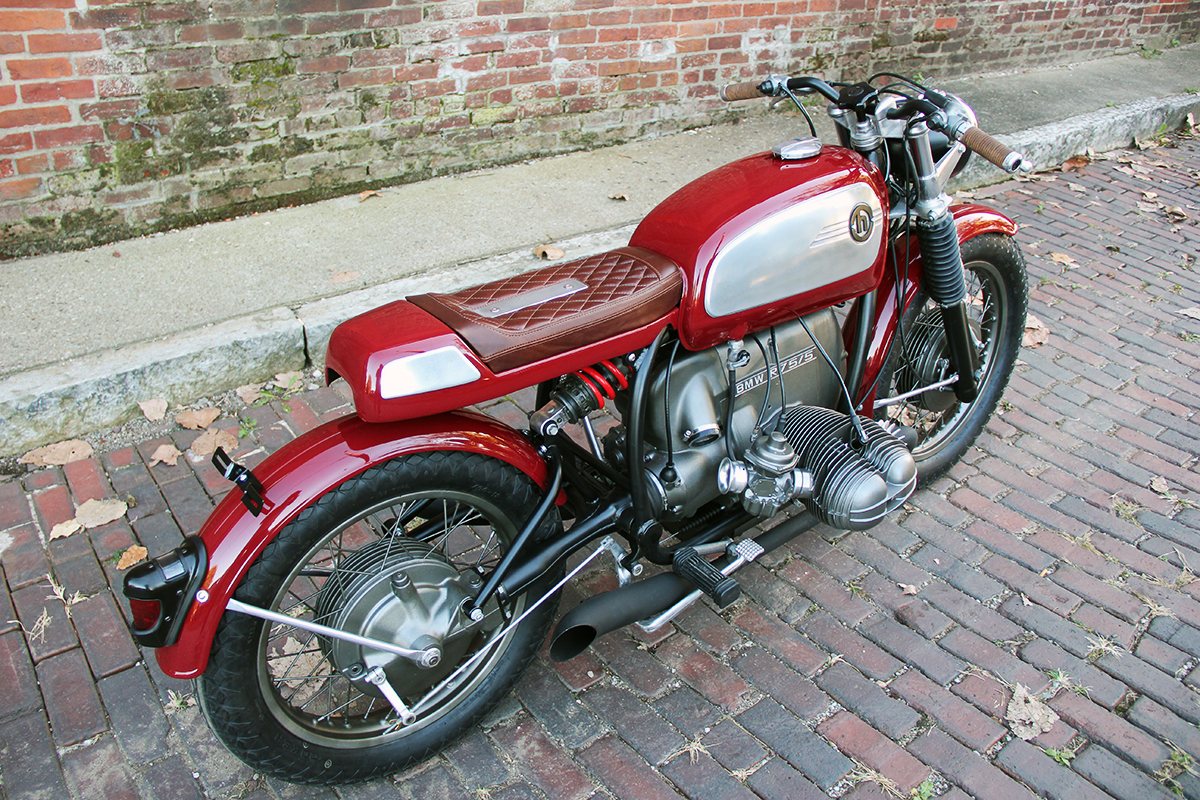
“I immediately knew I wanted to use the Coker Diamond tread tires with a larger sidewall on this build. The wheels were painted to match the motor using gunmetal grey powder coat and the new rubber was fit. The taller tyres required lengthening the front strut and fork brace to fit them under the guard. I also decided to use a front fender out back to hug both tires and I built a custom strut and swingarm bracket to mount it. It was finished off with an old school beehive taillight.
The stock mufflers were swapped for some turnout pipes. I machined the rear brake pedal to fit them and the exhaust and mufflers were painted with high temp black paint. New low-rise handlebars from Flanders went on the top clamp. The controls were stripped to bare aluminium and the headlight lowered using new aluminium ears. We also fit bicycle grips from Brooks by machining them to fit the stock throttle sleeve; thanks to Will Ramsey of Faith Forgotten Choppers for that one.
Not having all of the necessary machinery to do this stuff can be a hindrance, but it allows me to work with others who I look up to, so in the end, it’s almost a blessing.”

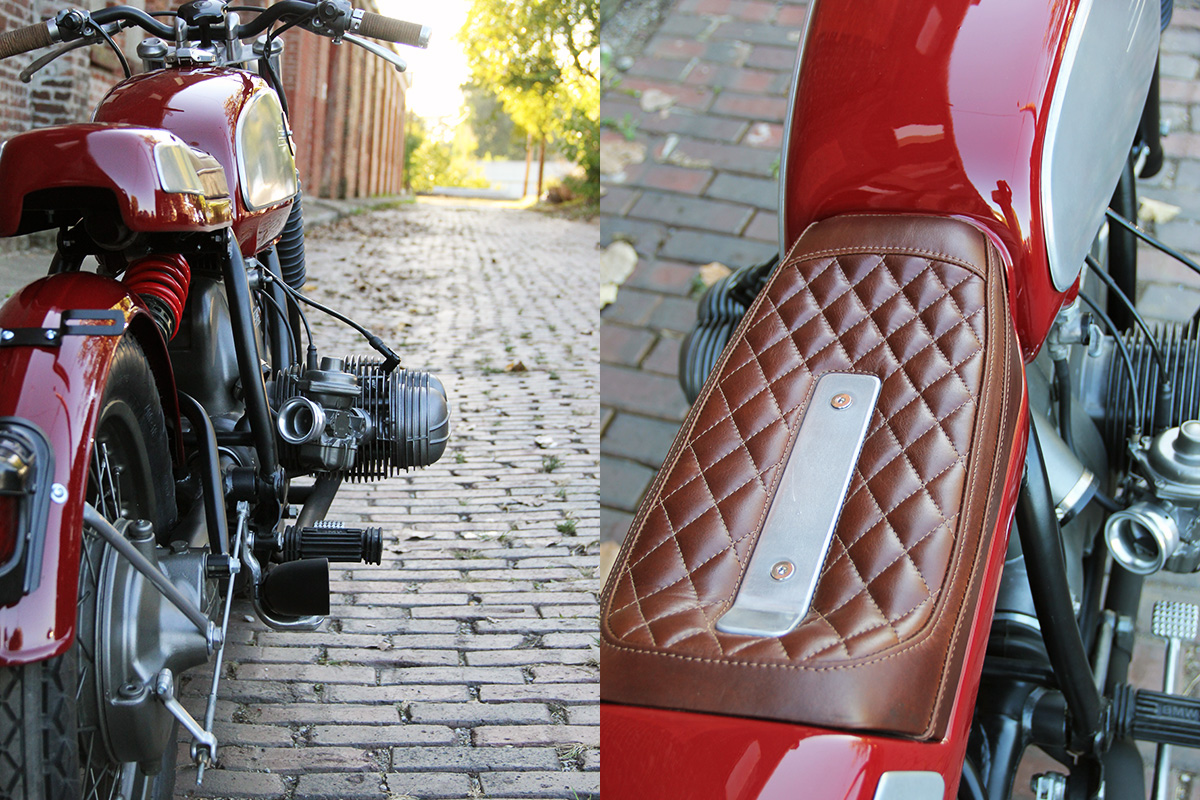
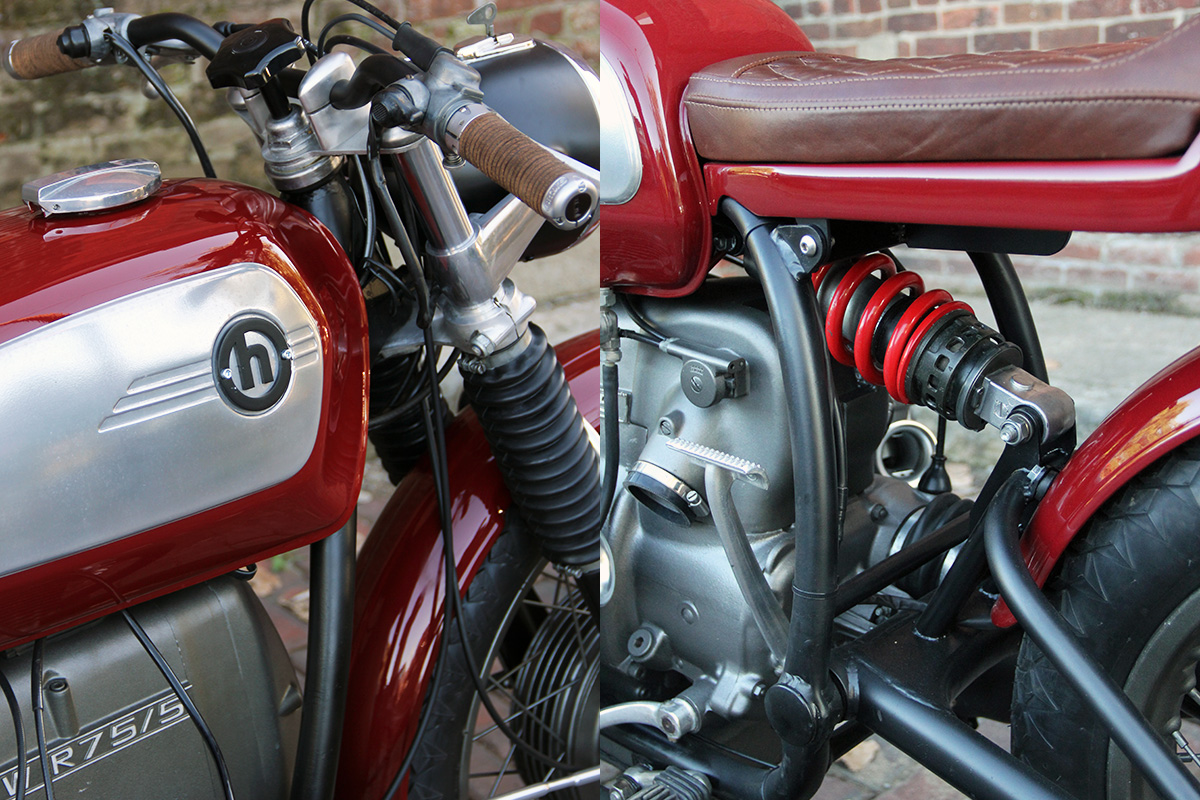
“The tank was raised 1/4 inch in the back to sit parallel with the motor. It was then time to fab up the custom seat/tail section. The goal was to have it look suspended, to keep it low, and to follow the turndown line on the tank. This necessitated scooping out the back of the cowl to allow for adequate suspension travel. Sheet metal was folded and rounded to make the basic shape and the top side was hammered out and welded in. Bobby Fulkerson slicked and painted the tins in a dark maroon, mounted new side panels to the tail and coated them all in an aluminium finish before fitting my H Garage emblems.
The seat was designed and redesigned before finally settling on a diamond pattern to match the tire tread. I added a recessed aluminium plate to tie everything together and Ginger from New Church Moto upholstered it. As always, I wish there was more time and money, but I think for what we had to work with, it’s a solid design with a nice fit and finish. The client is ecstatic and that’s what really matters in the end.
So, who’s next?”