Motorcycles are involved in rear-end collisions more often than you’d like to think. Infact in the USA, as many as 7% of motorcyclist deaths can be attributed to rear-end collisions. That’s a pretty grim statistic. As a rider, you may feel there isn’t much you can do to lessen the chance of being involved in a rear-end collision. The good news however is that there is.
Increasing your visibility to other motorists is the key to avoiding many accidents. The obvious solution is to wear high vis riding gear, but a pair of motorcyclist entrepreneurs have come up with an even brighter way of being seen.
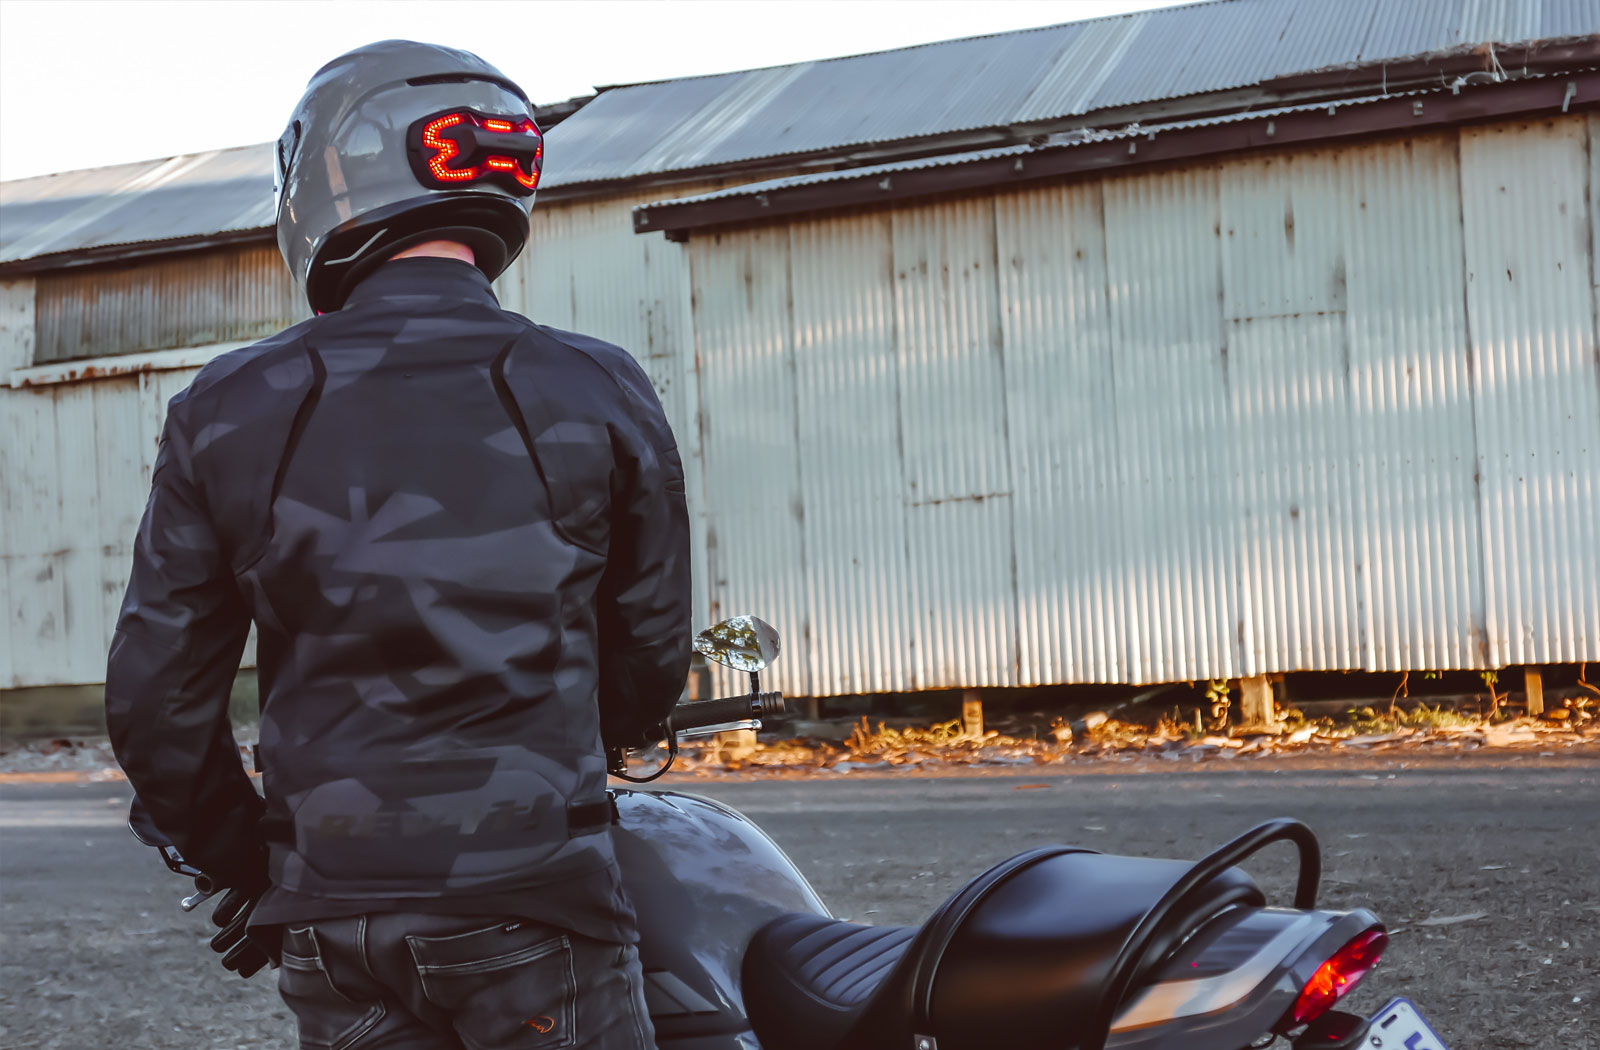
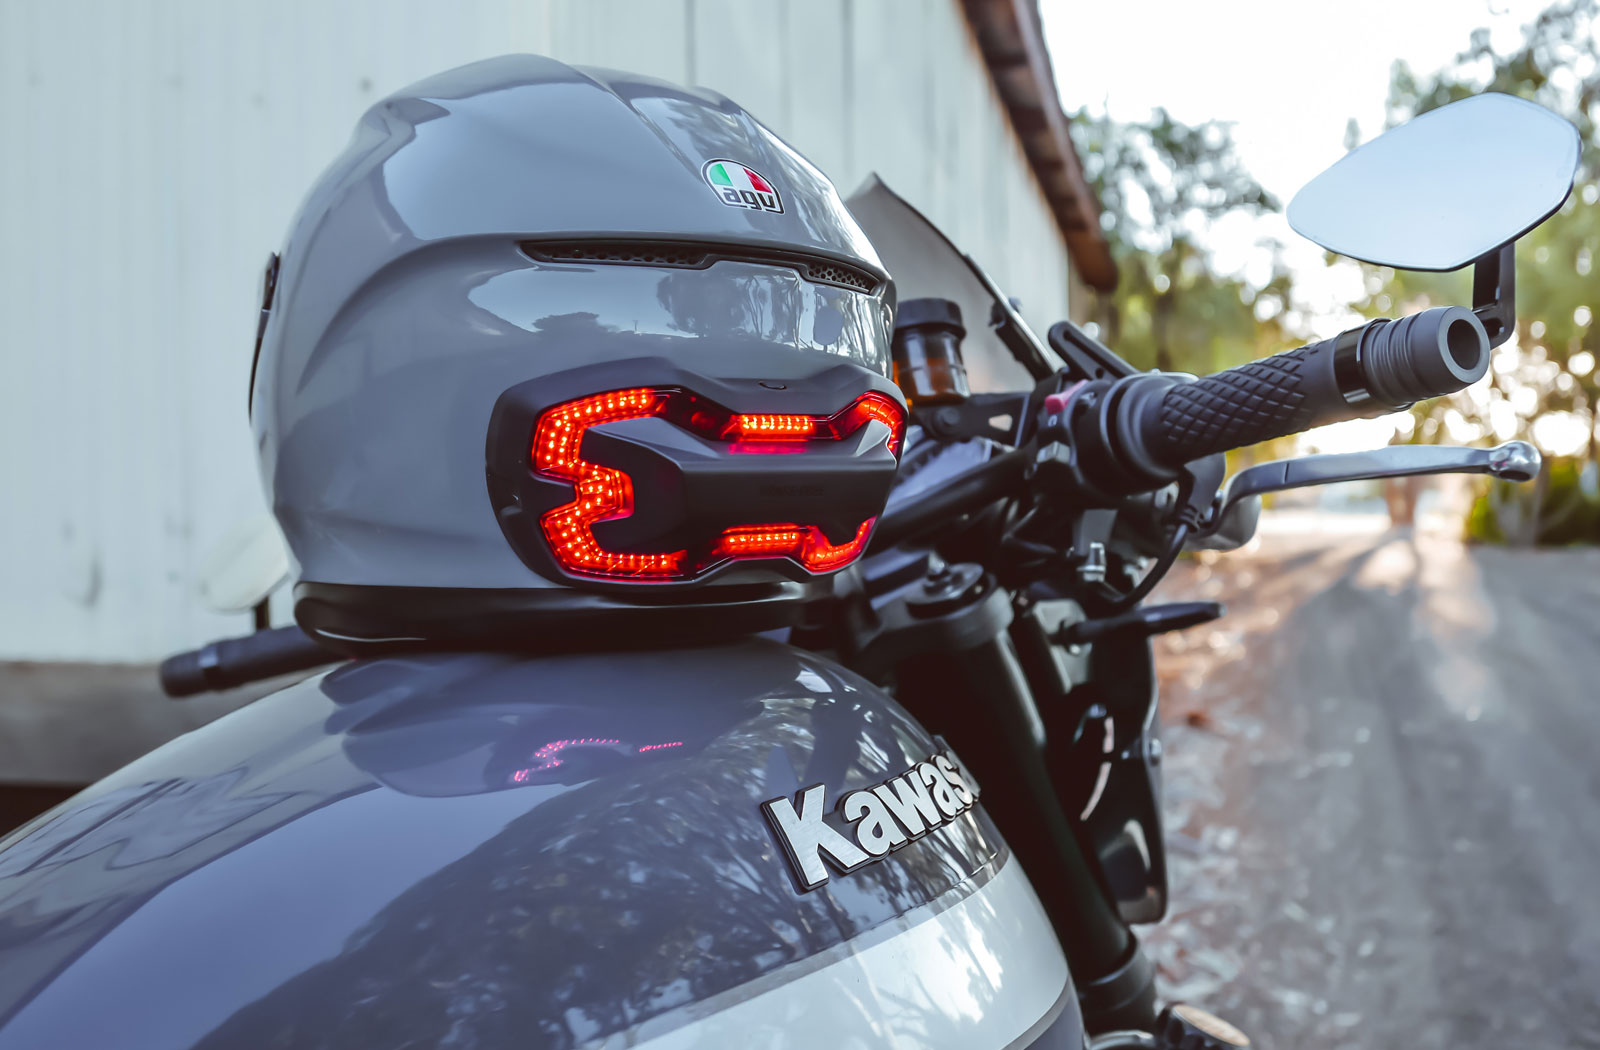
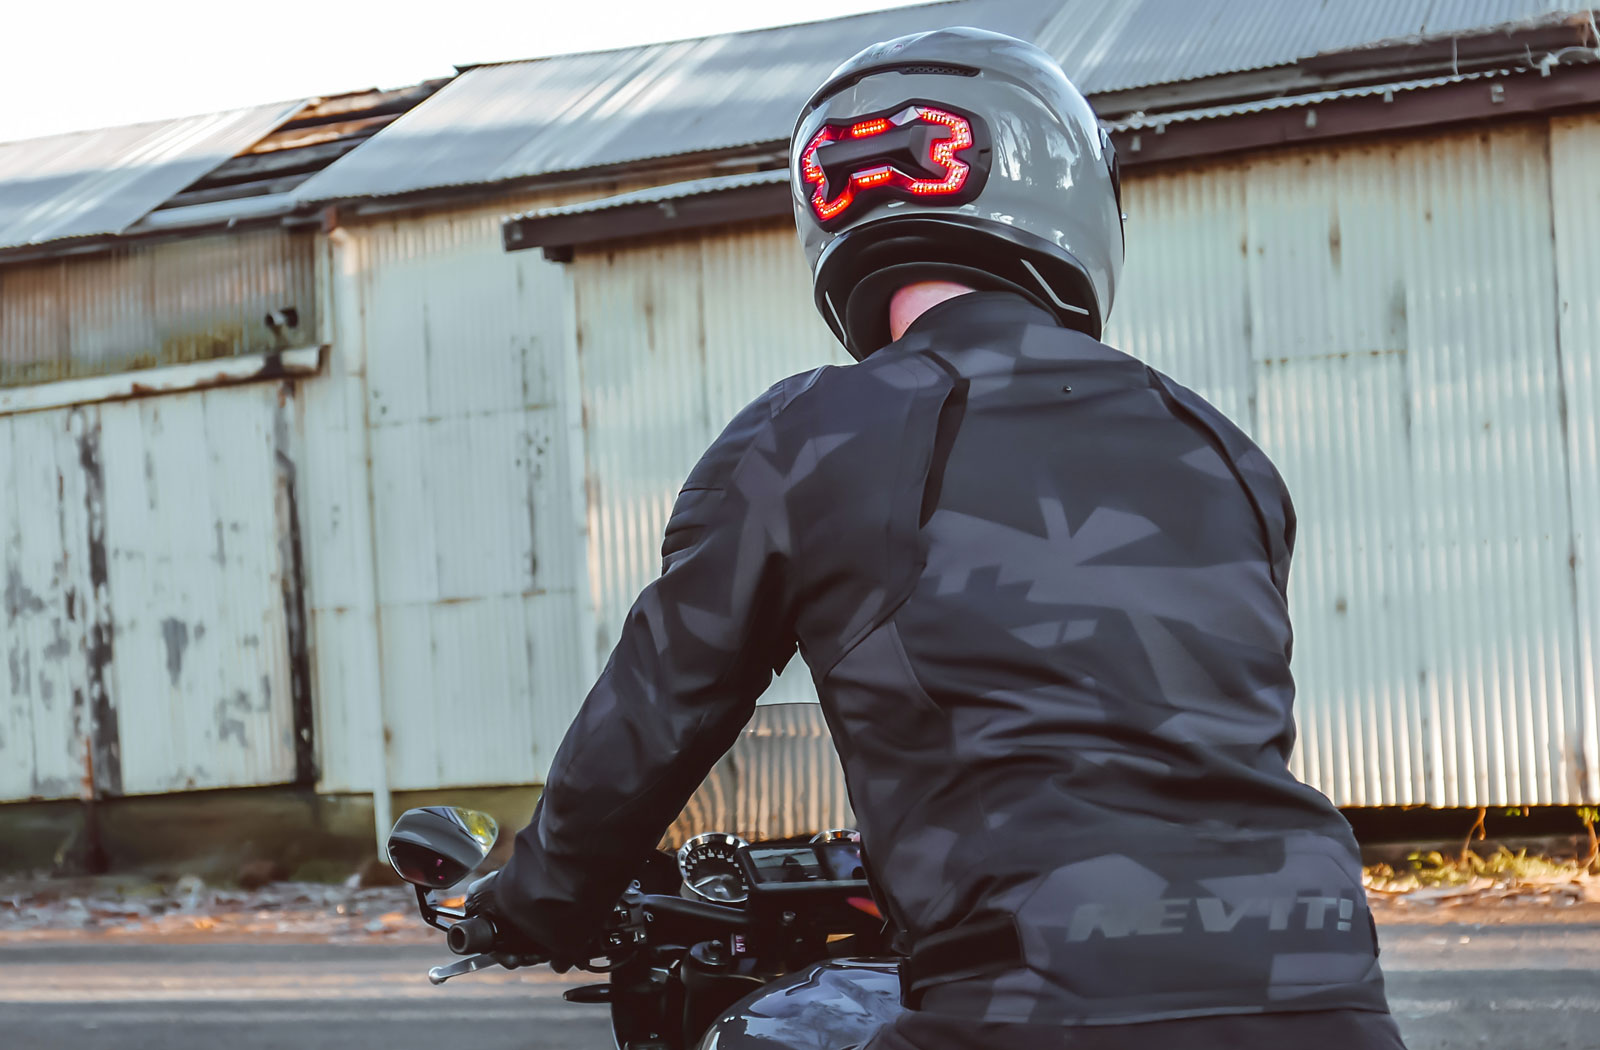
The Brake Free Light is the creation of Alex Arkhangelskiy and Henry Li in the United States. The 2 product design engineers/entrepreneurs wanted to make an easy to use safety device that would dramatically increase a rider’s presence on the road. Their solution was to create a highly visible helmet-mounted brake light.
The thinking behind the Brake Free came about after the pair recognised an inherent problem with motorcycle tail lights. Due to the proportions of a motorcycle, the brake light assembly is drastically smaller than one you’ll find on a car. It also sits lower than the average motorist’s line of sight. So by adding an additional brake light at a much higher location they could make a rider significantly more visible to other motorists.

 How the Brake Free Light works
Putting it simply, Brake Free is a helmet-mounted brake light – but there’s a lot of technology packed into this clever device that makes it really something.
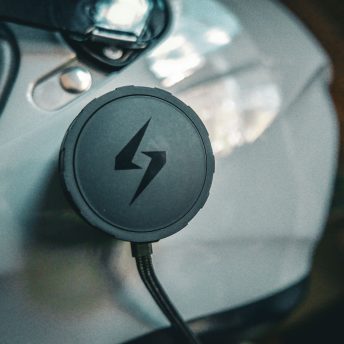
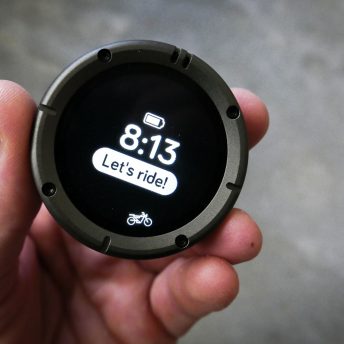
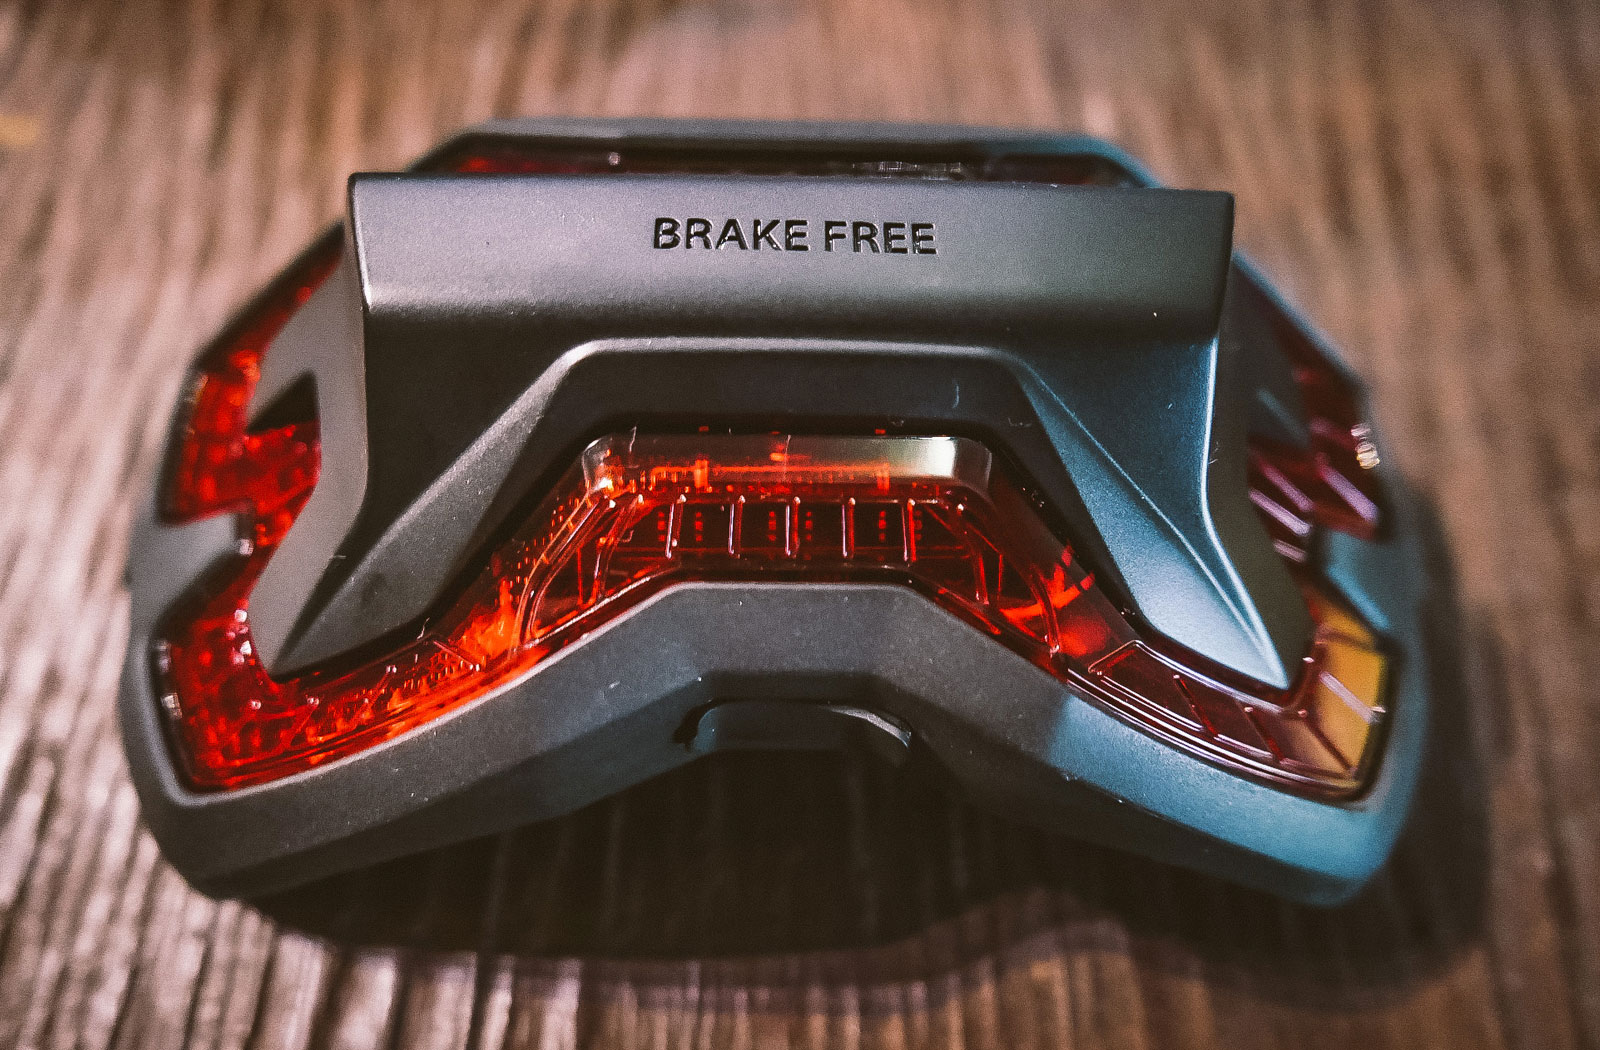
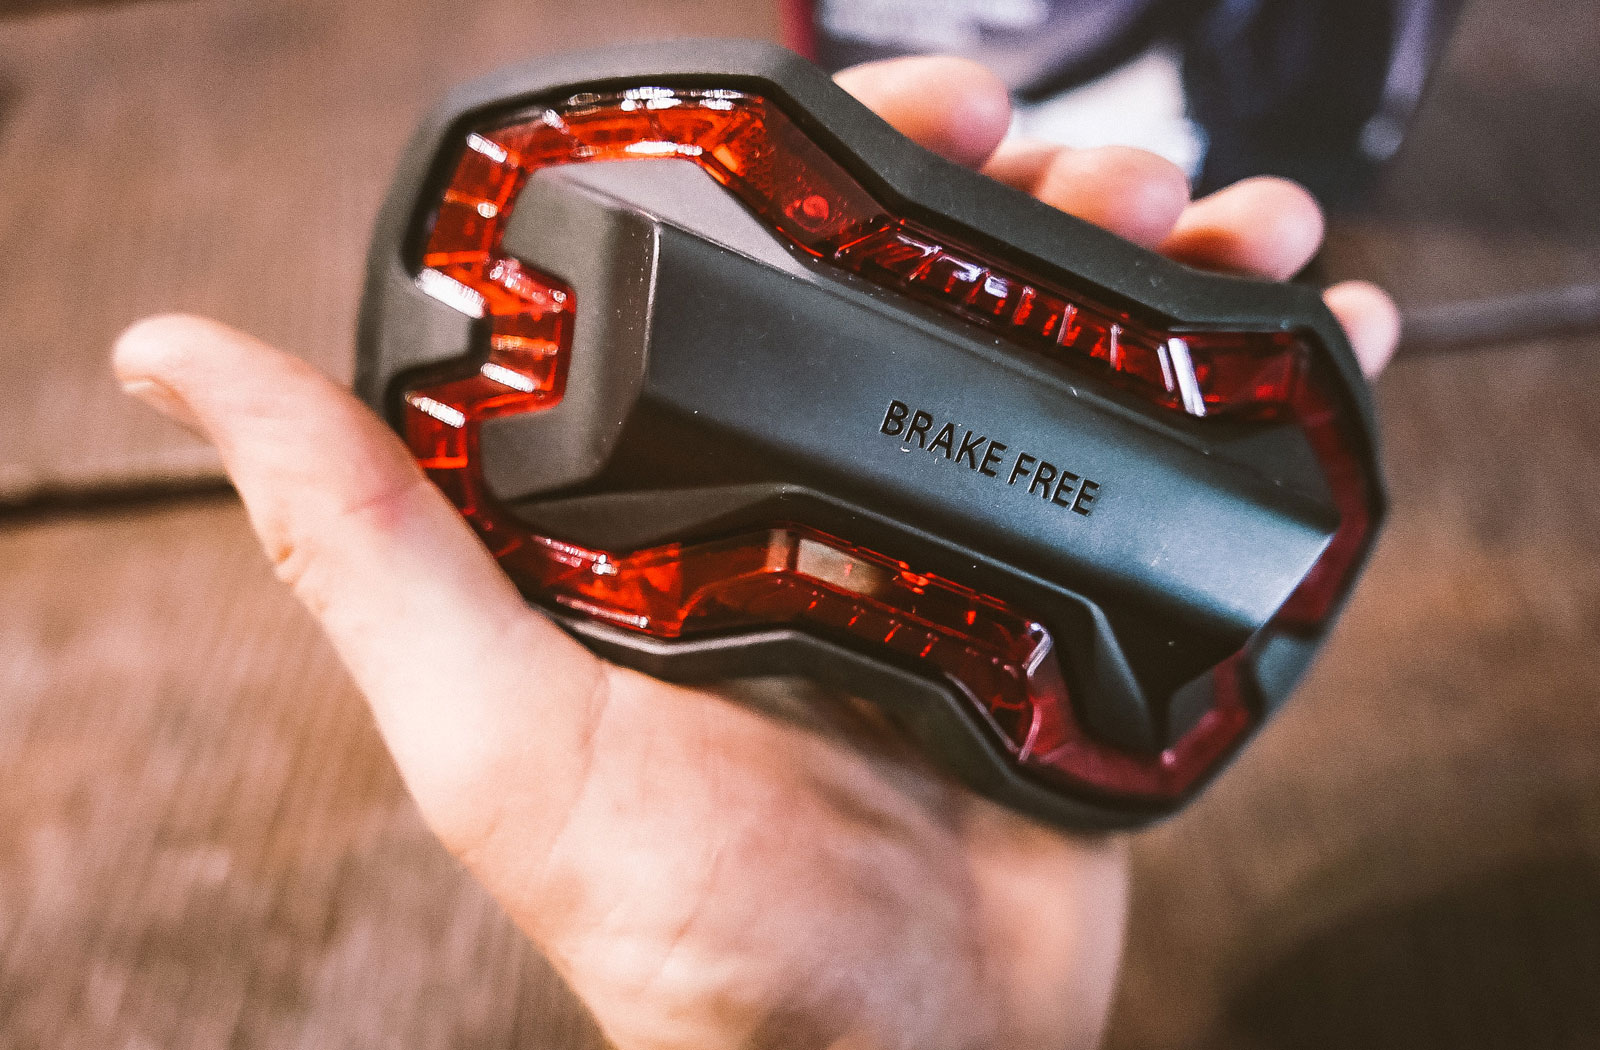
The Brake Free Light unit measures 6.5 inches wide, 3 inches tall and 1.5 inches deep. The unit weighs a mere 7 ounces and features a black plastic casing and red lens. Brake Free is operated using a single multi-function button at the top of the unit. Charging the internal battery is completed via a micro USB port that’s stashed behind a waterproof cover. The entire unit is IP65 rated which makes it completely weatherproof and a full battery charge will provide up to 12 hours of functional use.
On the inside of the Brake Free is where all the magic happens. Alex and Henry avoided the use of Bluetooth technology or any type of wired connection when creating the Brake Free. This removes the risk of a lost signal or cumbersome connectors. Instead, the unit uses inbuilt sensors to recognise when your motorcycle decelerates and brakes.
Within the casing of the Brake Free Light is a three-dimensional gyrometer and an accelerometer. Working in unison the 2 sensors detect any changes in movement. When that change involves deceleration lights are activated to signal that you are slowing down. These calculations happen within fractions of a second and the sensors are clever enough to differentiate between random head movements and actual braking.
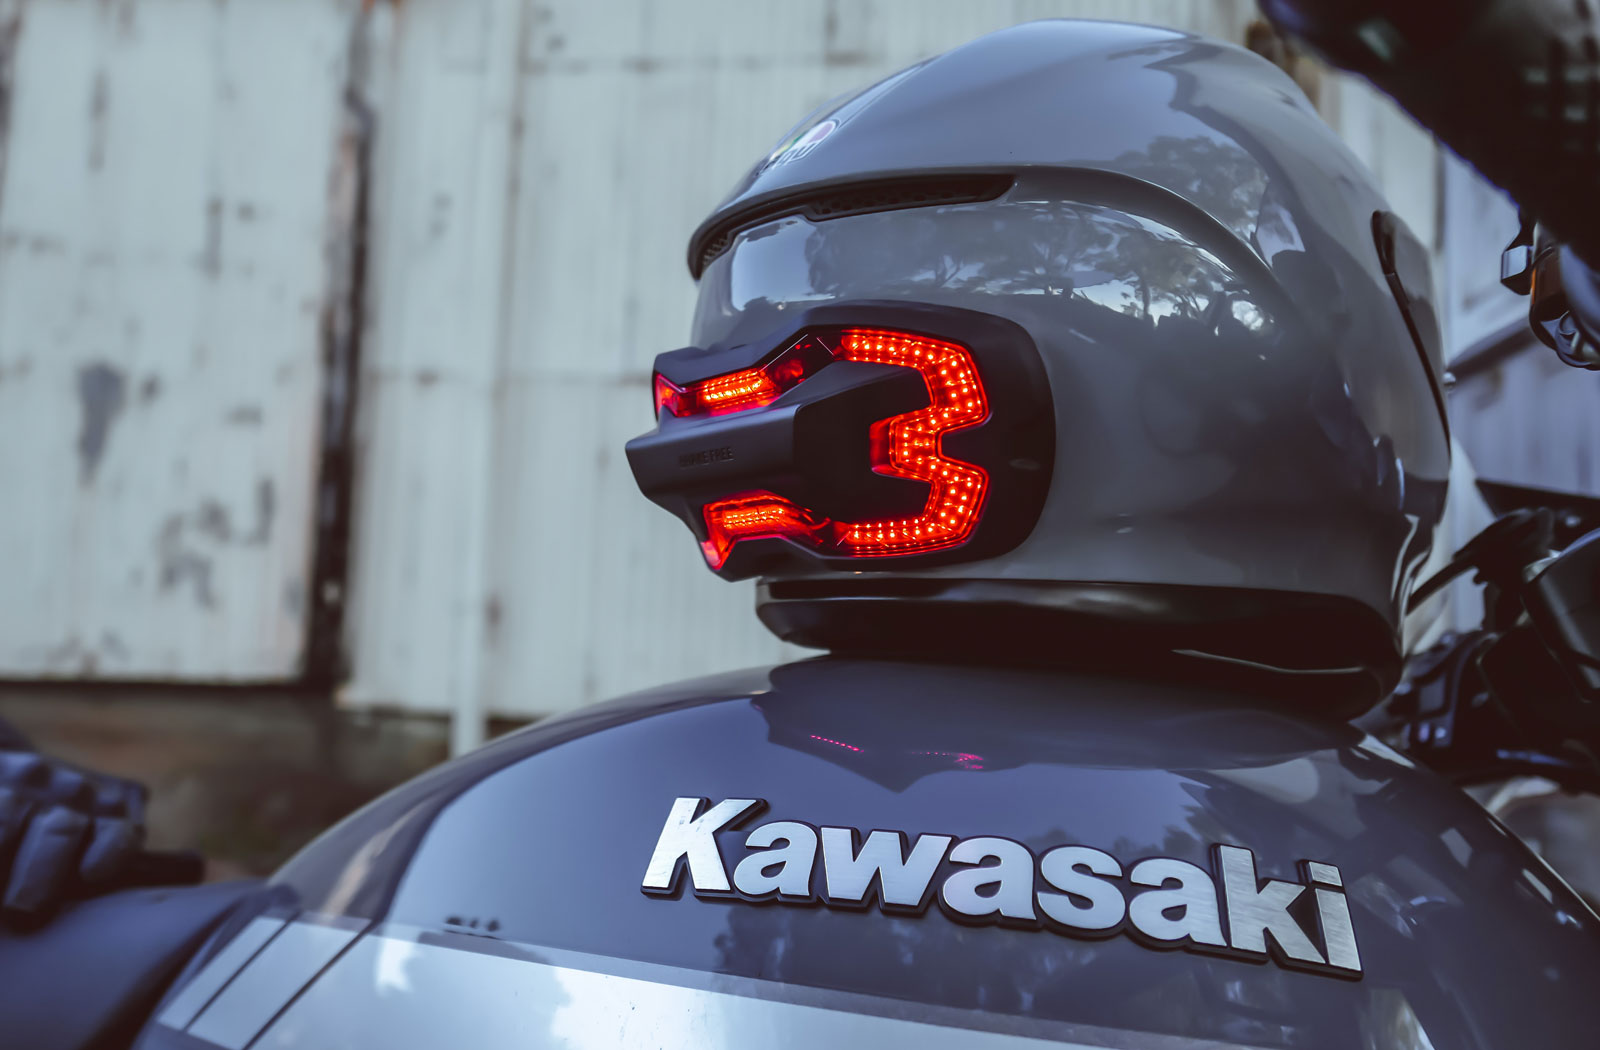
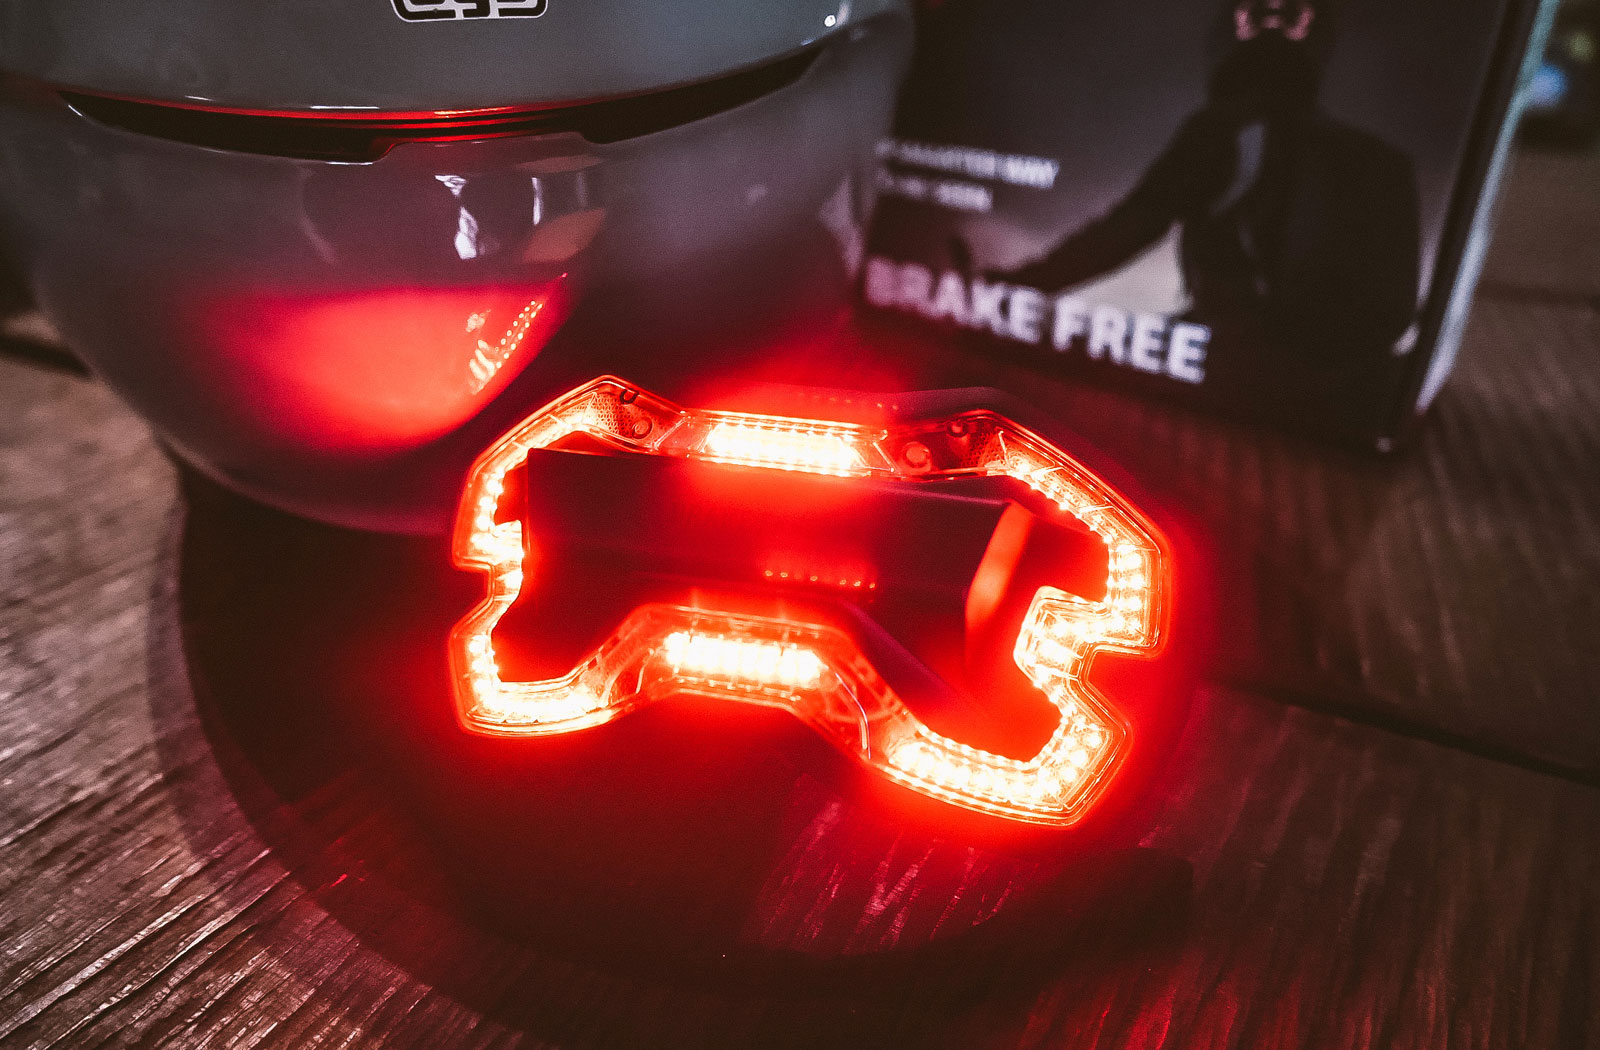
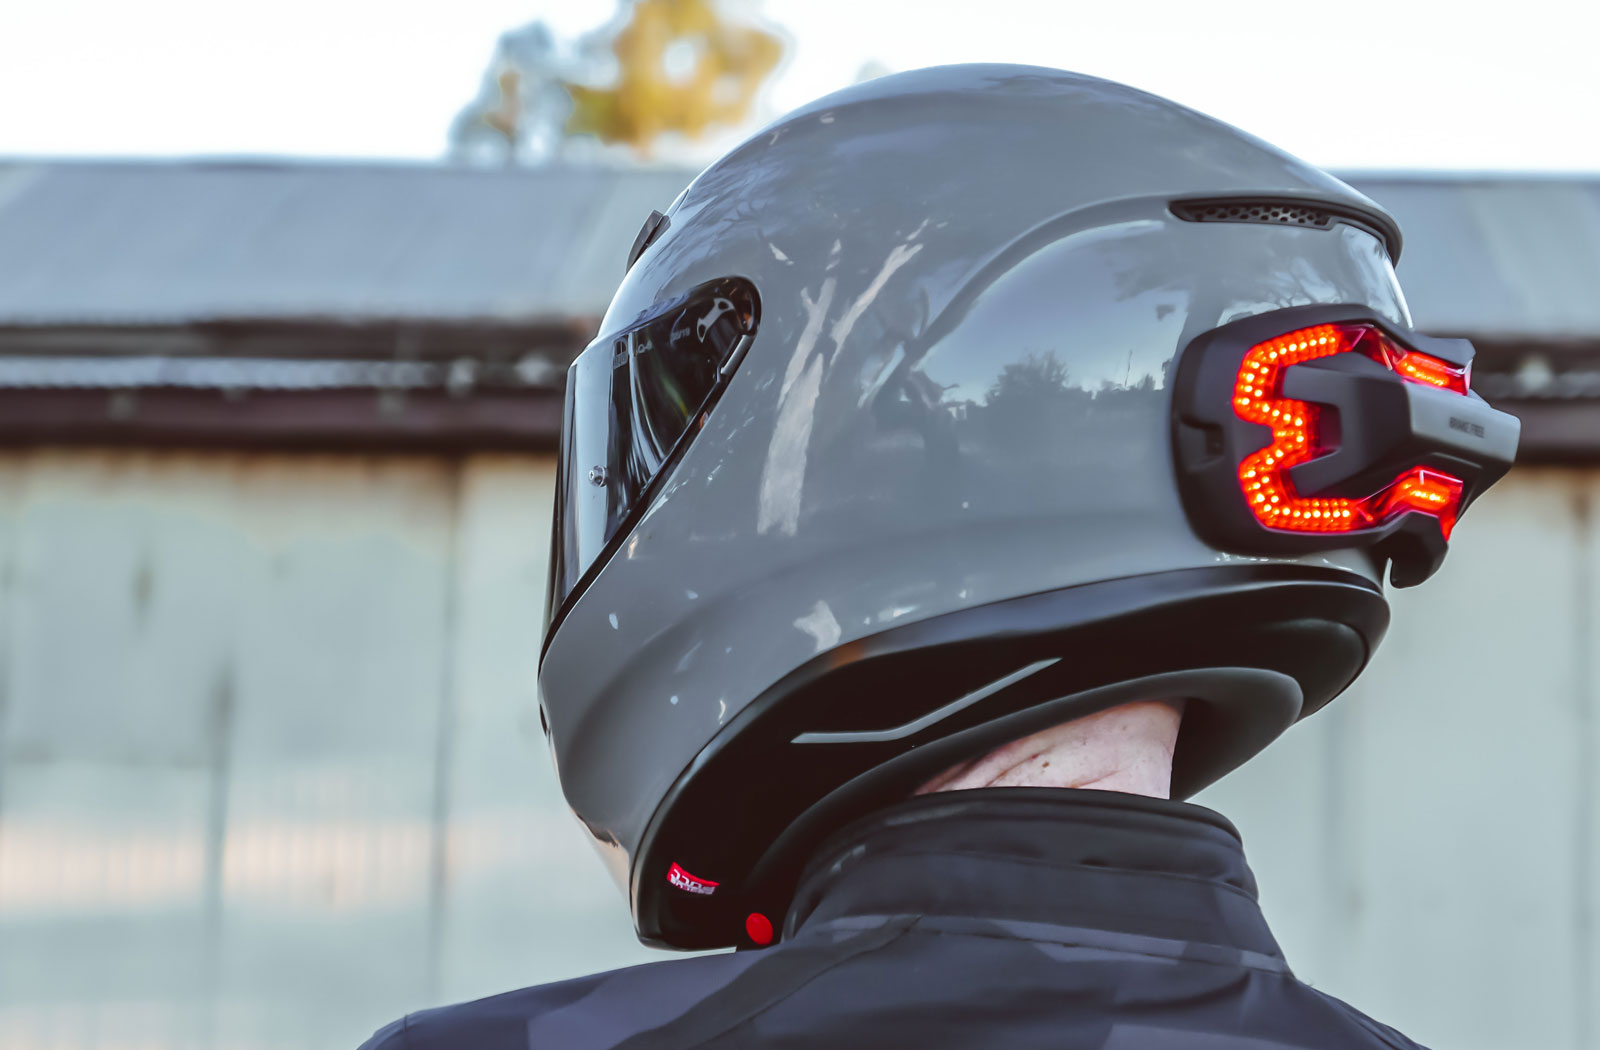
As for the brake light itself, it is made up of 100 ultrabright LED’s that produce an intense glow that is very hard to ignore.
Installing the Brake Free on a helmet
Before purchasing a Brake Free Light I think it’s important to mention that it will not fit all helmets. I had intended to originally mount my Brake Free light on a Bell Carbon Star. However, because that helmet has an angular ridge along the lower back edge it simply wasn’t possible. The Brake Free Light is designed to fit onto a smooth curved surface. Brake Free state they have tested the fitment of the unit on many helmets with success so I guess I was just unlucky. Thankfully I have more than one helmet in my riding gear collection and it fit perfectly onto my AGV K6.
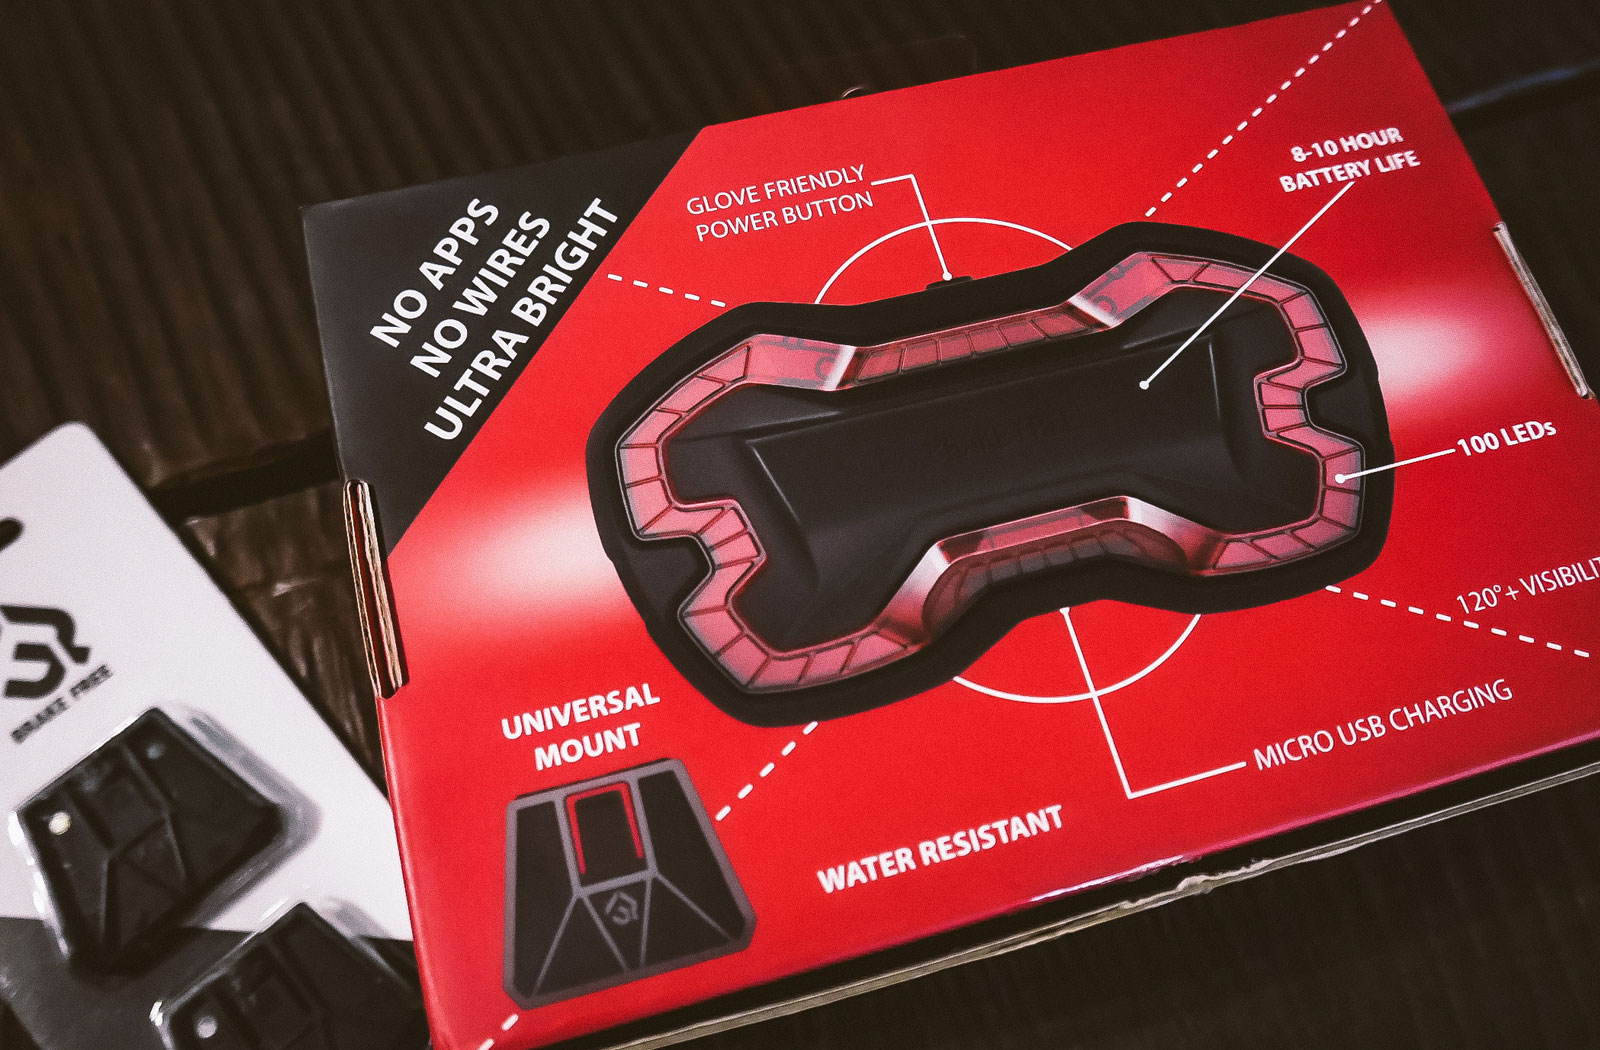

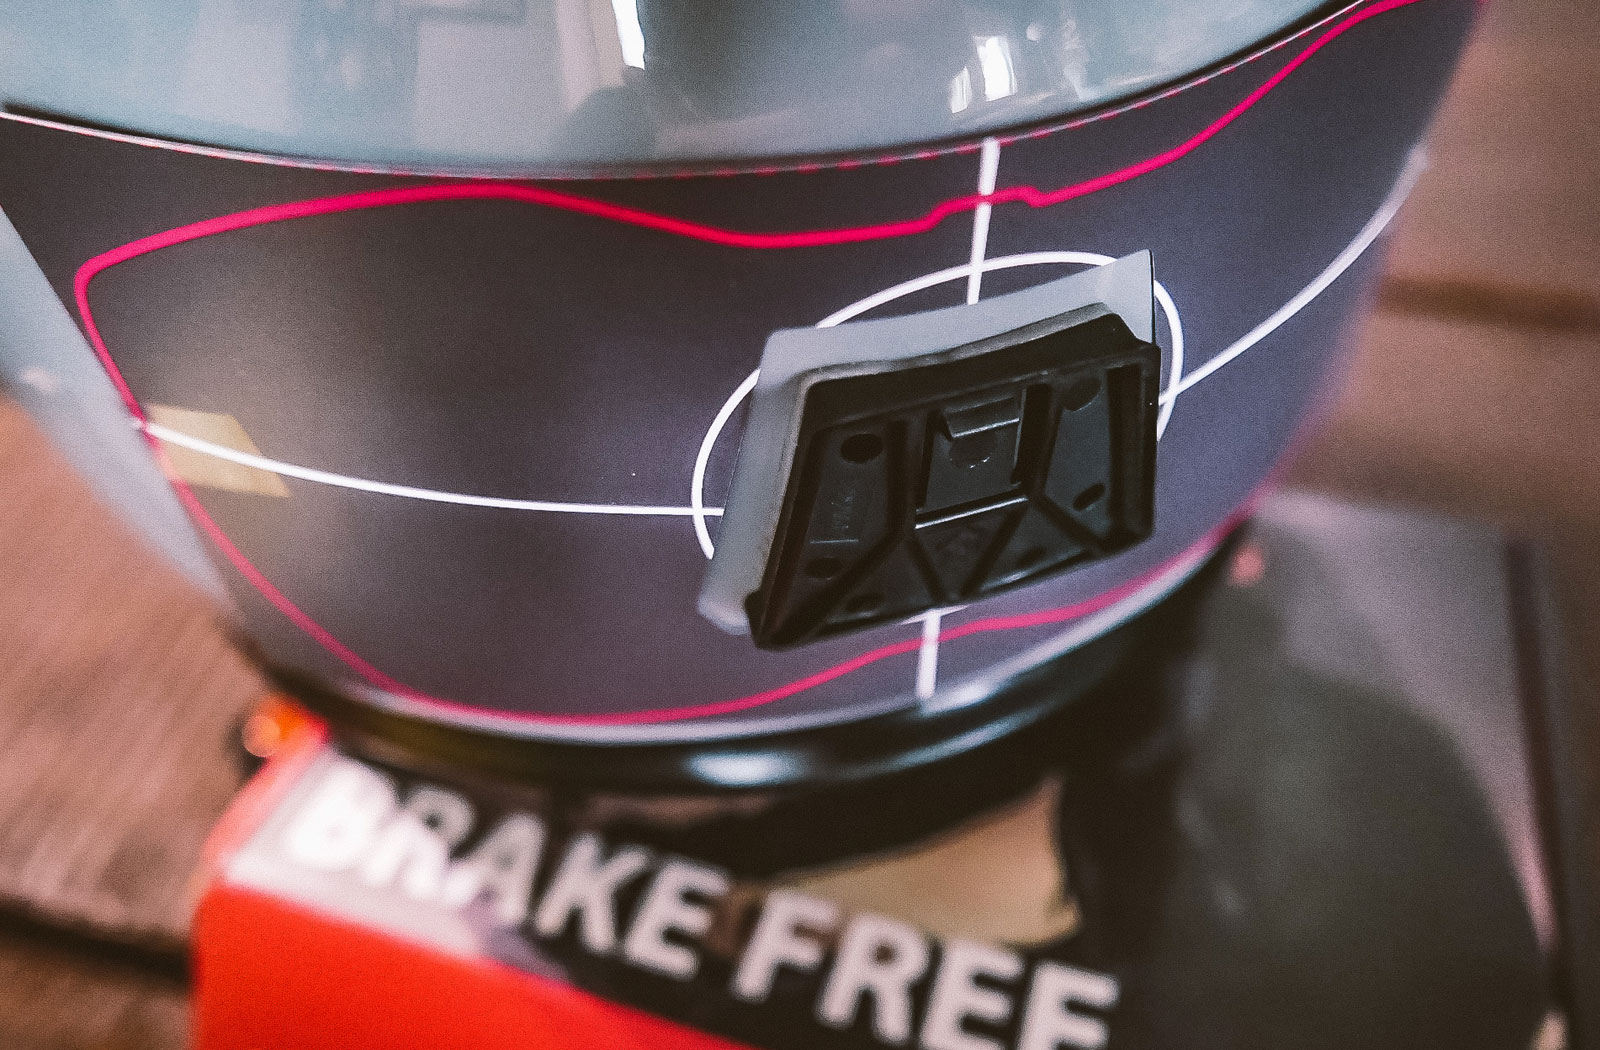
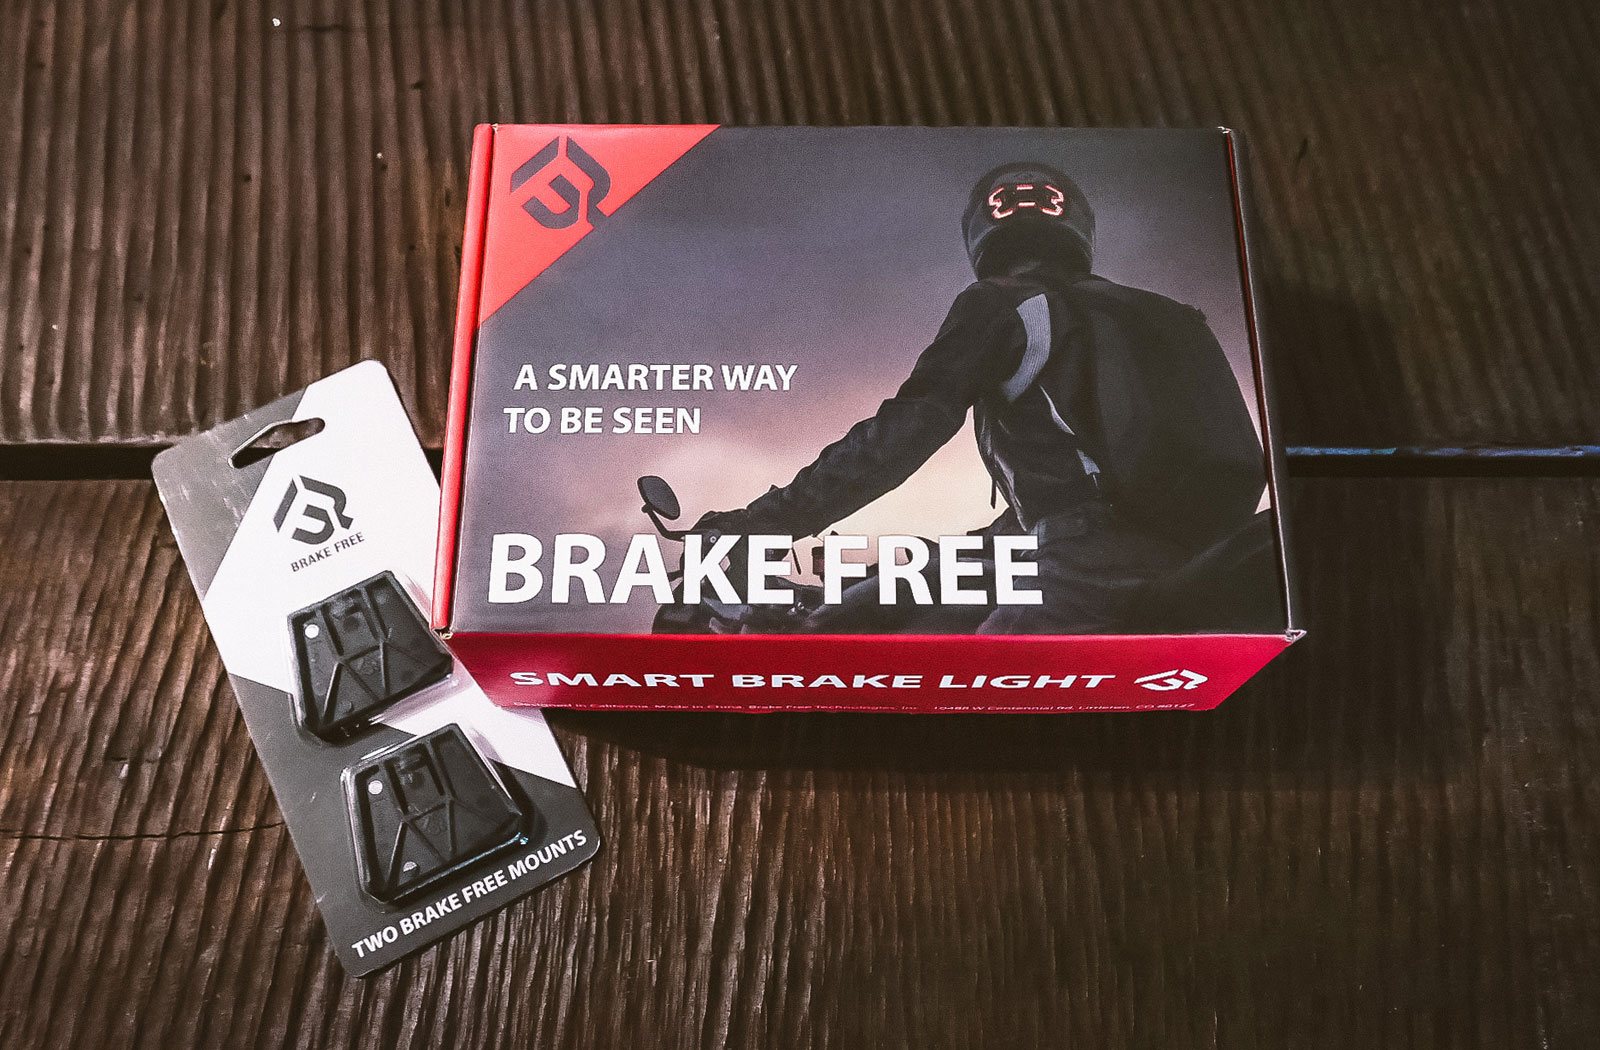
The Brake Free installation process is very straightforward. When you open the packaging you’ll find a 3M bracket and a mounting template. You begin by determining the best placement for the unit by hand. If you have a whiteboard marker you can use it to mark the centre points and sides of the unit on your helmet. You then stick the template to your helmet using some tape and check that the alignment and positioning are all correct. Next clean the area where the bracket will go, peel the backing off the 3M pad and firmly stick it onto your helmet. After giving it sufficient time to cure you can then fit the Brake Free Light onto the bracket. This is done by simply sliding it onto the bracket until it clicks and locks into place. The unit can be lifted off the bracket again when you want and Brake Free sell additional brackets so you can use the one unit on multiple helmets.
Scroll to the end of this post to watch Brake Free’s own installation video
Operating the Brake Free Light unit
To switch the Brake Free on you simply press down on the top button and hold it until the unit powers up (approx 3 seconds). Once it is on quick pressing the same button will cycle through the units different operating modes.
The 3 operating modes offer different running light options which vary in intensity. The first, least invasive mode illuminates 2 short strips of LEDs along the top and bottom of the unit. The second will activate all 100 of the LEDs at around 30% brightness. The third also activates all 100 lights but also makes them slowly pulse. The 3rd option is particularly effective for those riding in low visibility situations such as at dusk, fog, mist or rain.
In all 3 operating modes when the unit detects you are slowing down or braking all of the 100 LEDs illuminate at 100% brightness. When you have come to a complete stop the lights fade back to the preselected running light mode. Another clever feature of the unit is that it performs a burst flash sequence when it detects a hard or emergency brake to draw even more attention to your actions.


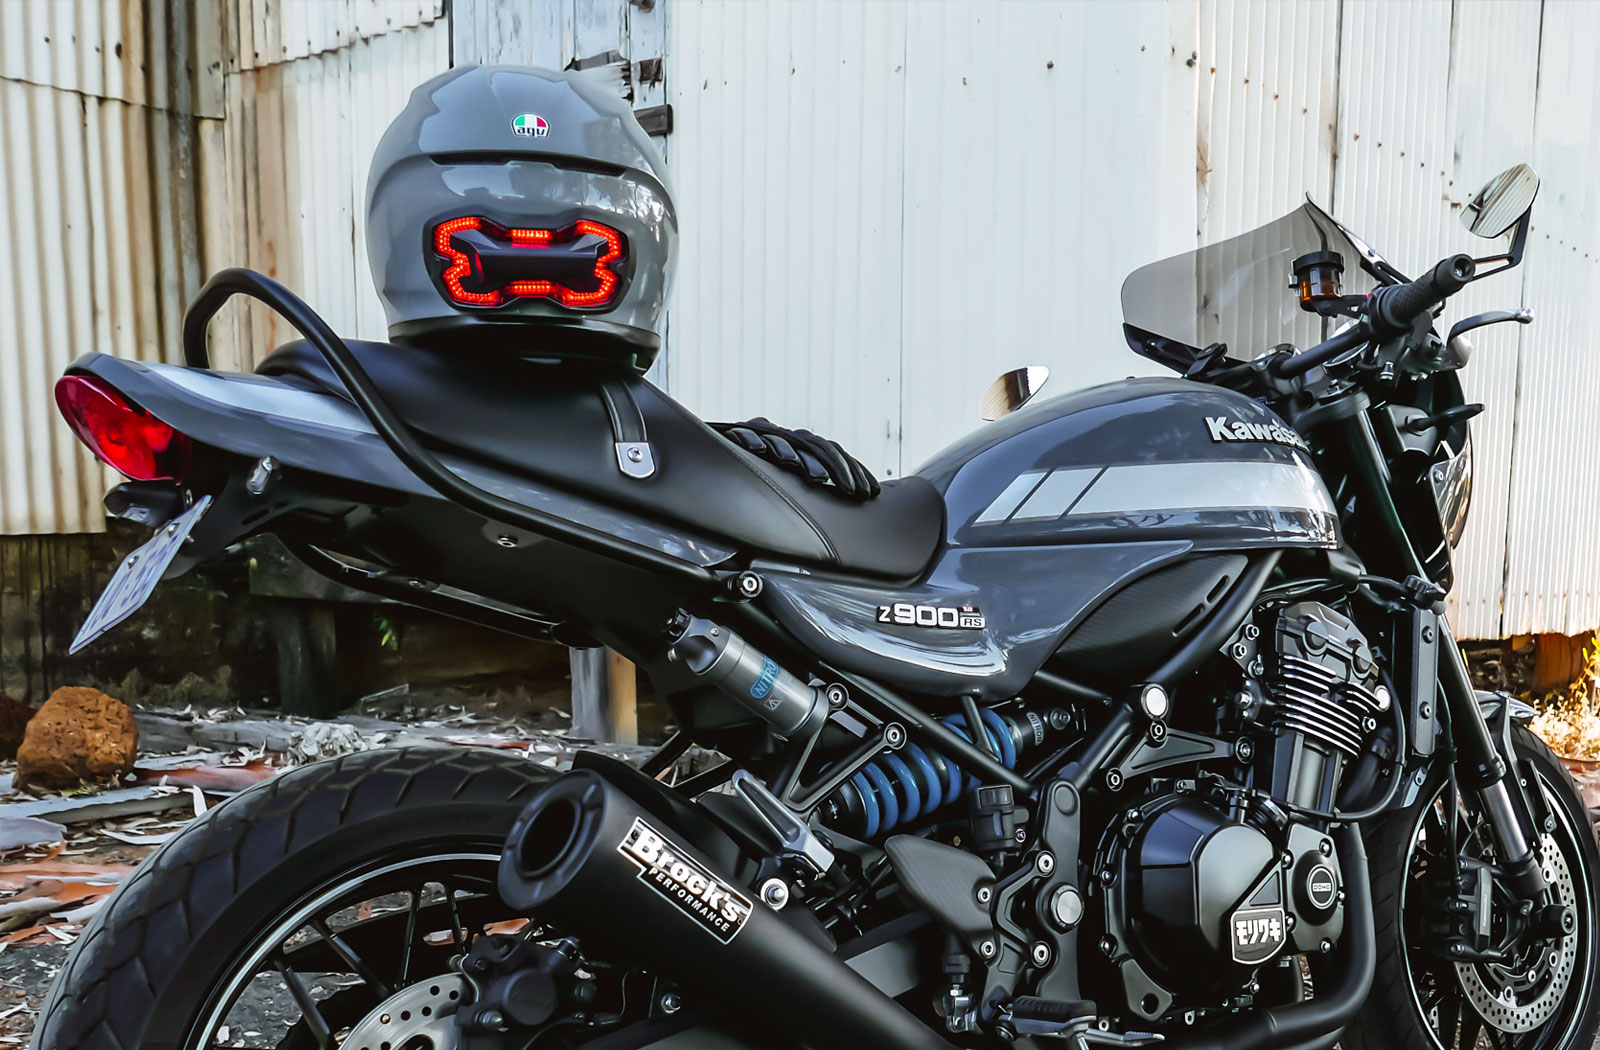
Riding with the Brake Free
In terms of fit and finish, I’ve already mentioned the Brake Free isn’t a truly universal accessory. So if you’re worried it may not fit your helmet I’d recommend contacting them before purchasing. As for its appearance, although Brake Free unit is lightweight and designed to be compact it does protrude quite a bit off the back of a helmet. But really this shouldn’t really be an issue since this accessory is all about safety rather than looks.
As for its effectiveness, I have no doubt that the Brake Free has increased my presence on the road. This is due to the simple fact that the 100 LED lights within the unit are so bright they are impossible to miss when activated. With an accessory like this, however, it’s a matter of turning it on and hoping for the best since you can’t see it working yourself. So for the purpose of my testing, I called on the help of a fellow rider.
After a half-day riding, my buddy reported that the unit did indeed function as described. During our ride, the Brake Free lit up in almost perfect sequence with my motorcycles brake light and sometimes even earlier. He also commented on how interesting it was to see the unit activating when I was engine braking. This consequently made him realise that when he was engine braking he wasn’t giving anyone behind him any warning that he was slowing down. Perhaps this could be a contributing factor to motorcycle rear-end collision statistics? Hopefully, we’ll never find out.
In summary, I highly recommend adding a Brake Free to your riding gear garb. For those who regularly commute in heavy traffic, it’s pretty much a must-have since that is when most rear-end collisions are most likely to occur. The Brake Free is incredibly simple to use and at the end of the day what rider wouldn’t want other motorists to take more notice of them?