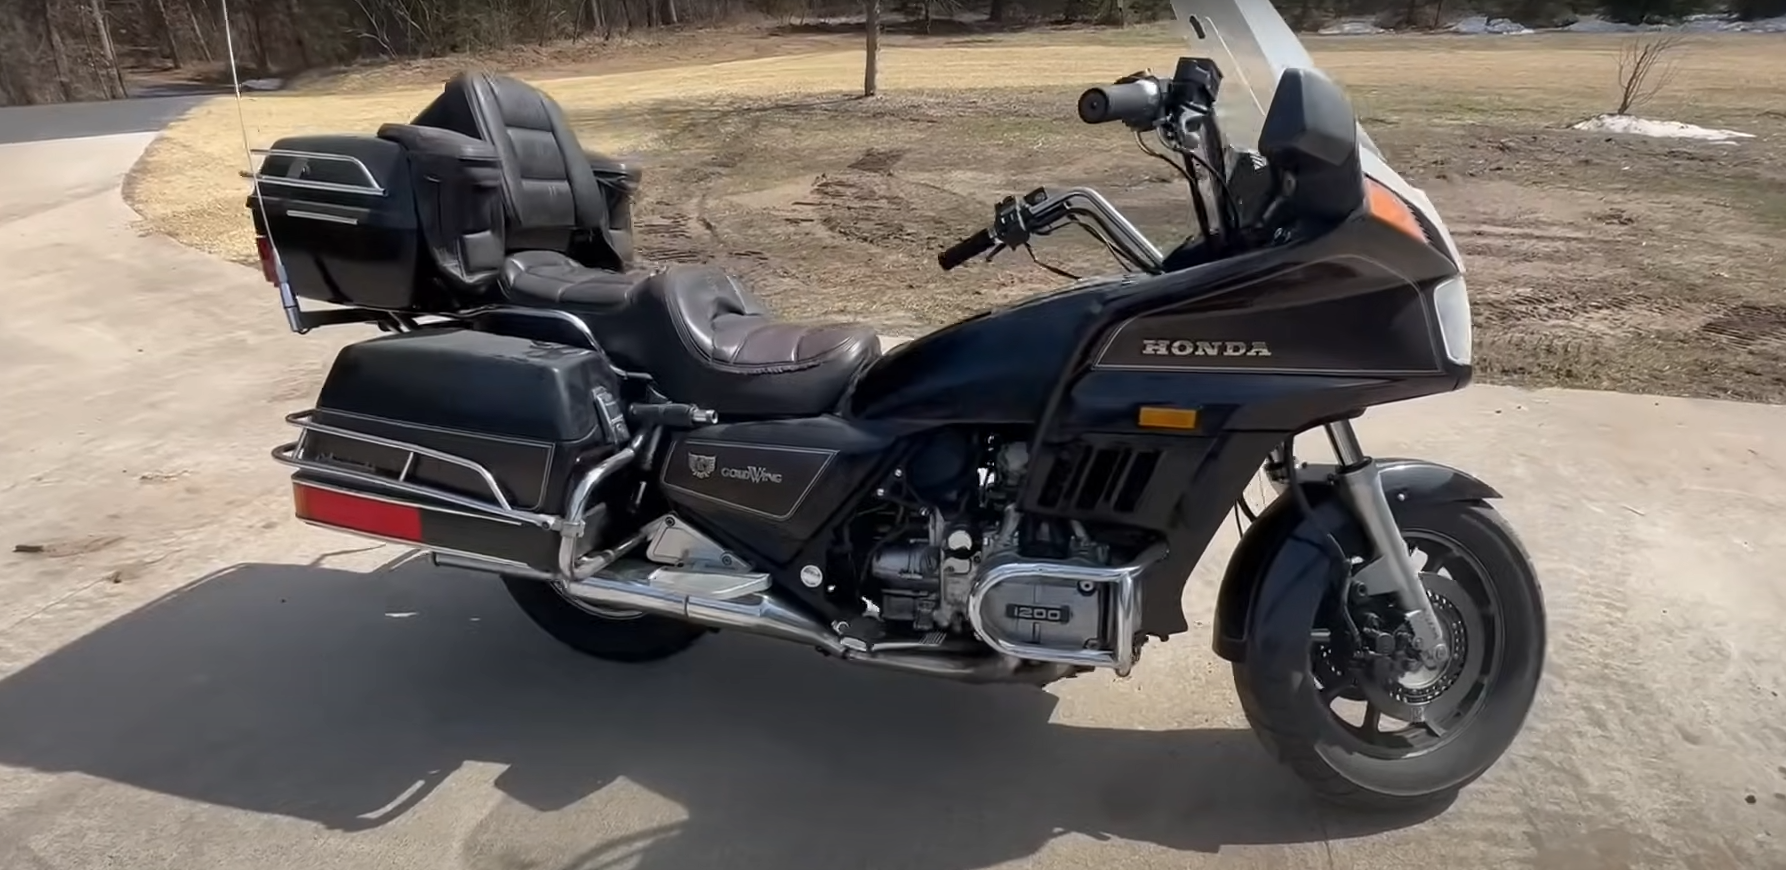
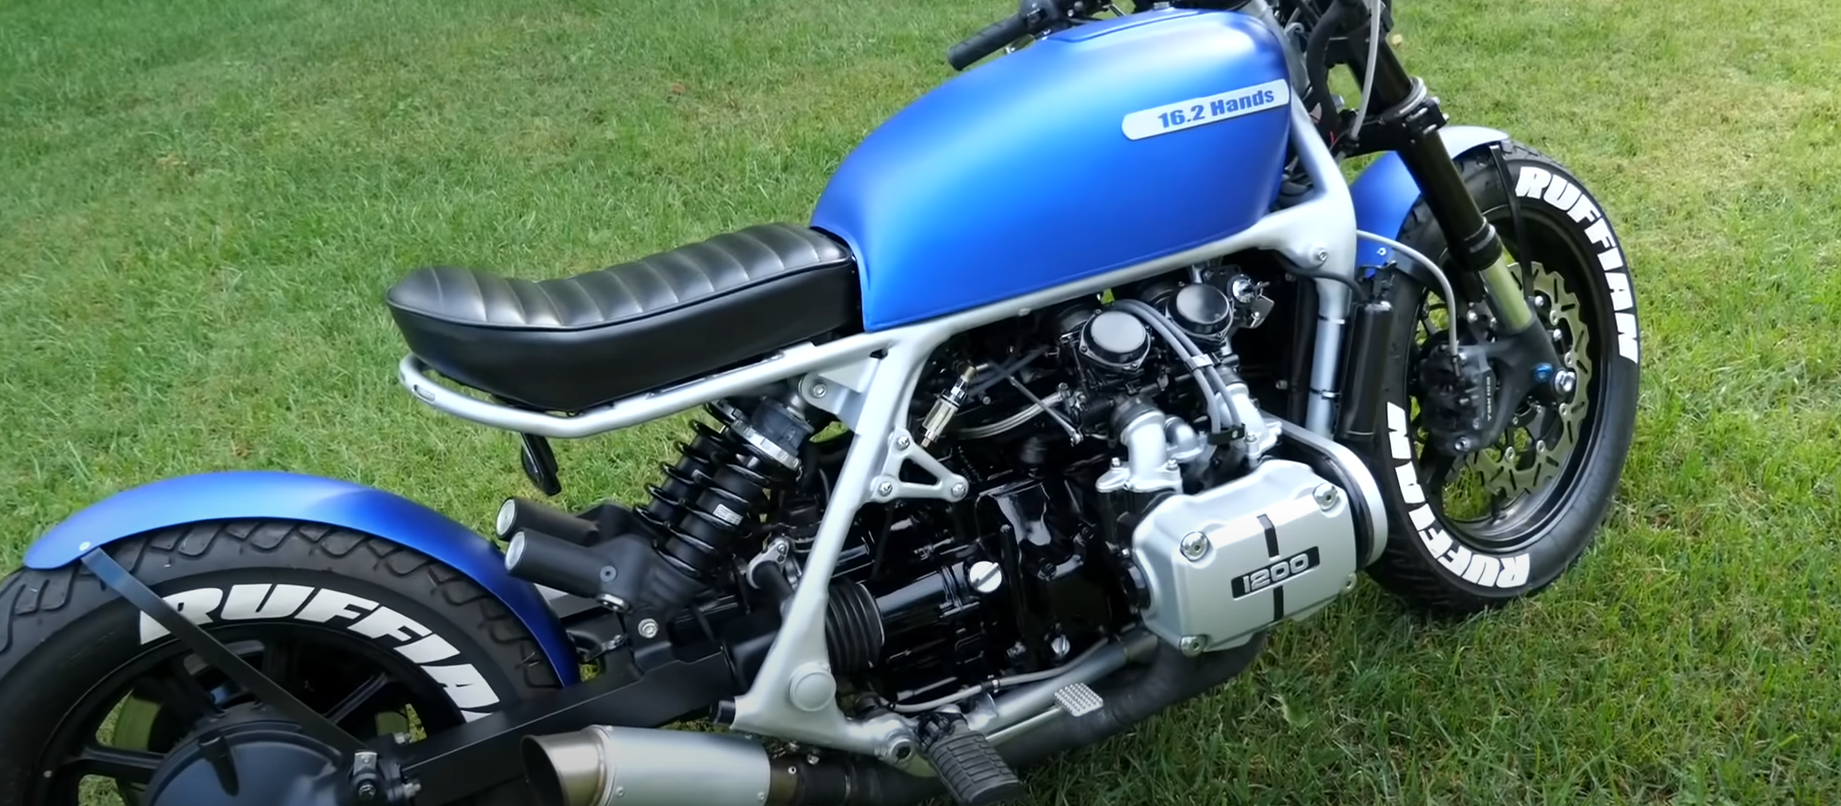
Turning an old 1984 Honda Goldwing 1200 into something new takes a lot of time, planning, and hands-on work. They started by buying the bike for a low price and began stripping away extra parts like the front fairing, saddlebags, and old lights. Each step brought new ideas, such as adding a modern round headlight and custom LED tail lights.
Mechanical repairs and updates followed, with attention to essentials like air filters, spark plugs, and brake fixes. The project also included customizing the seat, reworking the dash and speedometer, and making creative changes for a clean look. Every task meant figuring things out along the way, leading to a unique and fresh take on this classic motorcycle.
Key Takeaways
- The project began with a full teardown and creative vision.
- Mechanical and styling upgrades were done step by step.
- Custom features and repairs turned the Goldwing into something special.
Project Overview
Buying the Bike and Managing Costs
The project started with a 1984 Honda Goldwing 1200, purchased for $400. The owner set a clear plan to keep costs low by removing unnecessary parts and reusing or updating what was needed. Some essential replacements included the air filter, oil, oil filter, spark plugs, and seat.
A table below lists the major expenses as described:
| Item | Status |
|---|---|
| Honda Goldwing 1200 | Purchased |
| Air Filter | On order |
| Oil & Oil Filter | Replaced |
| Spark Plugs | Replaced soon |
| Seat | Replacement, modified |
| Headlight | New, ordered |
| Taillight | New, ordered |
He aimed to only spend money on the most important parts and made modifications when he could instead of buying new.
Goals and Plans for the Goldwing
The main goal was to strip down the motorcycle and build something custom, removing the front fairing, saddlebags, and old lighting. Plans included:
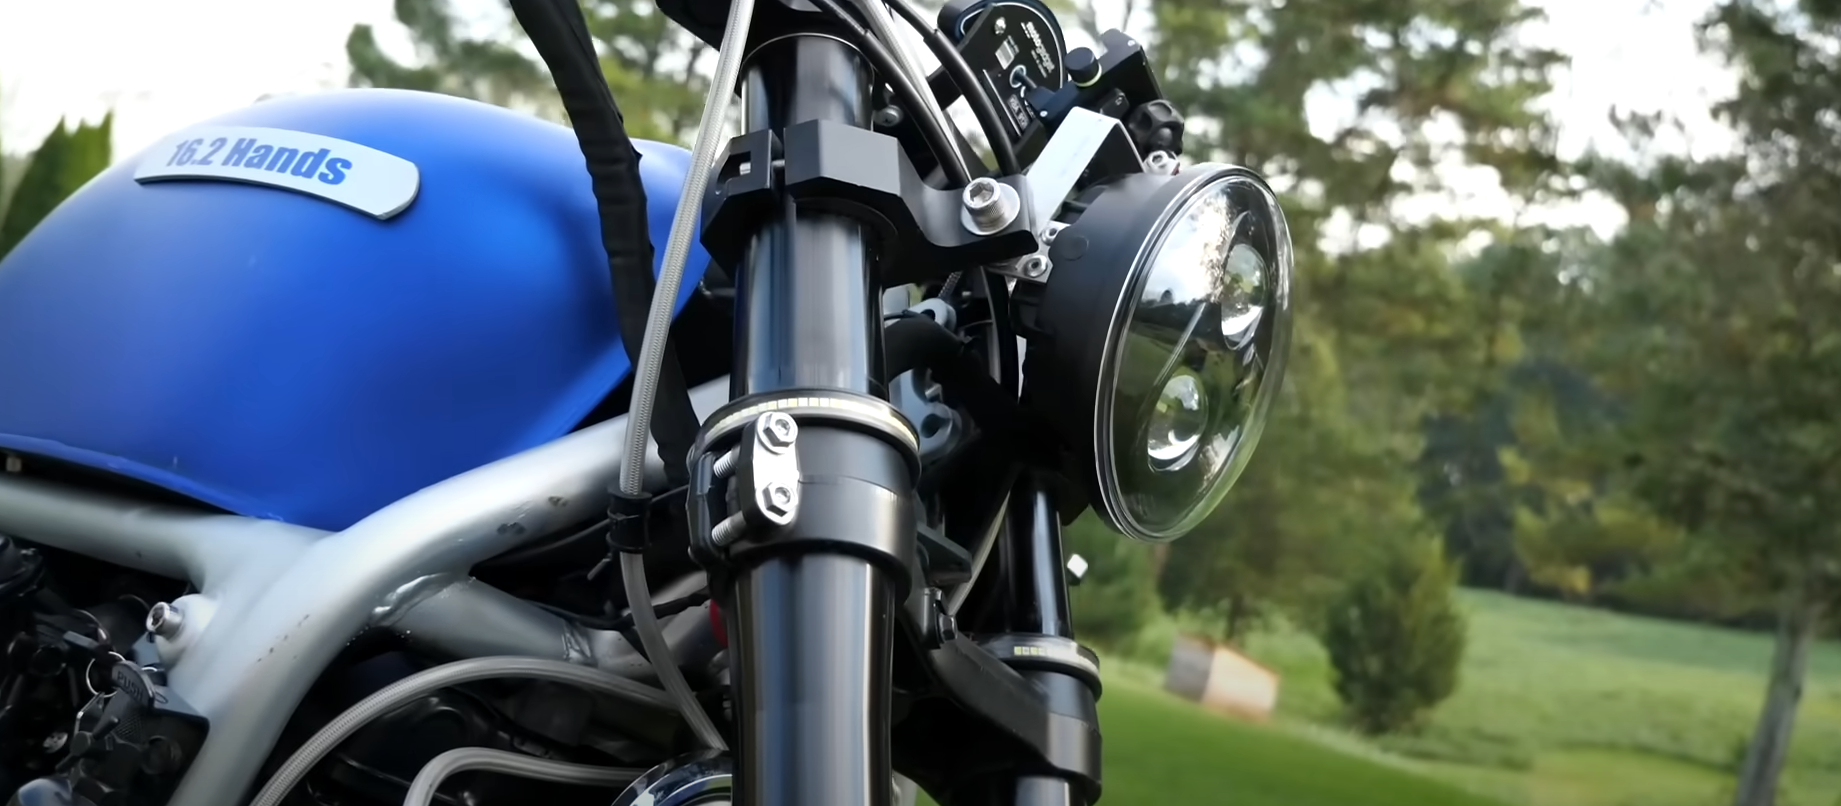
- Installing a round 7-inch headlight with integrated blinkers
- Adding an LED strip taillight with built-in blinkers
- Modifying the seat for a new shape and lower profile
- Reworking the dash and wiring for a cleaner look
- Testing different ways to block off and cap old components
- Customizing the speedometer and mounting it in a new way
- Improving the brakes by trying a different caliper setup
The project took a trial-and-error approach so changes and new ideas happened as the work progressed. Each step focused on making the bike lighter, more compact, and tailored to the owner’s preferences.
Key plans were handled as they came up, and fixing or replacing broken parts was part of the process. The vision remained clear: turn the old Goldwing into a unique and simple ride.
Breaking Down the Goldwing
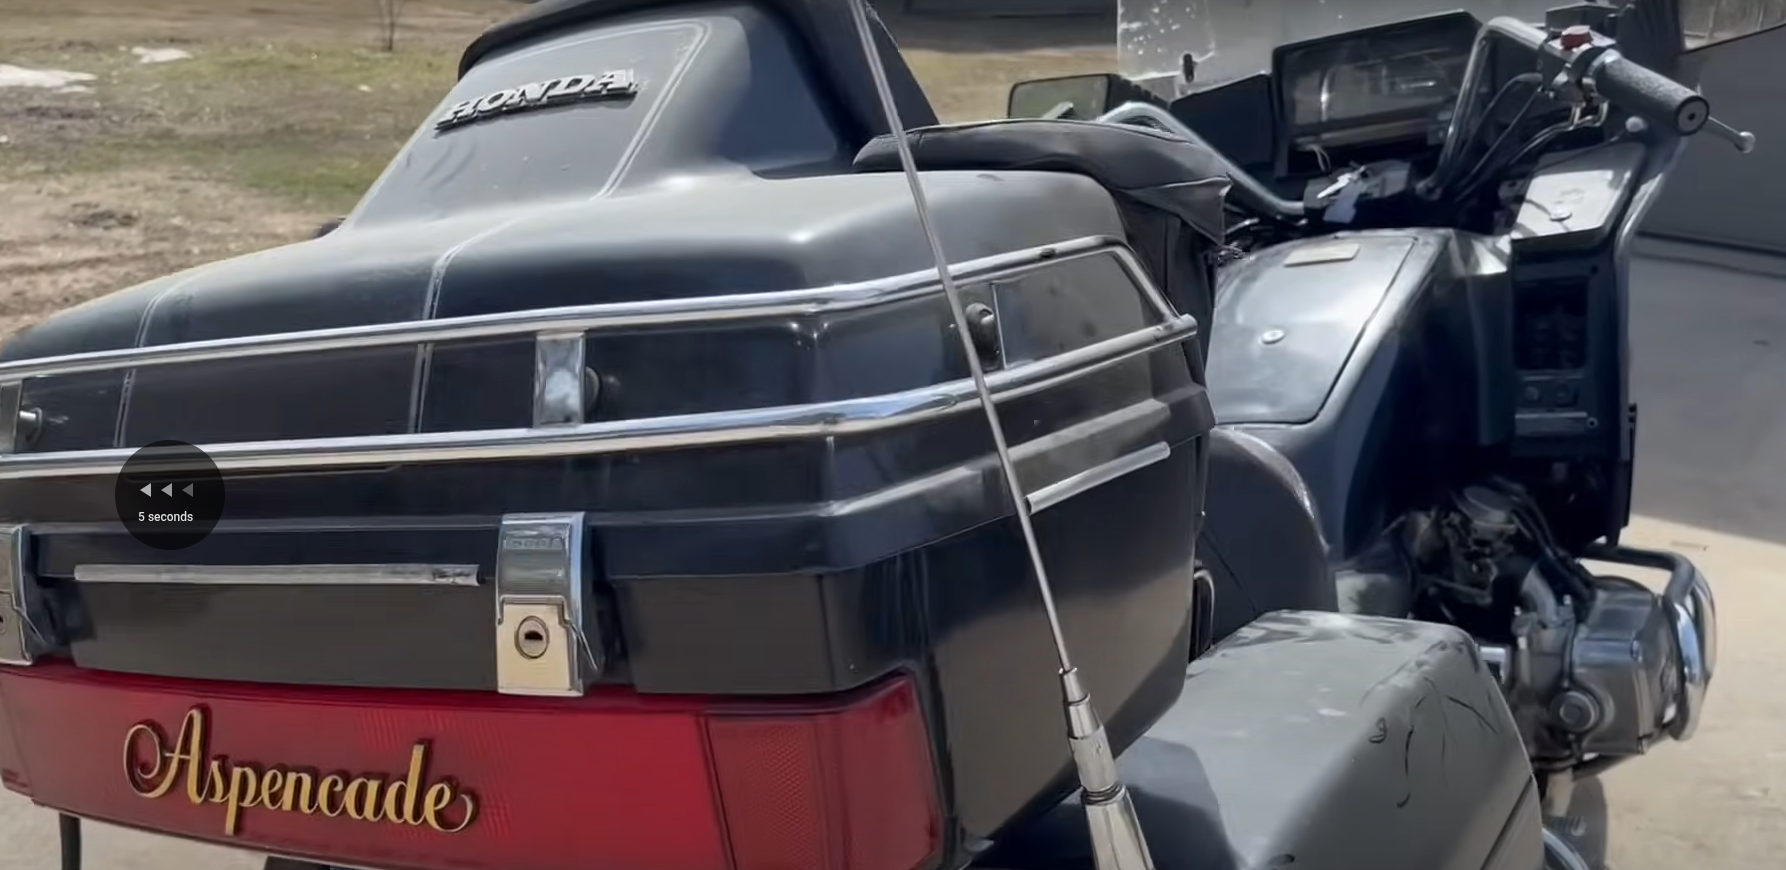
Taking Off the Front and Extra Parts
First, the front fairing, side covers, and all storage bags were removed. The original lights and most of the wiring were pulled off carefully. A list of what was taken apart:
| Removed Parts | Notes |
|---|---|
| Front Fairing | Replaced with a new round 7-inch headlight |
| Side Covers | Exposed much of the frame |
| Saddlebags | Cleared out for a cleaner look |
| Extra Lights | Preparing for new LED strips |
| Airbox and Dash Panel | Set aside for repairs and upgrades |
The air filter was missing, so a new one got ordered. The exhaust was rusted and needed replacing, which matched the plan to cut and simplify the exhaust.
The seat saw some major changes. Cutting away extra foam and shaping it for a lower, slimmer feel. The plan included rounding off the corners and trimming any extra bulk for a more basic look.
Washing Up and First Look
After most of the big pieces were gone, it was time to clean the bike. A fresh wash revealed how much different the Goldwing looked with its bare frame. The group checked which wires were still needed for the new lights and dash.
A new headlight was installed, and ideas for the new seat and windshield started coming together. Some changes in the wiring meant a lot of leftover cables, which needed to be hidden. Cardboard templates helped imagine new covers and brackets before making them from metal.
The new shape of the bike started to show. With the front cleared up and extra weight gone, plans were made for a smaller dash and updated speedometer. Each change made the bike look less like a touring bike and more like a custom build.
Fixing Engine Essentials and Upgrading Parts

Changing Filters and Fresh Oil
He started by removing the old airbox. After checking, it was clear the bike needed a new air filter. The original filter was missing, so he ordered a replacement. Using new oil and a clean oil filter, he made sure the engine had what it needed for smooth running.
A simple maintenance checklist he followed:
- Remove old airbox
- Check for missing or dirty air filter
- Replace with new air filter
- Drain old oil
- Install fresh oil filter
- Add clean engine oil
Regular oil and filter changes help the engine last longer and work better.
Replacing Spark Plugs and Dealing With the Exhaust
He put in new spark plugs to keep the engine firing strong. While looking over the exhaust, he found that it had rusted through and broken off. Although this was unexpected, it happened to be close to where he planned to cut the pipe anyway.
Quick exhaust update:
- Old exhaust rusted off by itself
- Good timing for making custom changes
- No need for extra cutting tools here
Installing new spark plugs and fixing up the exhaust make a big difference in power and sound.
Brake Work in the Rear and Planning for Dual Calipers
There were problems with how soft the rear brake felt. He suspected a leak along the line to the front caliper. To make things work safely, he planned to block off the front caliper for the time being.
He is thinking about switching to a dual caliper setup for the front brakes later, which is a method used in off-road bikes and four-wheelers. For now, the main focus is on making sure the rear brake works as it should so the bike is safe to ride.
Brake plans:
| Problem | Step Taken | Future Plan |
|---|---|---|
| Rear brake spongy | Blocked front caliper | Add dual front calipers later |
| Suspected leak | Check brake lines | Full system check after repairs |
Fixing the brakes is an important safety step before putting any miles on the bike.
Upgrading Lights and Wiring
Installing New Front and Rear Lights
The original lights and bulky fairings were removed to give a cleaner look. A new 7-inch round headlamp was selected for the front, providing a simple, modern update. This new headlight is set up to handle integrated turn signals for a streamlined finish. At the back, a thin LED strip was added to serve as both a tail light and turn indicators. The rear fender was trimmed to fit the new style and allow a more custom fit for the lighting strip.
| Light | Type | Placement |
|---|---|---|
| Headlight | Round, 7-in | Front center |
| Tail Light | LED Strip | Rear, trimmed fender |
Updating Flashers and Main Wiring
With the original wiring harness exposed, unused connections—like those for the radio—were tagged and left out. The wiring for the turn signals was identified and routed to the new lights. Each blinker wire was connected with attention to original labeling and checked before final installation. Bunched wiring was organized and tucked away in a storage area under the seat to keep the setup tidy.
- Superfluous wiring (radio, compressor) removed or cut
- Blinker and main wiring connected directly to new lights
- Zip ties and storage box used to keep loose wires controlled
Connecting Turn Signals and Instrument Display
After removing the stock dash, the indicator lights and dash electronics were tested for function. The plan was to mount the display closer to the driver, using part of the original housing. Custom side panels were created for a clean display install. Only essential indicators, such as the oil light and turn signals, were kept active. Mounting solutions for the new display included an aluminum plate with a custom-cut slot for the ignition key.
Details on dash and indicator integration:
- Dash cluster removed and customized
- Only important indicator lights hooked up
- Aluminum mounting plate fabricated
The focus was always on clean wiring, reliable function, and a minimal, classic look.
Changing the Seat
First Steps with the Seat
The first thing done was removing the old seat from the bike. It needed changes to match the new look and feel. Parts of the seat were marked for cutting. The plan was to trim the seat so it would fit better and cover only what was needed.
A cardboard template was used to help see how new parts could fit. This helped decide where to keep or remove material.
Smoothing and Shaping the Cushion
Next, extra padding and raised areas were cut away. The seat was trimmed along marked lines to lower the height in certain spots. Corners were rounded off and the sides were smoothed out to make the seat fit better with the rest of the bike.
Some “ears” on the seat were cut off as part of this step. After rough shaping, finer cuts and sanding made the seat look cleaner.
Setting and Adjusting the Seat
To put the seat back on the bike, it was test-fitted several times. Each time, small adjustments were made so it would line up with the shocks and frame.
Plans were made to use metal plates for mounting. The seat is now set up to both look good and stay firm in place while riding.
Key adjustments made were:
- Making sure the seat covers important parts
- Lining up with existing mounting points
- Trimming the sides for a better match with the bike’s frame
Custom Building Steps and Strength Improvements
Metal Sheets and Windshield Ideas
Sheet metal played a key role in this project. The fabricator modeled shapes using cardboard first, then planned to replace those with sheet metal. One idea was to create a curved wind deflector or windshield around the new headlight. This would help block the wind while keeping the look simple and tidy.
Here’s a quick summary:

| Component | Material | Purpose |
|---|---|---|
| Windshield | Sheet Metal | Block wind, smooth appearance |
| Mockup | Cardboard | Test shapes and fit |
End Caps and Fender Adjustments
Certain bike parts had open or rough edges after stripping down the bodywork. To fix this, the builder experimented with capping the ends using custom plates. The rear fender also needed trimming for a cleaner style. He considered cutting and shaping the seat to better fit the new look and expose important frame parts, while still covering necessary sections.
List of key changes:
- Capped exposed ends with flat plates.
- Trimmed rear fender for a smoother finish.
- Cut, reshaped, and slimmed down the seat to match new design.
Hiding Storage Spaces and Routing Wiring
With the body panels removed, leftover wires became more visible. The builder organized wiring using tags to identify each function (for example, headlights, blinkers, and dash connections). To keep things neat, he planned to tuck excess wires into hidden storage spots and use zip ties for temporary fixes.
Additional steps included:
- Organizing wires into labeled bundles.
- Hiding wiring inside new storage areas.
- Concealing clutter without sacrificing easy access.
Speedometer and Dashboard Makeover
Taking Apart the Old Setup
First, the original dashboard and speedometer housing were removed. Wires for the old radio, turn signals, and other gauges were labeled to keep things organized. The main goal was to strip away extra parts so only the essential functions remained.
A careful teardown exposed the inside of the housing. The speedometer itself was separated, and the cracked plastic cover was discarded. The old wiring created a lot of clutter, so unused wires were tucked away or planned for removal.
Building a New Speedometer Holder
A custom holder for the speedometer was designed using cardboard as a mock-up. After testing the size and shape, the mock-up was transferred to more durable material. The sides of the new housing were glued in place and later sanded smooth.
To secure the new speedometer, an aluminum plate was used. Holes were cut for the ignition key and for mounting points. The finished plate would let the speedometer and ignition fit neatly into their new positions.
Materials Used:
- Cardboard (for modeling)
- Sheet metal or aluminum (for the final mount)
- Glue and zip ties
- Sandpaper
Making the Dashboard Match the New Look
The new dashboard design needed to blend in with the custom headlight and layout. Plans included trimming off large sections and adding a flat sheet or wind block in front. The dashboard sides were rounded, and the edges were shaped to match the rest of the bike.
Unused indicator lights were removed or replaced with a simple oil warning and turn signal lights. Wires were hidden in a small compartment to keep the area neat. The end goal was a clean look with only the most necessary gauges and lights left visible.
Key Visual Changes:
- Smoothed and painted new housing
- Fewer switches and lights
- Hidden wiring for a tidy appearance
Wrapping Up the Build and What Comes Next
Installing the Front Light and Wind Deflector
A new 7-inch round front light was selected to replace the original headlight. The updated light is designed to include blinker functions, making the setup cleaner and less cluttered. The current stage involves adjusting the fitment of this new headlight, trying to tuck it back for a better look.
There is still some uncertainty about the wind deflector design. Initial ideas involved shaping sheet metal or using a curved setup to help block the wind around the new light. Prototypes were made with cardboard to visualize options, but the final shape and mounting method are still under review. Options like trimming down large sections or switching to a flatter plate are being considered.
Here’s a quick breakdown of what is installed and what’s still being tested:
| Component | Status | Comments |
|---|---|---|
| 7-inch headlight | Fit in progress | Looking for a tighter fit |
| Windshield concept | In design phase | Cardboard models tested |
| Blinker wiring | Ready | Blinker wires identified |
Moving Forward and Ongoing Issues
Some parts of the project are waiting on new ideas or parts. The seat has gone through the first round of trimming and reshaping, but still needs more work for a cleaner profile. The plan is to keep cutting and shaping the foam and edges until it fits as wanted.
Loose wiring is another area that needs attention. While functional connections are made, the extra wires are messy. A small storage space next to the dash will likely be used to hide and organize these. Other dash parts, like the speedometer and indicator lights, are being mounted with new brackets and aluminum support shapes.
Unsolved problems include:
- Deciding on the final wind deflector shape
- How to cap off open ends after cutting the frame
- Permanently mounting the reworked dashboard
- Managing and hiding extra wiring for a neat look
The work will continue step by step, refining each part as new ideas and challenges come up.