Maintaining your motorcycle’s chain should be a regular habit of every rider. The general rule of thumb is that you need to clean, lubricate, and check the chain tension every 400 – 600 miles (650 – 900 km). If you’re a regular commuter that could be as often as once a month. Maintaining your chain properly will extend its lifespan, prevent excessive wear of your sprockets and can help keep your motorcycle safe. An excessively loose or tight, rusty, dry chain on a motorcycle is a recipe for disaster.
Cleaning and lubricating a motorcycle chain is a simple process. You can find instructions on how to do it printed on the packaging of most quality chain lubricants. It’s just as easy as washing and waxing your paintwork so there’s really no excuse to not do it yourself. Adjusting the chain, however, is a slightly more complicated process that can seem daunting to the uninitiated. The good news is there’s an easy solution and it’s called the Tru-Tension Chain Monkey.
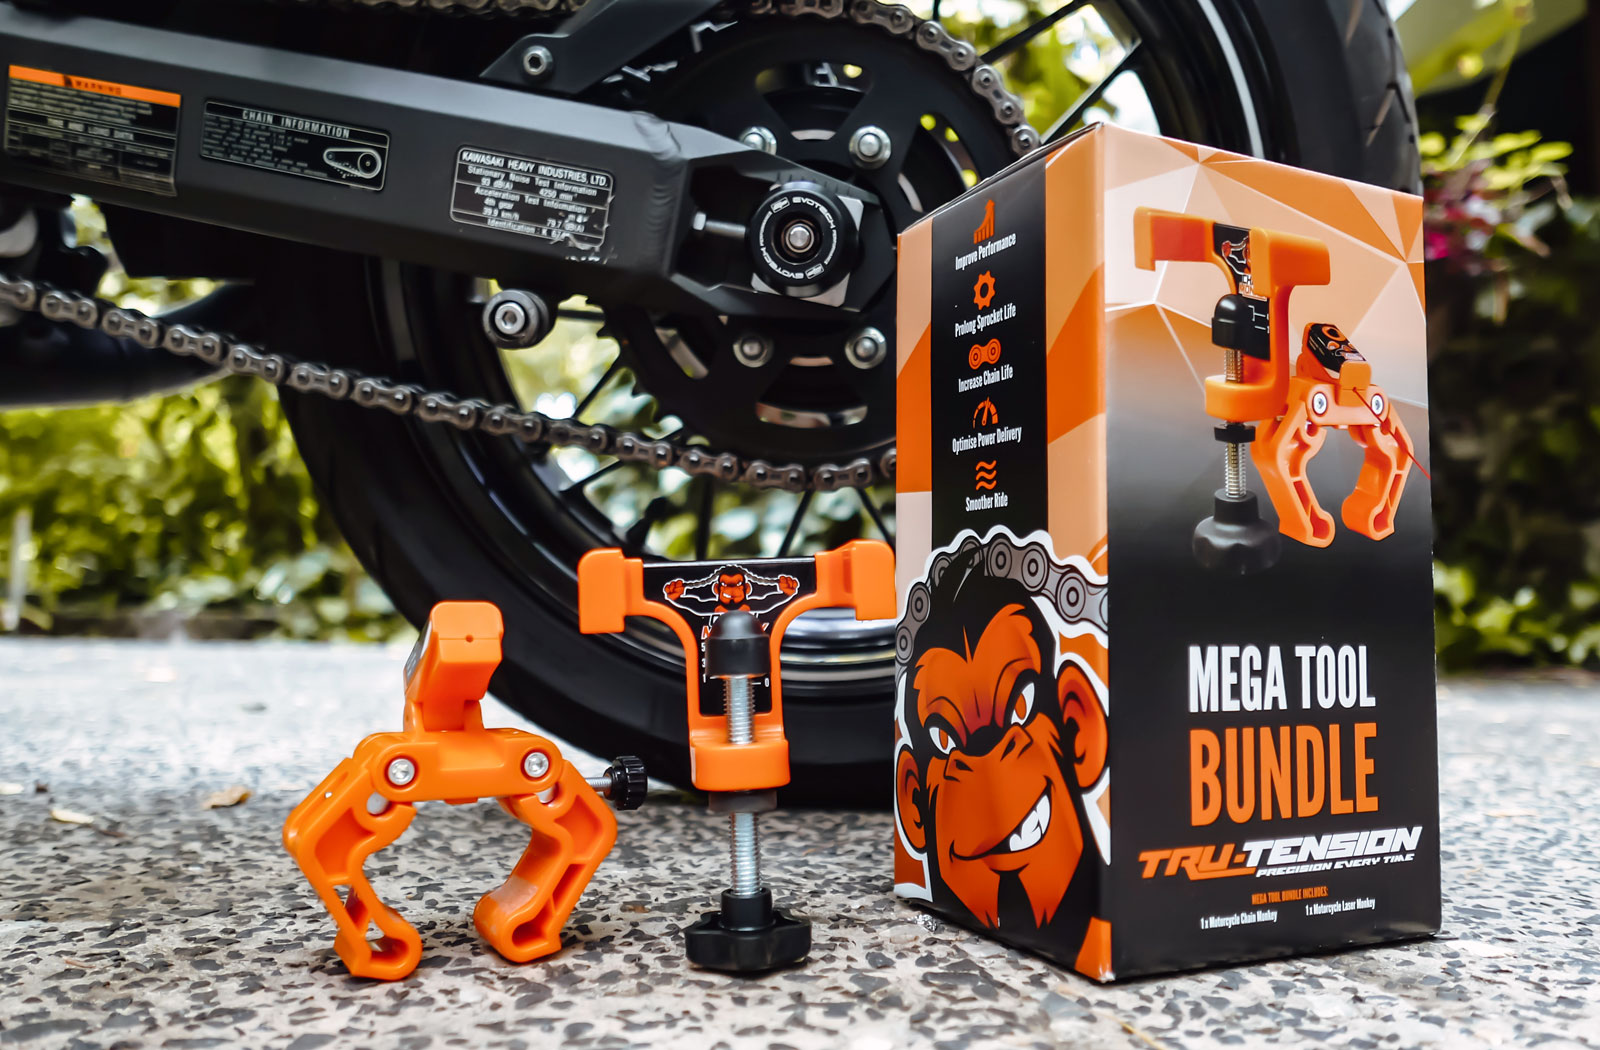
What’s a Chain Monkey?
The Tru-Tension Chain Monkey is a simple yet brilliant little device that takes the guesswork out of adjusting a motorcycle chain. Your motorcycle’s chain should have slack in it. The exact amount of slack is specified by the motorcycle’s manufacturer as a range i.e. 20 – 30mm. The Chain Monkey is designed to help you set that range precisely without the trial-and-error you encounter when not using the tool.
Tru-Tension also sells a product called the Laser Monkey. Used in conjunction with the Chain Monkey it helps you to align your motorcycle’s wheel so that the chain (or belt) is running true. With your chain’s tension set correctly and running true your chain and sprockets will last longer and their overall performance is improved.
Before adjusting your motorcycle chain
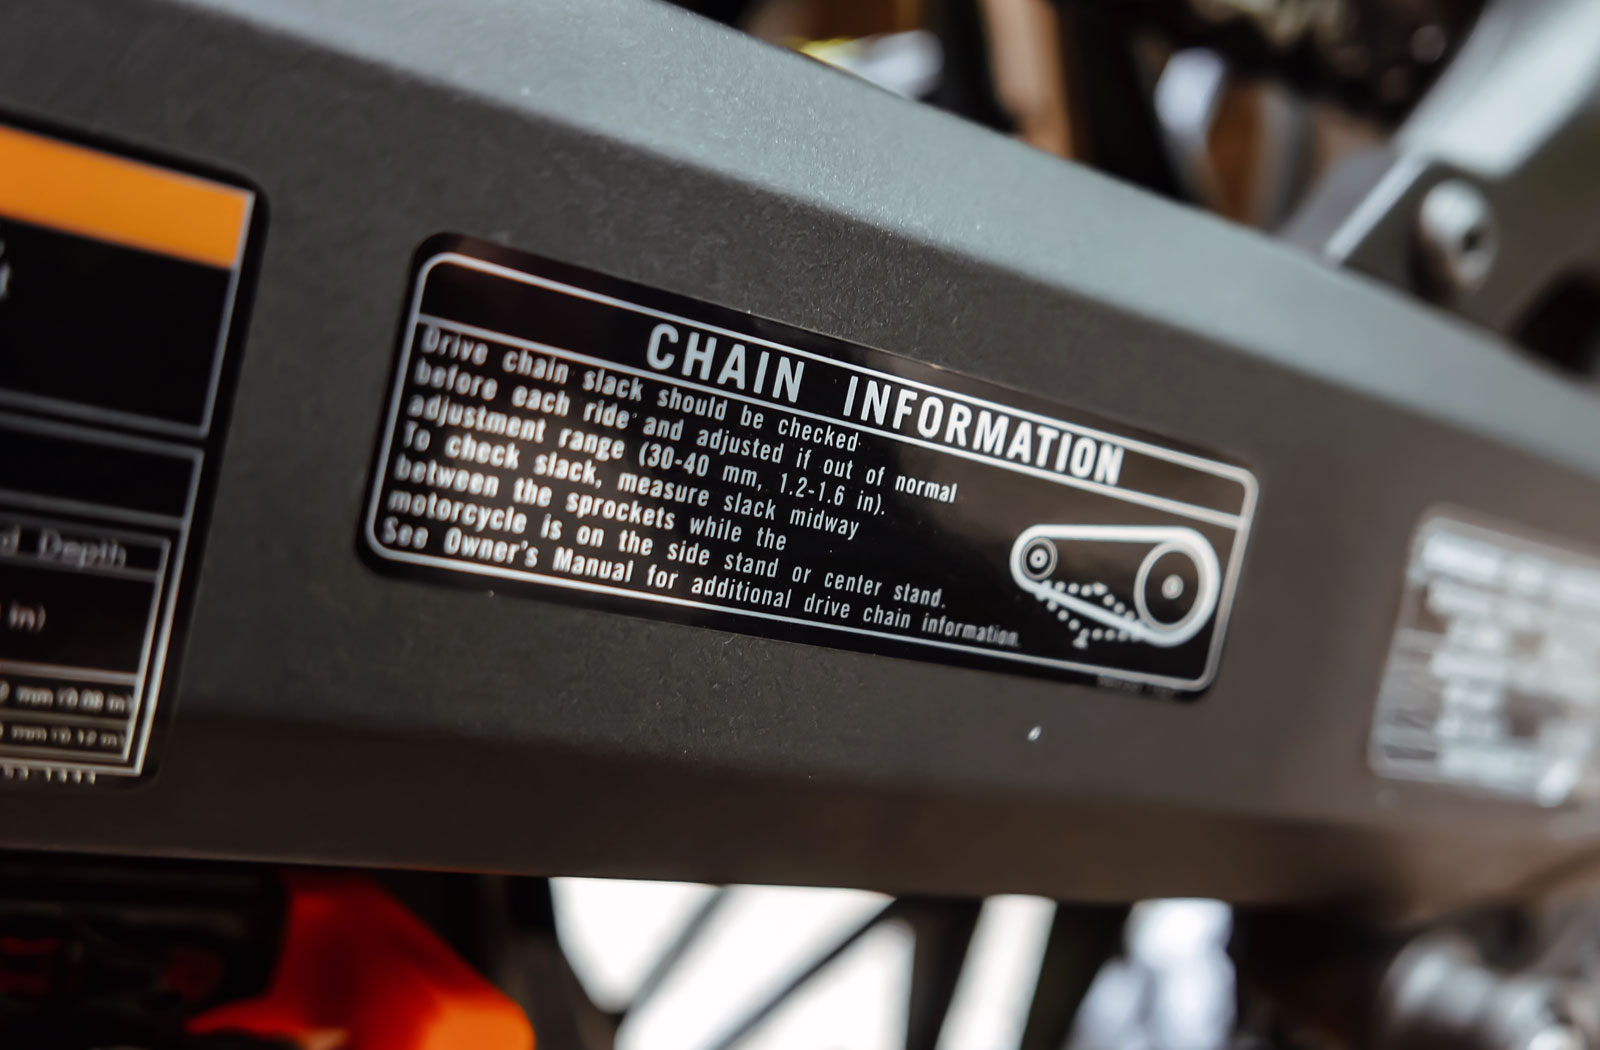
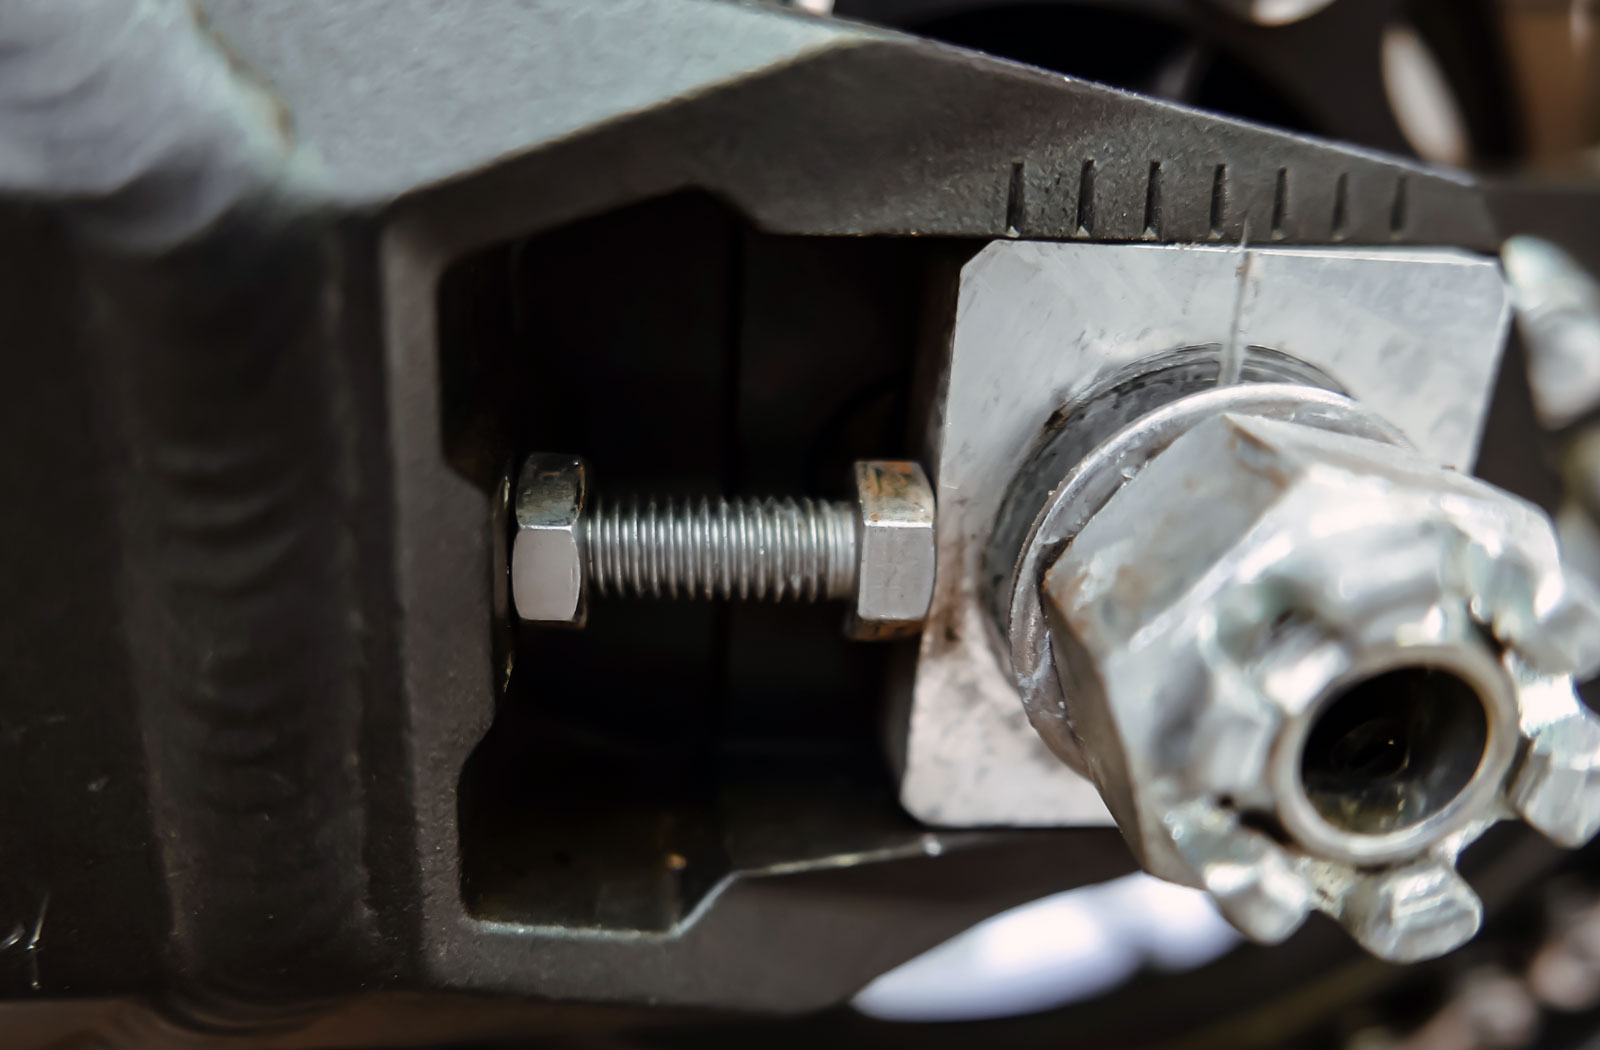
The process for adjusting the chain on a motorcycle will vary from model to model. There are different types of axle chain tensioners and different ways the bike should be sitting during the process (wheel on or off the ground). So before you begin be sure to consult your workshop manual for specific instructions. On our test motorcycle, a Kawasaki Z900RS Cafe, the chain slack specifications are listed on the swingarm and the adjustment process is outlined in the user manual.
PLEASE NOTE: It is always important to remember that if done incorrectly maintenance tasks like this could damage your motorcycle or render it dangerous to ride. If you are concerned you can not perform this task competently ask a trained mechanic to do it for you.
How to use the Tru-Tension Chain Monkey
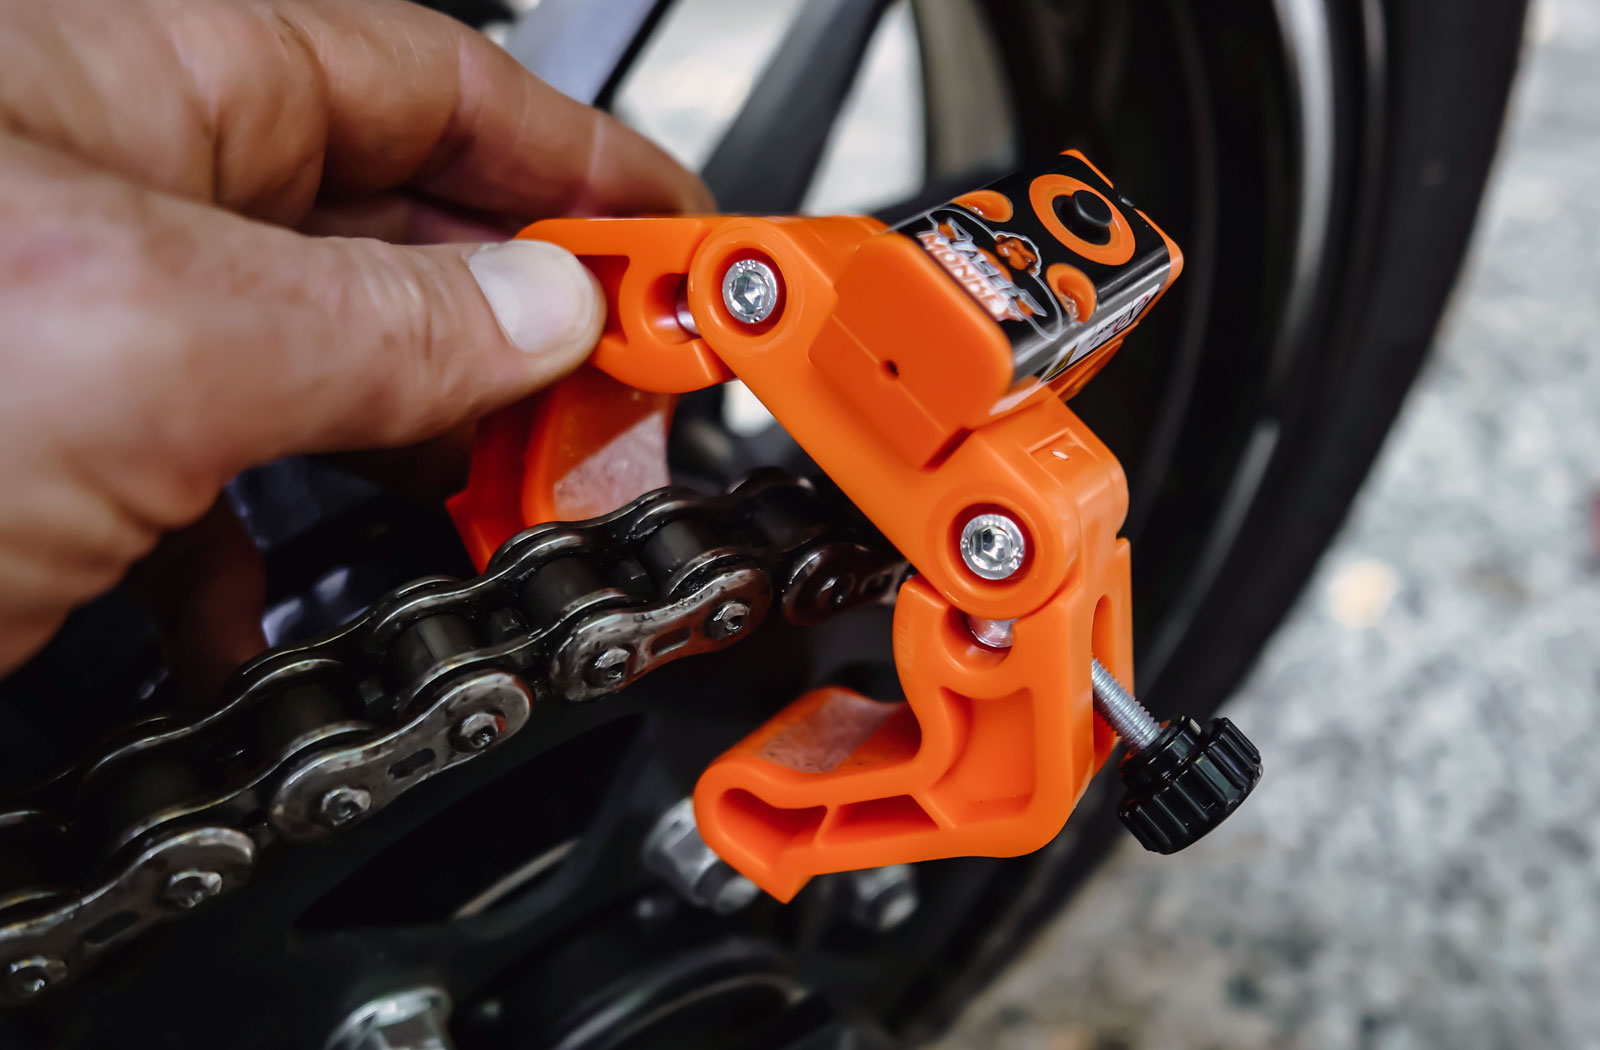
The first step in adjusting any chain is to loosen your motorcycle’s axle. Perform this step as per your workshop manual.
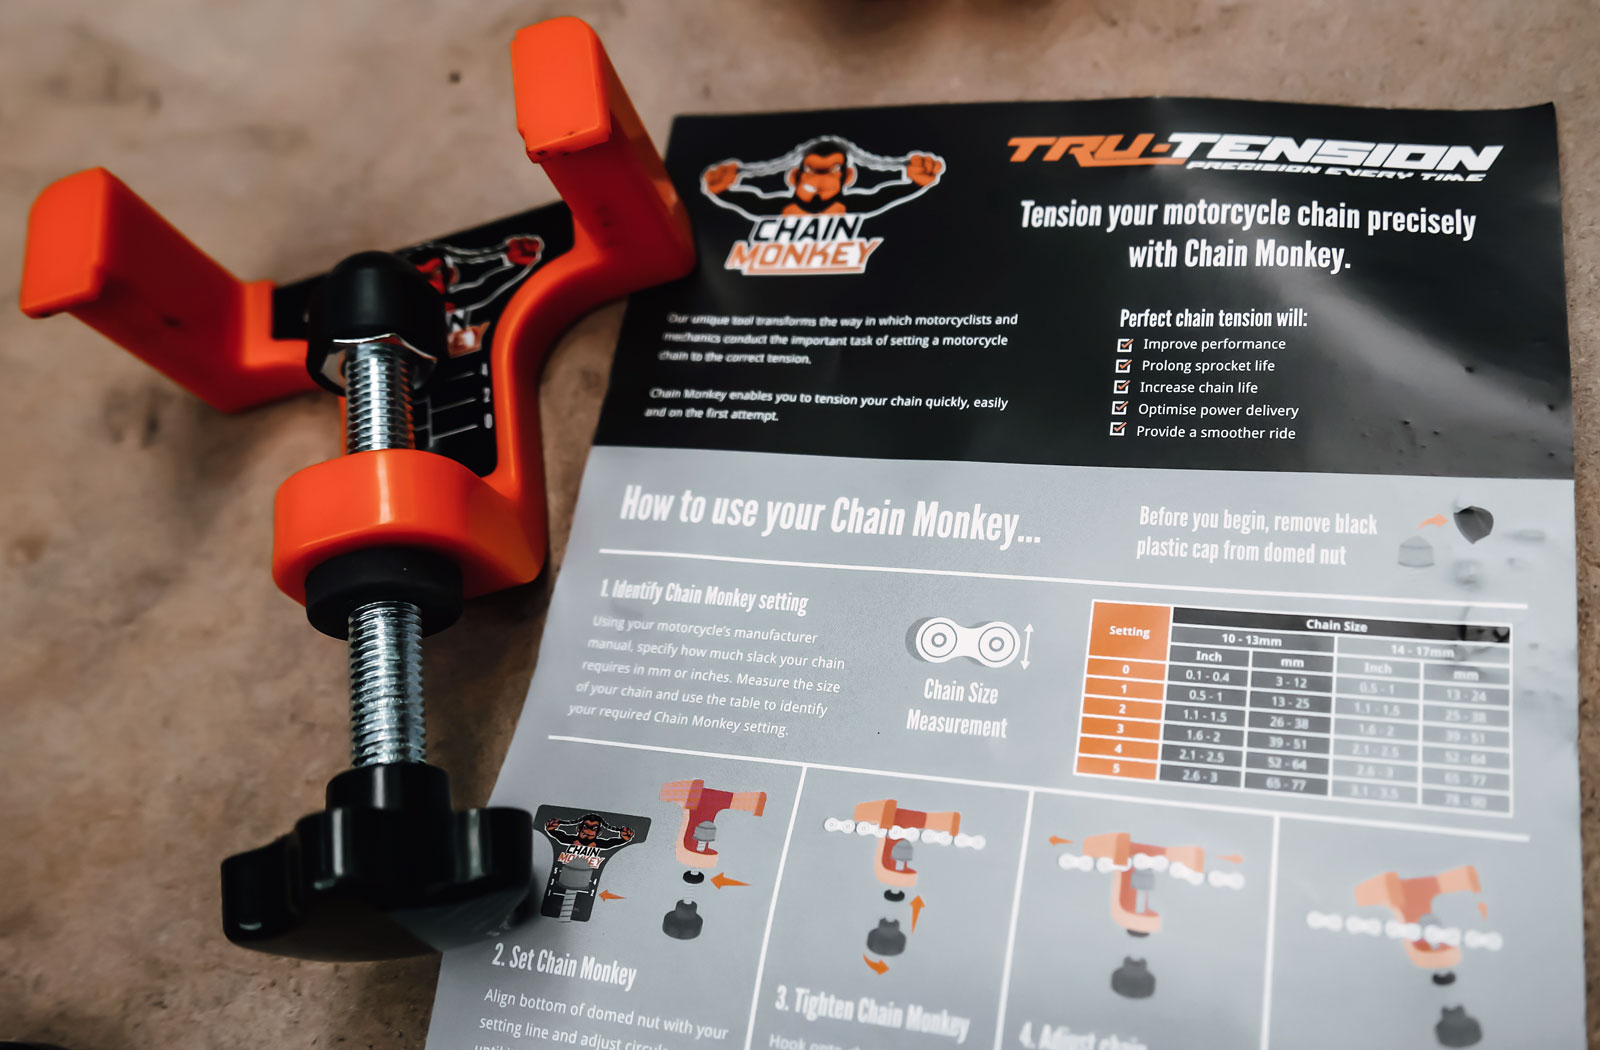
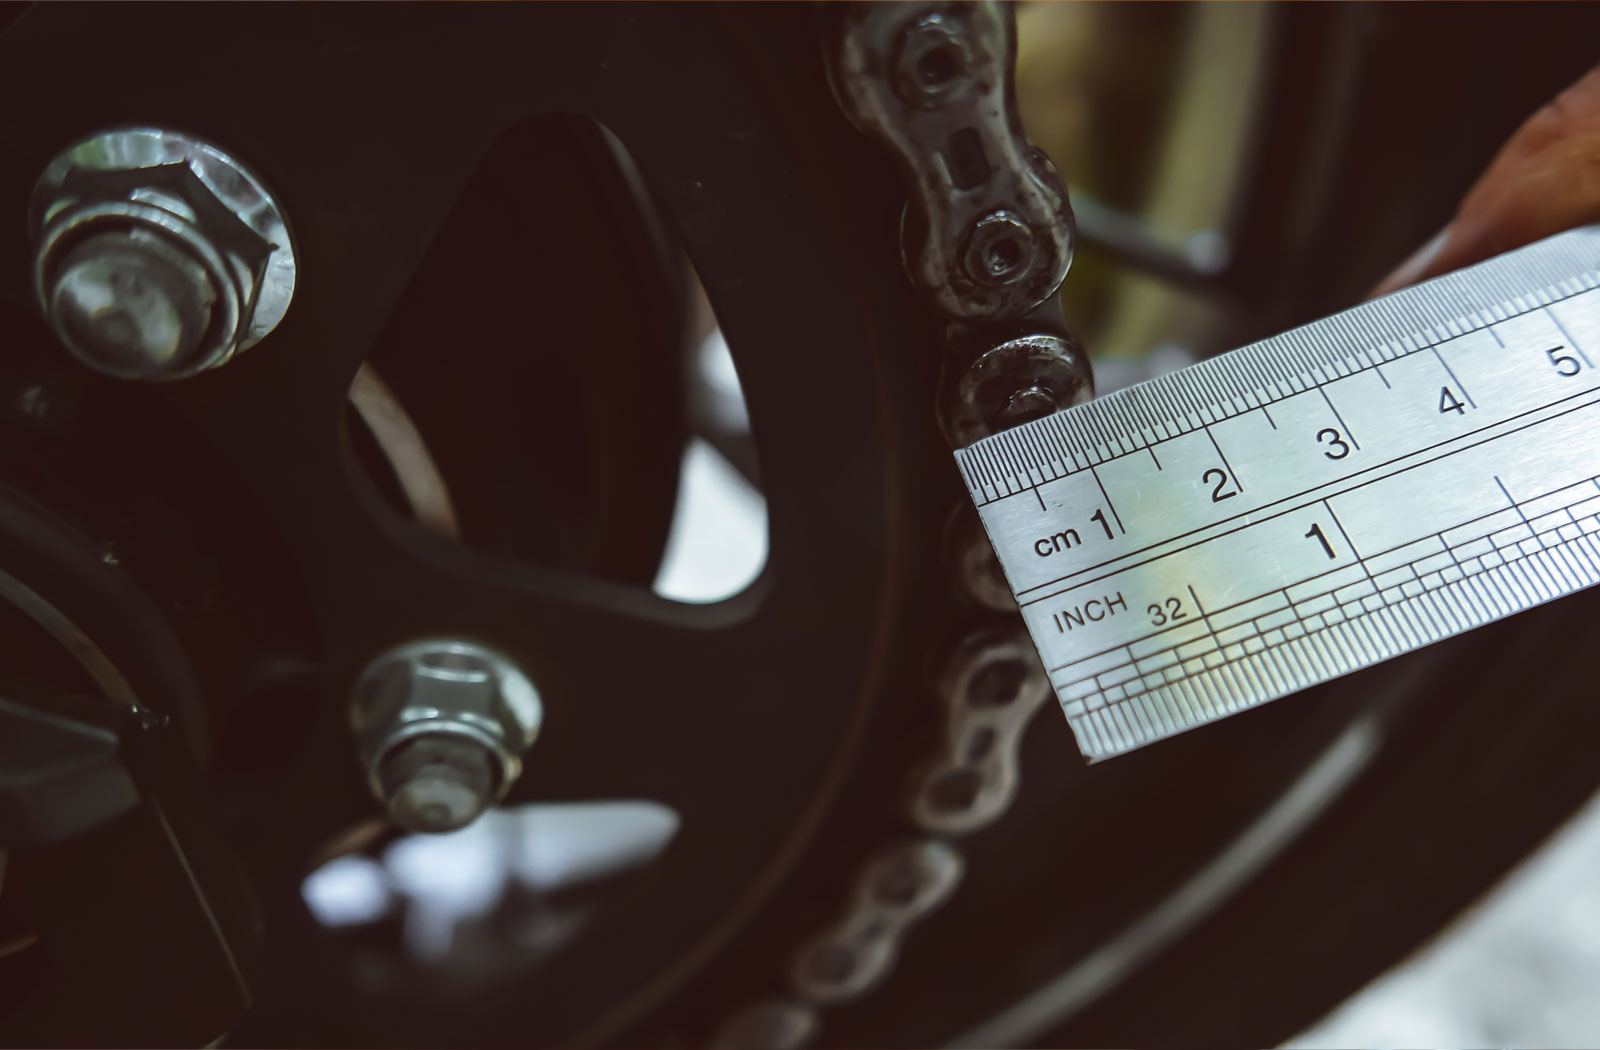
Once the axle and chain are loose you will need to measure your chain link size. Using a ruler you should be able to determine whether the chain links fall between either 12-13mm or 14-17mm in width (see image above). The Z900RS was 13mm and the correct slack according to the manual is between 30 – 40mm. Using the supplied chart in the Chain Monkey instructions I could see that I needed to use setting 2 on the tool.

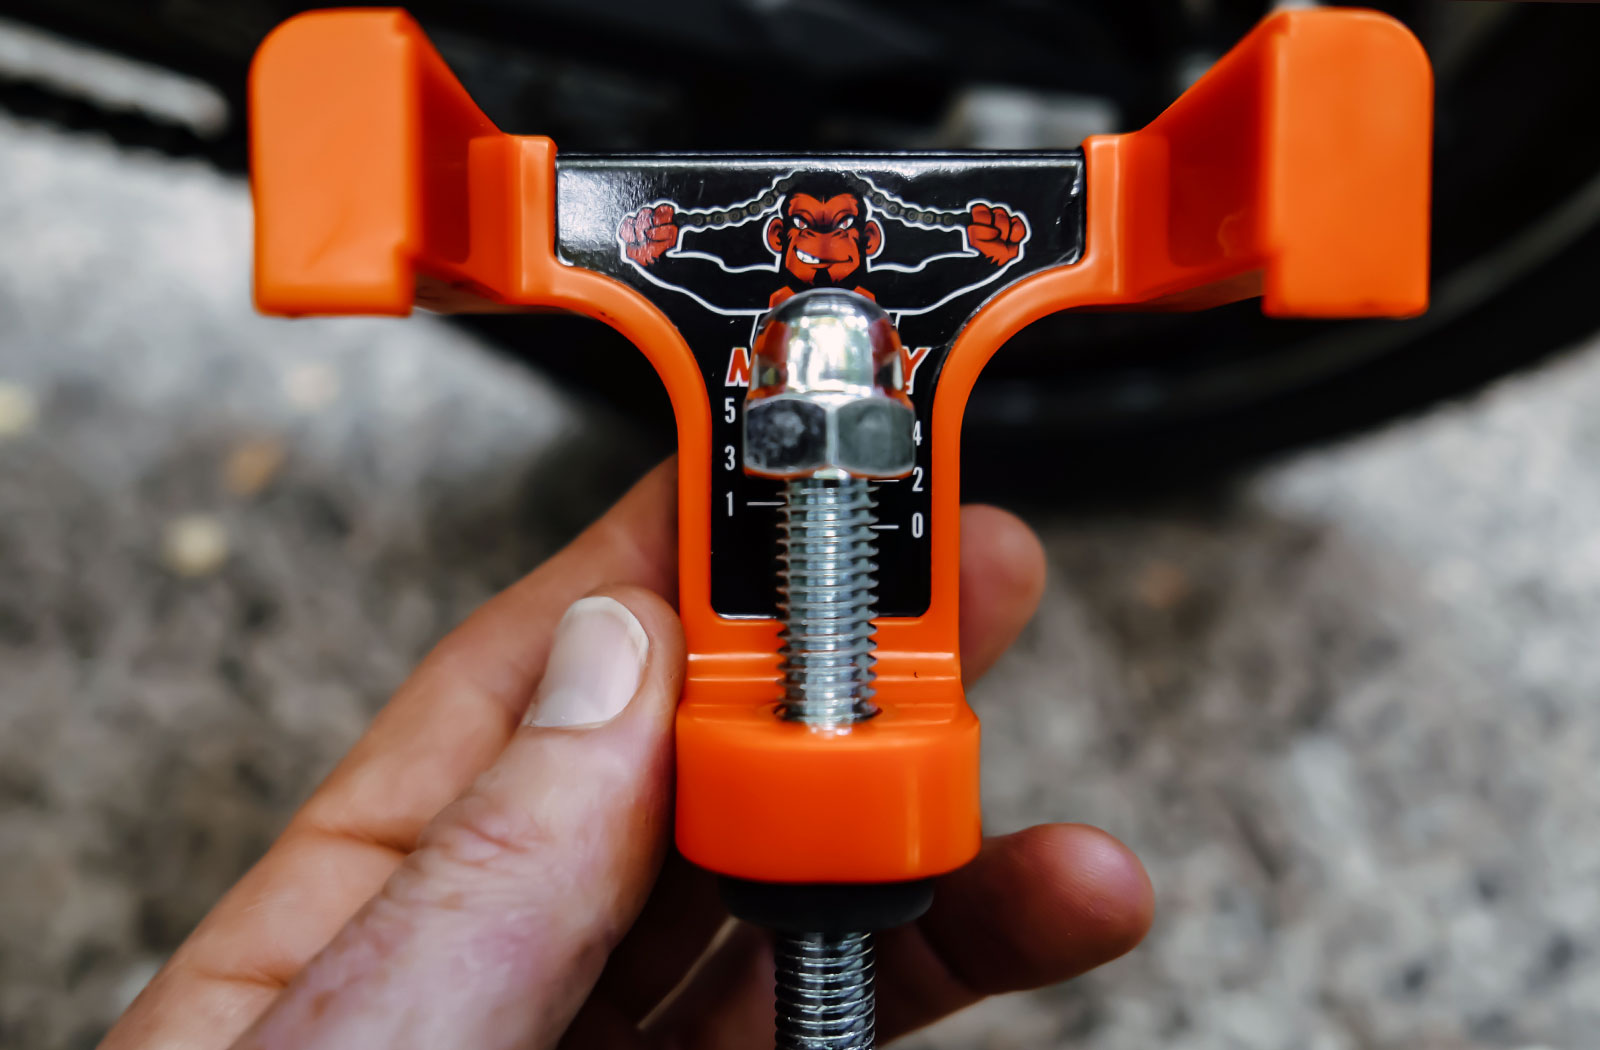
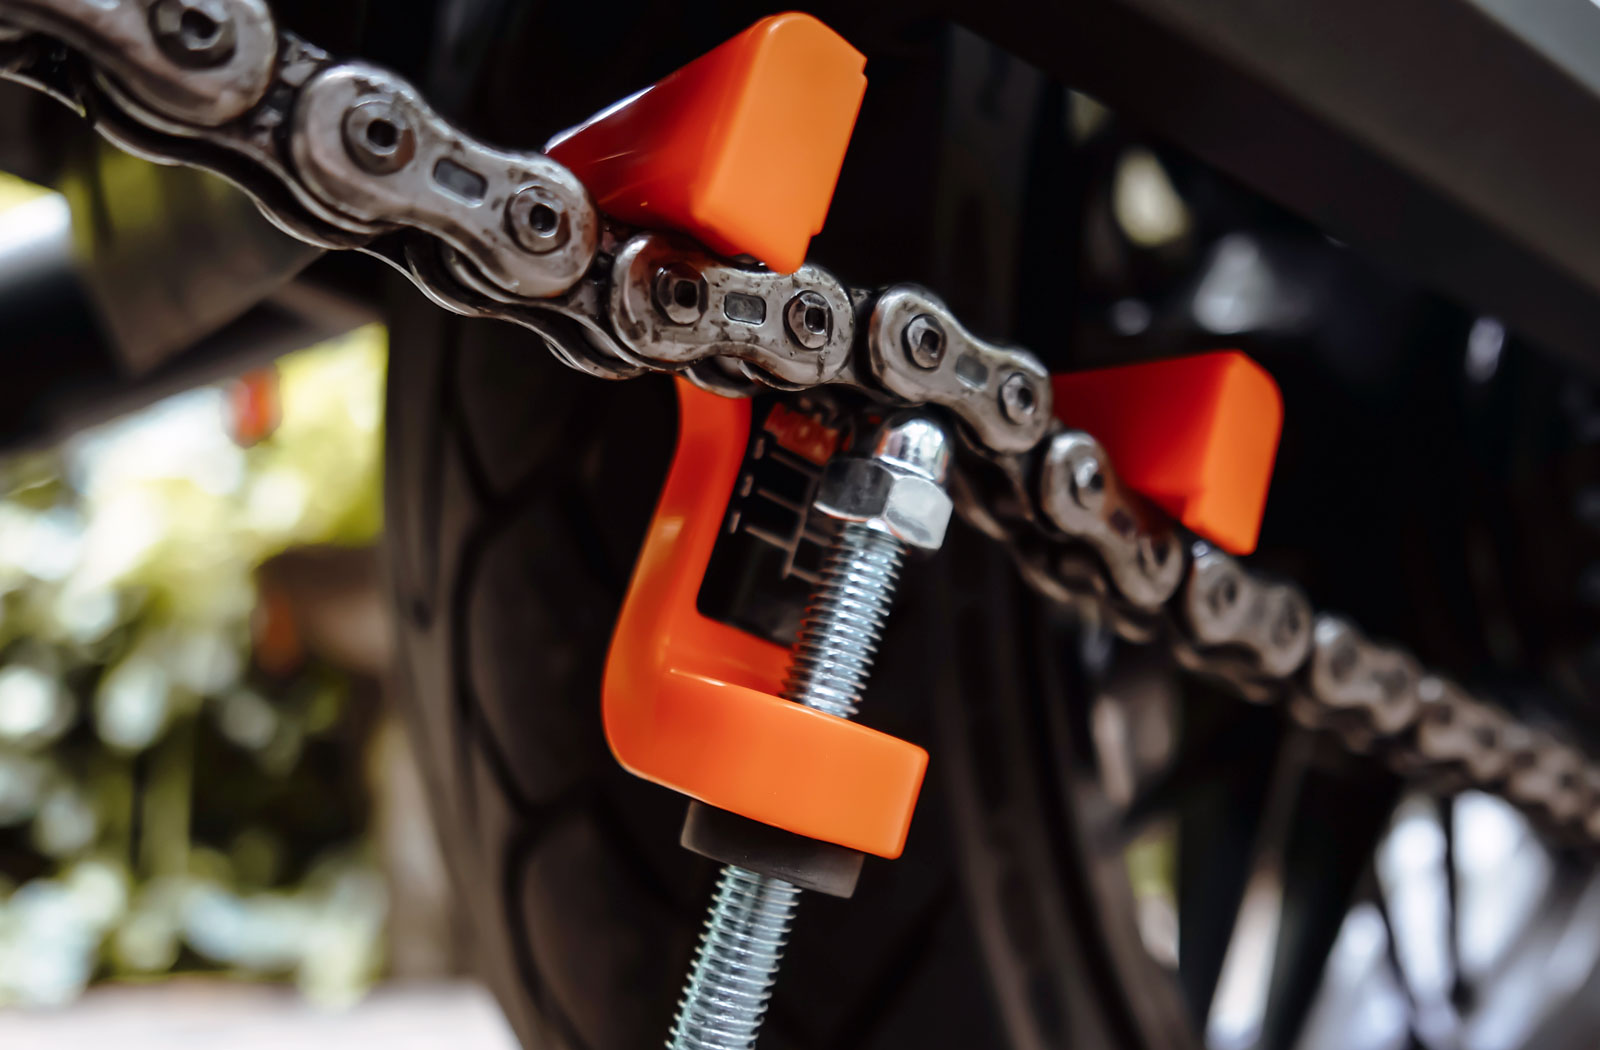
To set the Chain Monkey correctly you screw the bolt in its centre until the base of the domed nut is aligned with the correct setting number. When it’s positioned correctly move the rubber stopper on the lower half of the bolt up to seat it against the body of the Chain monkey. Now unwind the bolt and hook it onto your chain mid-way between the front and rear sprockets. Position the dome nut so it sits in the centre of a link and screw the bolt up until the rubber grommet seats at the base of the Chain Monkey. This will form a kink in the chain which equates to the size of the slack required.

Now without removing the Chain Monkey pull the rear wheel back until the chain is taught i.e. no slack at all. The axle can then be tightened as per your workshop manual. Once that is done simply remove the Chain Monkey and your chain slack will be set correctly. Yes, it’s that easy!
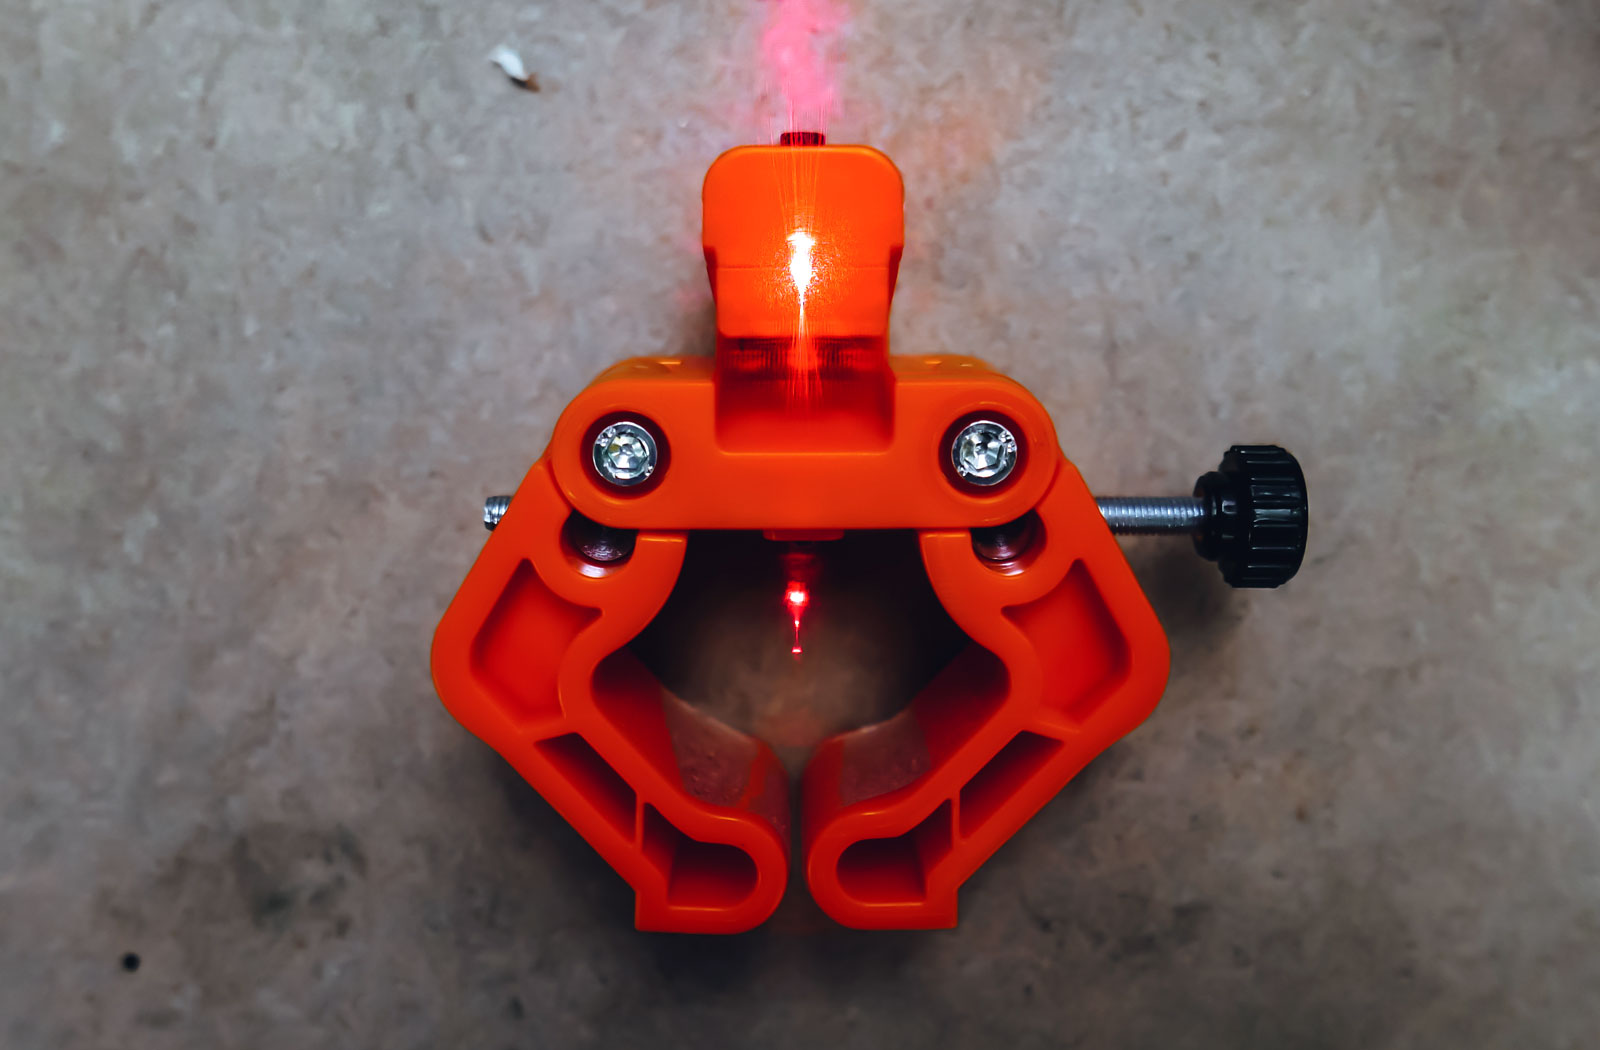
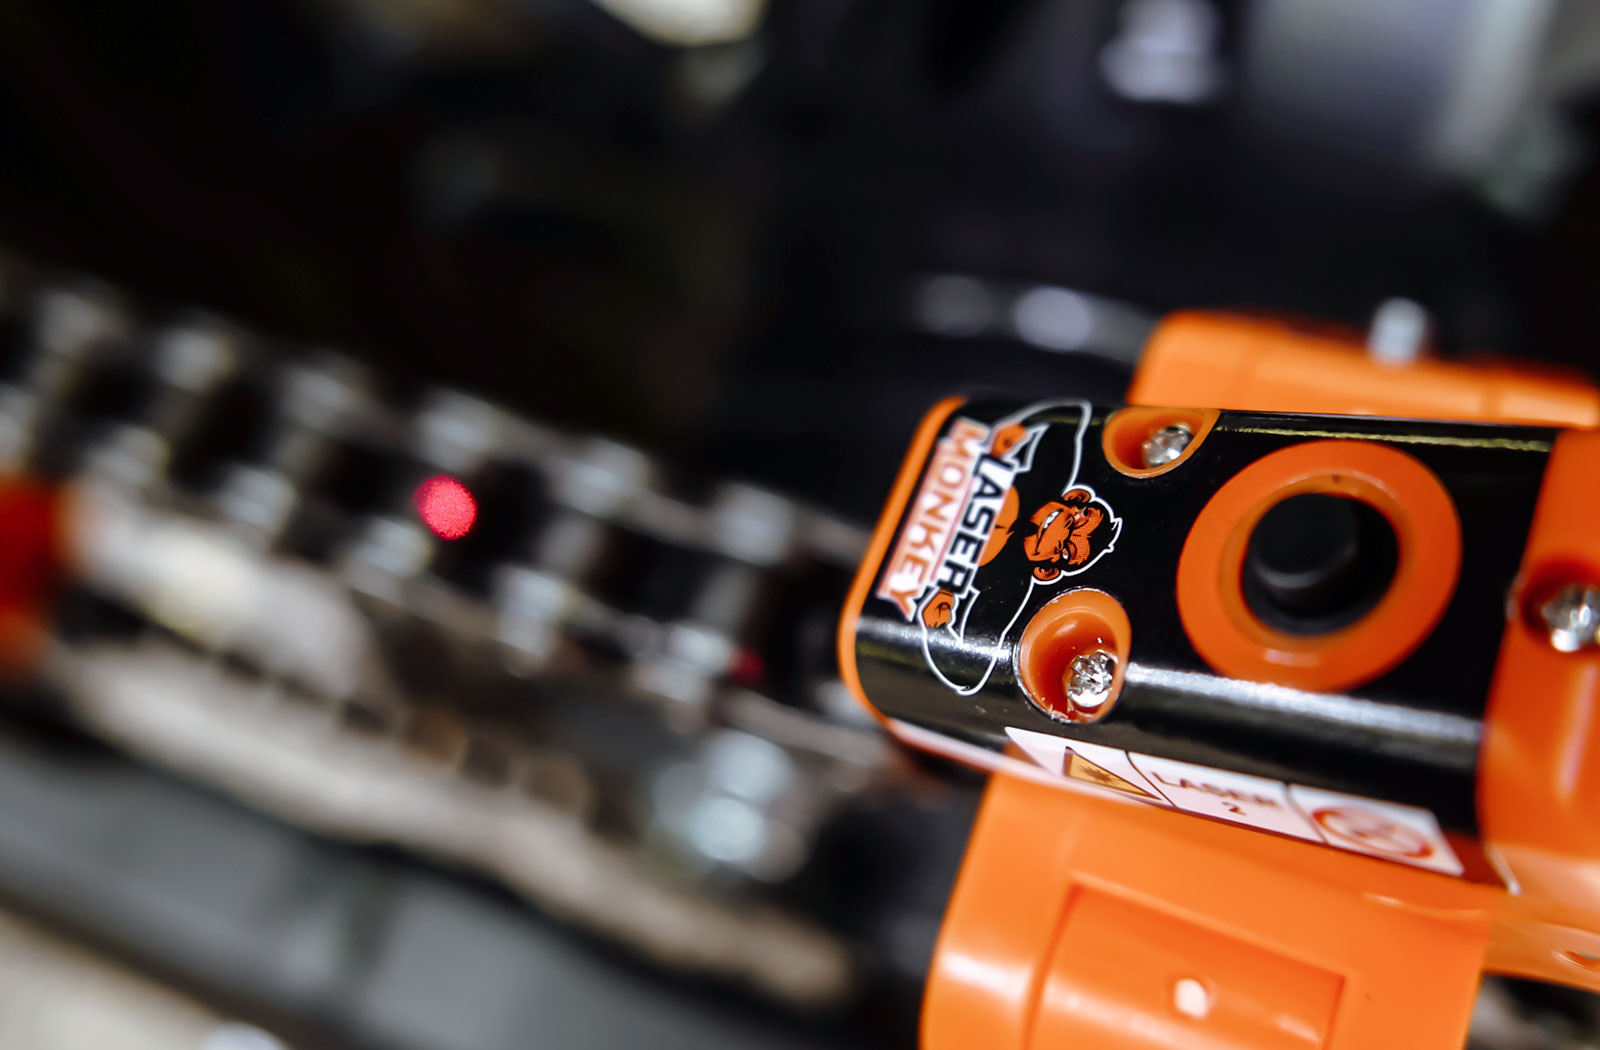
How to use the Tru-Tension Laser Monkey
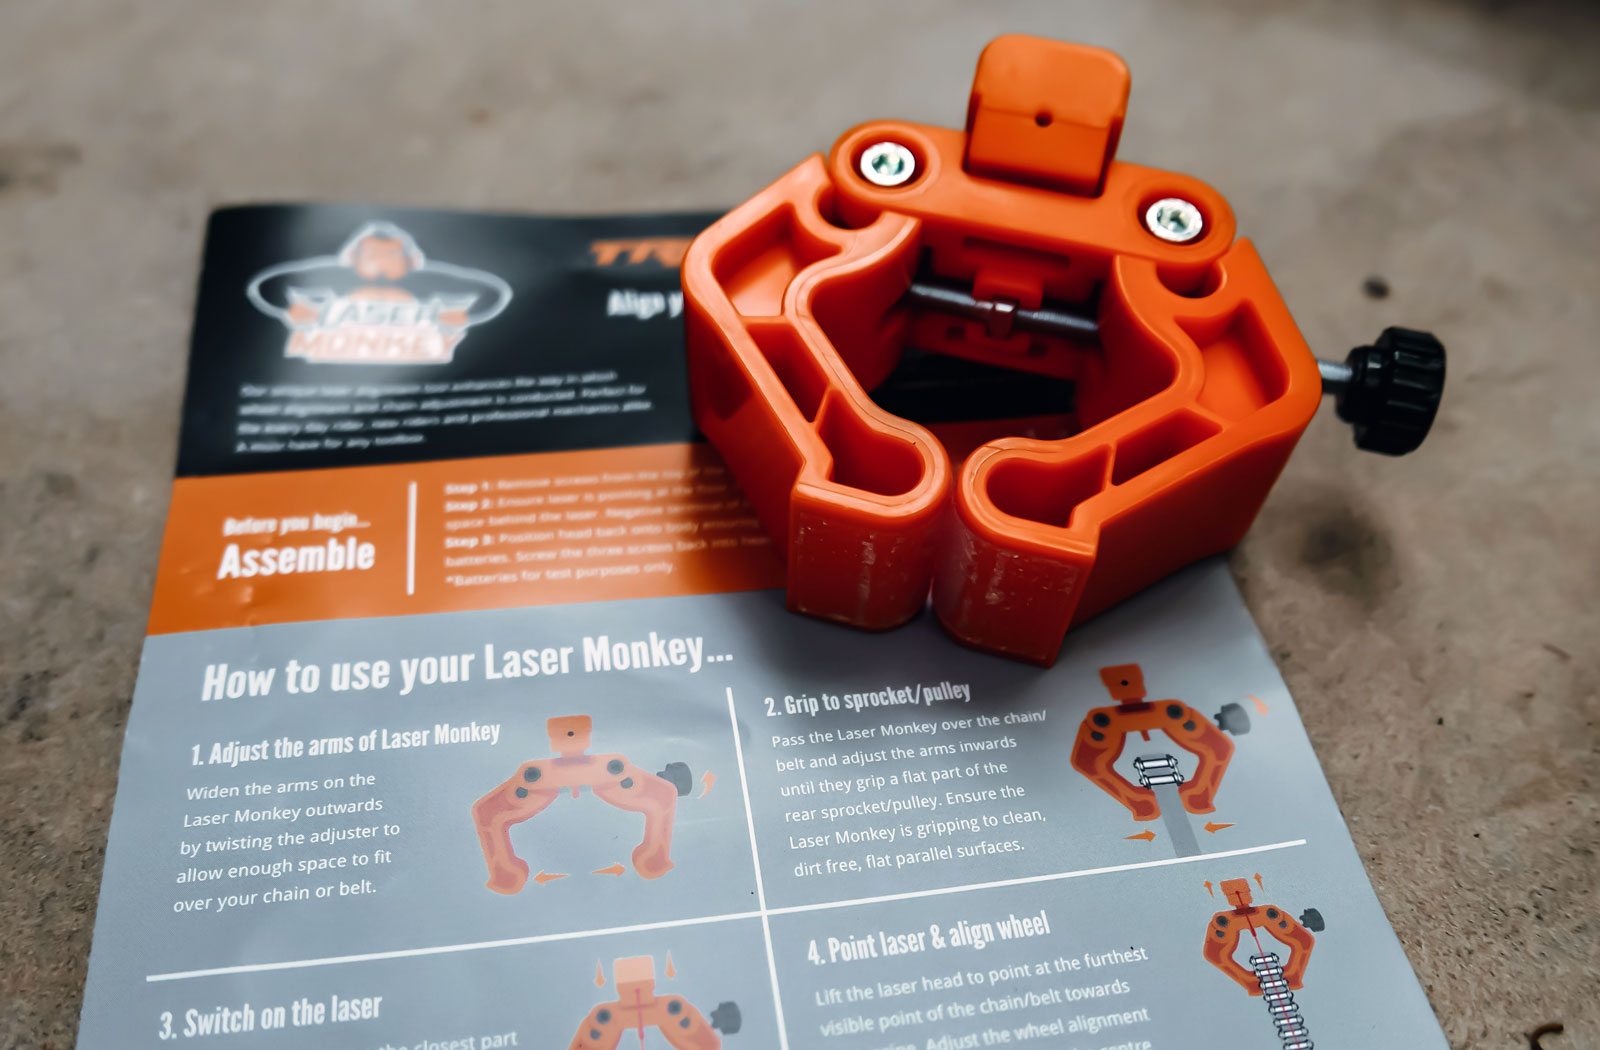
The Tru-Tension Laser Monkey is used during the final step of adjusting your chain. This is when you adjust the angle of your axle to ensure the chain is running true. The process for doing this is explained in your motorcycle’s workshop manual. The issue with the traditional methods however is that they are not an exact science.
In most cases, wheel alignment is judged using a set of markers on the swingarm. If you don’t have a motorcycle bench to work on getting the markers set to identical positions can be difficult. This is where the Laser Monkey comes in.

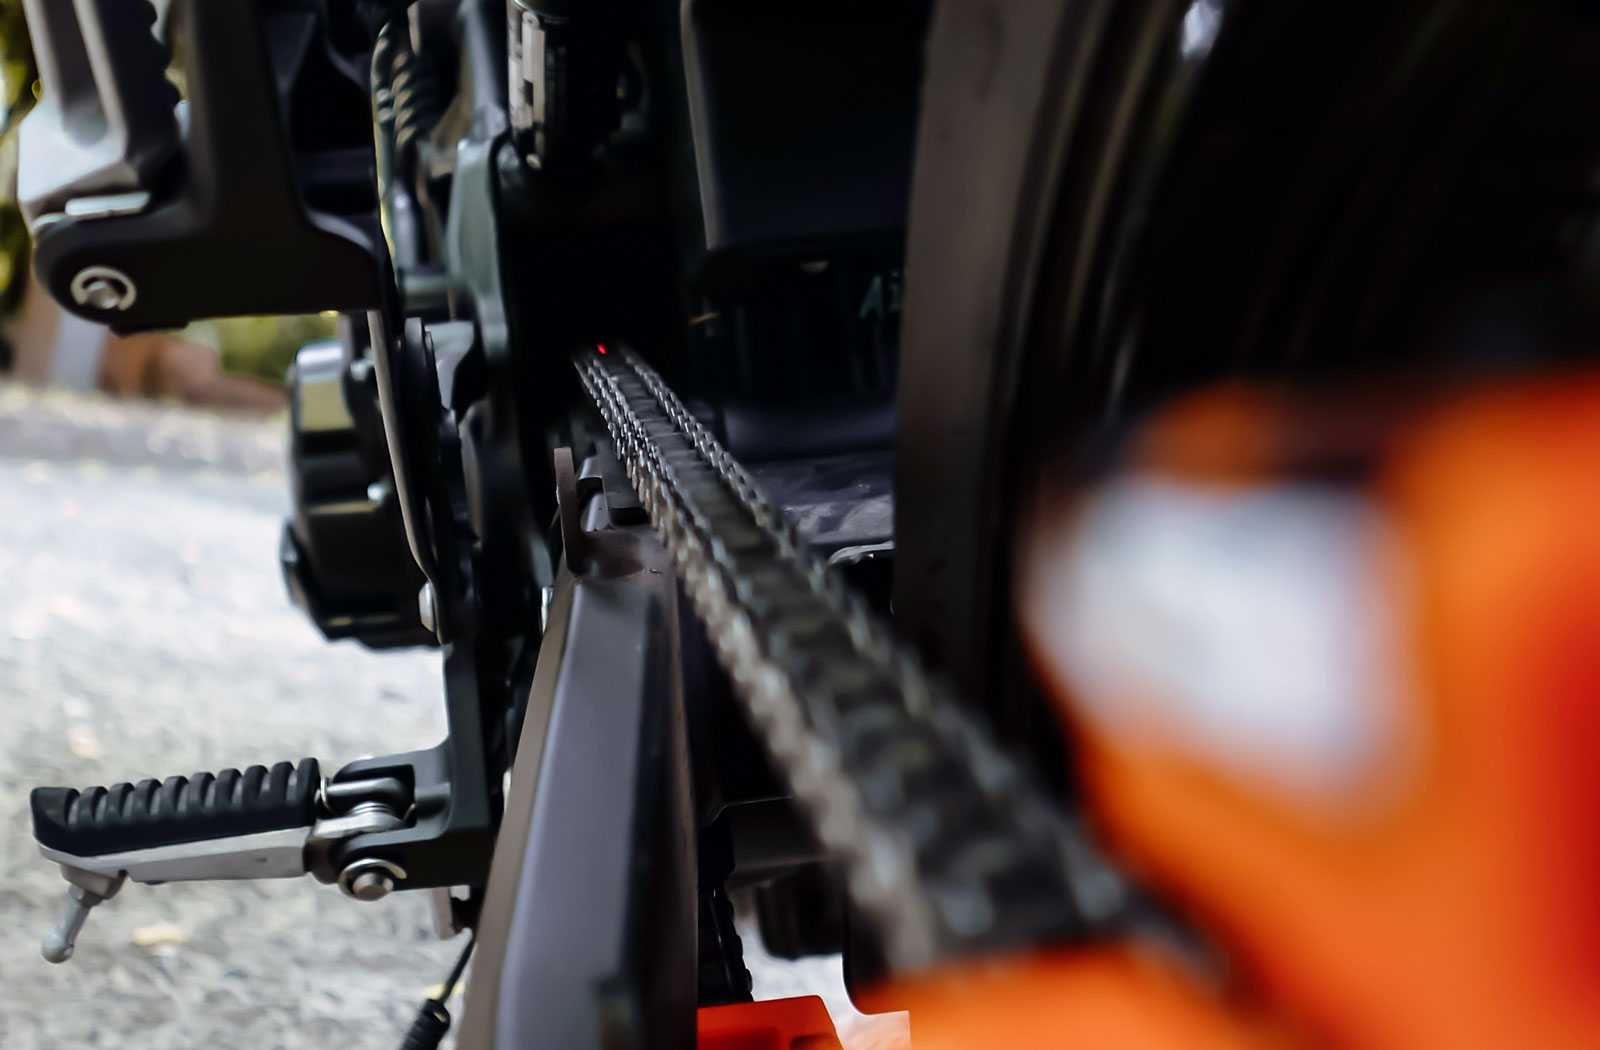
To use the Laser Monkey you will first need to remove your chain guard. Next, clamp the Laser Monkey to the body of your rear sprocket (not the chain) at the top of the sprocket. Turn on the red dot laser and point it at the closest chain link. Now adjust the Laser Monkey so that the red dot sits in the centre of the chain.
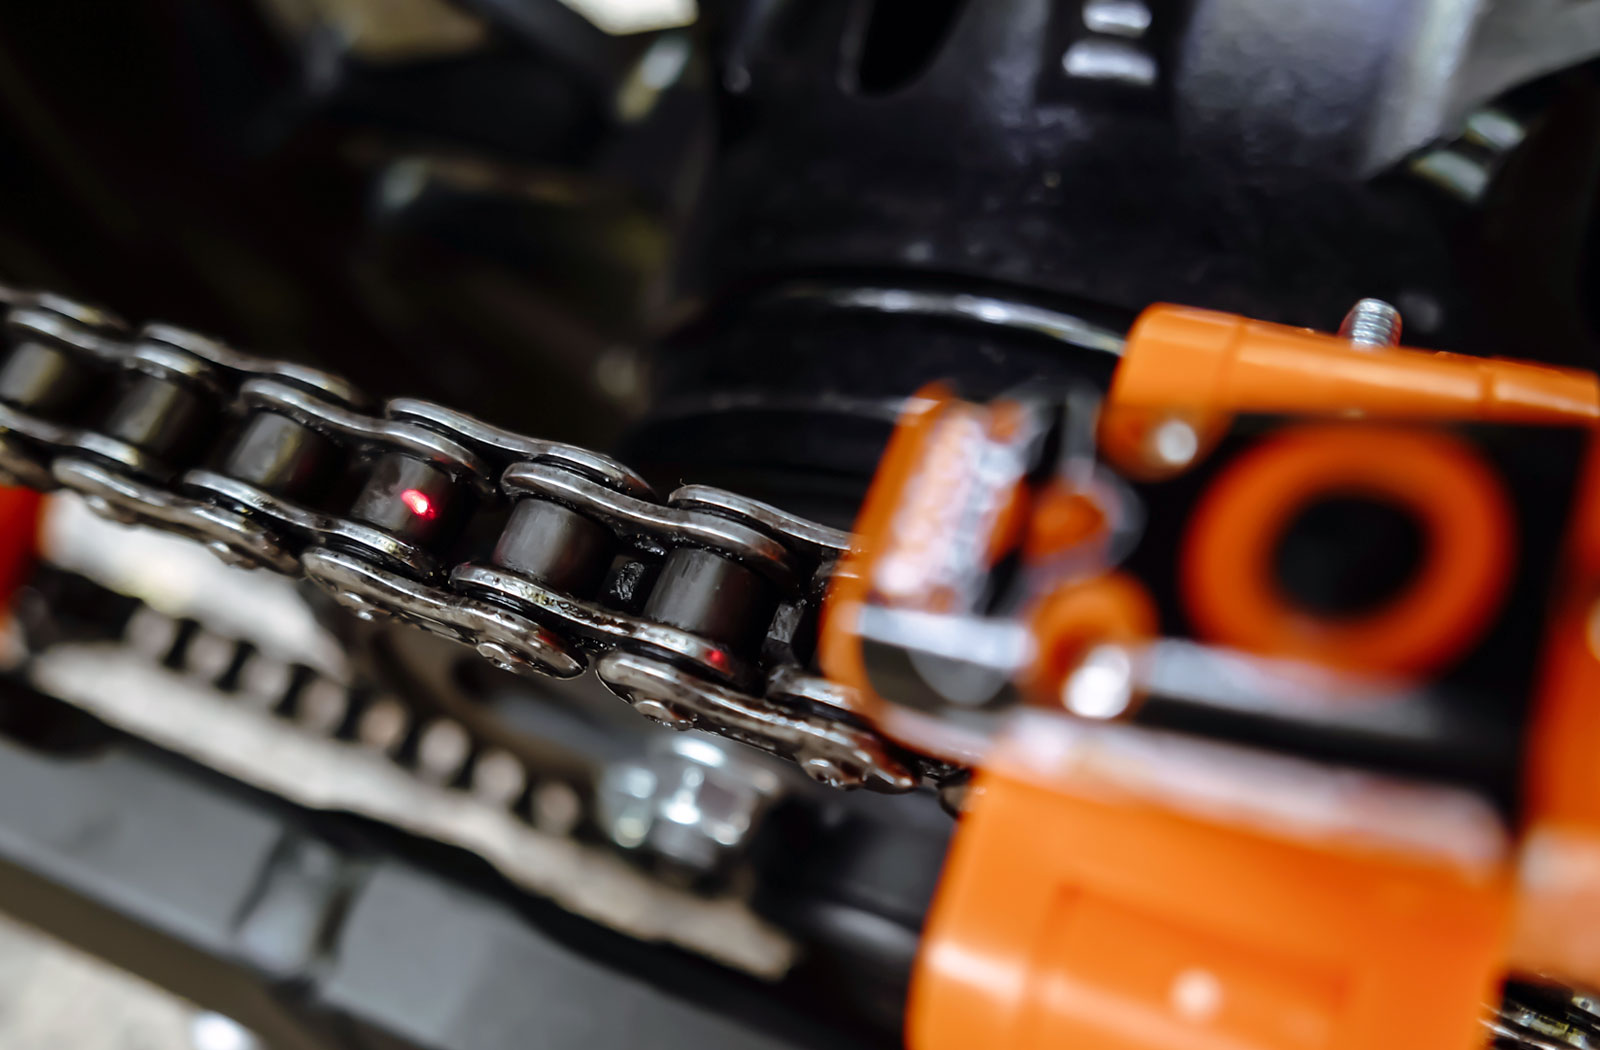
Now tilt the laser up until the red dot sits on the furthest chain link you can see. If the dot isn’t sitting at the centre of that link adjust the axle angle according to the workshop manual instructions. Once the dot is centred lower and raise the laser again to check it is still aligned centrally at both points of the chain. When it is you can tighten the axle according to your workshop manual specifications.
Tru-Tension Chain Monkey and Laser Monkey final verdict
Having performed my own motorcycle chain maintenance for years now these products are well worth having for 2 reasons. Firstly they make the entire process much faster. Using the True-Tension tools removes all of the measuring, testing and remeasuring performed while using the standard chain adjustment process.
Secondly, although very simple in its design, the Laser Monkey is an incredibly precise tool. This is because the alignment is set over a distance of around 1 meter which gives a much more accurate result than using the notches on the swingarm. Before adjusting my chain I used the Laser Monkey to see how well it was already aligned. To my surprise, the red dot was about 3-4mm off-centre. That may not sound like much, but it’s enough to cause unnecessary sprocket wear. I now know that my axle and chain are aligned dead straight.
Would I recommend this product? Yes. The Tru-Tension Chain Monkey and Laser Monkey take the guesswork out of what is essentially a critical maintenance task. I don’t often see products that I’d label as revolutionary, but these clever maintenance tools definitely fit the bill
Available from: Tru-Tension