Recently I relocated from a major city to a regional town. Because of this, I have had to adopt new riding habits. This is due to the fact that speed limits around here are generally higher than in the city. This makes the risk of injury much greater in the event of an accident. Also due to the number of trees on the roadside, there are a lot of shadows cast over the road. These can reduce motorists visibility of oncoming traffic. Then, to top it all off, many country drivers have been travelling for extended periods of time. This means they are more likely to be fatigued or less focused.
There’s only so much I can do as a rider to predict what the traffic around me will do. So what else can be done to reduce my chances of being in an accident?
One of the best things you can do to work the odds in your favour is to make yourself more visible. There are many ways to do this, but one of the most effective is to install additional lighting on your motorcycle. So with this in mind, I acquired a Denali Electronics DRL (day time running lights) kit from Australian distributor WhitesMoto.
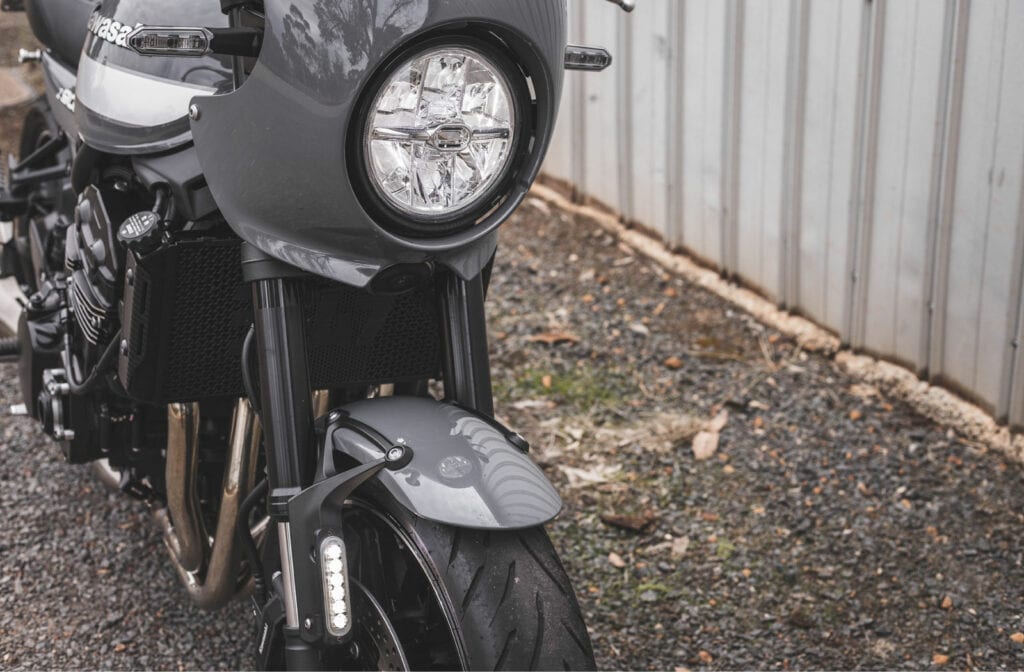
The bike I wanted to fit these to was the Return of the Cafe Racers Kawasaki Z900 RS Cafe. The Zed has a great looking LED headlight, but like most motorcycles, it’s the only thing lighting up the front end. A big contributing factor to the decision to go with these lights was how they would affect the overall look of the motorcycle.
Being a modern retro style motorcycle (Retro Sports to be precise) the Z900RS Cafe is a balanced mix of classic lines and modern equipment. It simply didn’t seem right to hang a pair of bulky adventure touring spotlights off it. The low profile Denali DRL Visibility Lighting Kit with Fender Mounts seemed like an ideal solution.

What’s in the Denali DRL Fender Mount Kit?
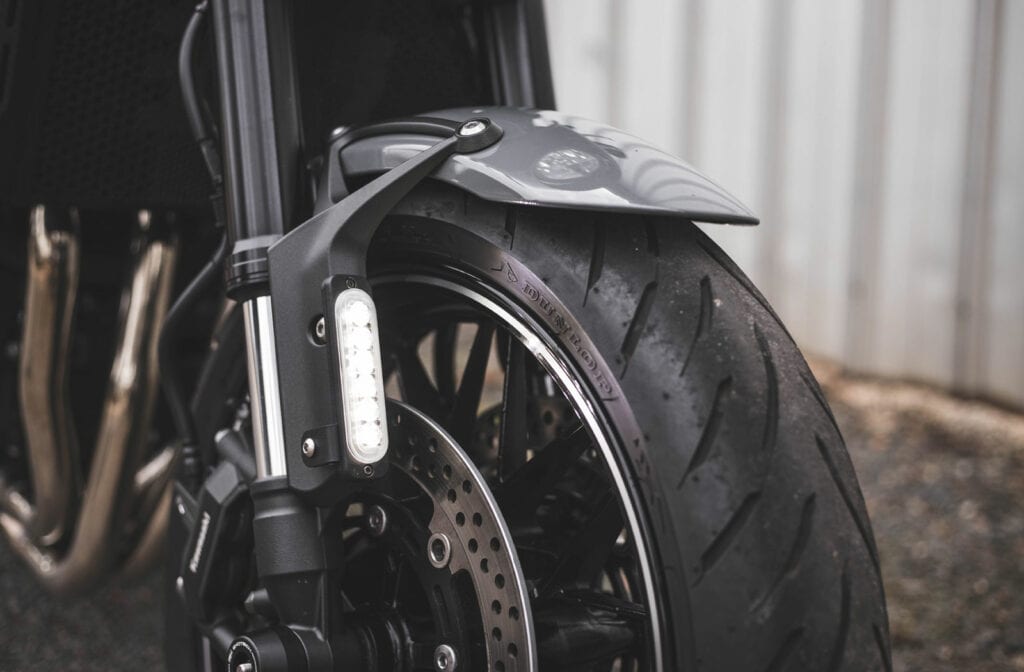
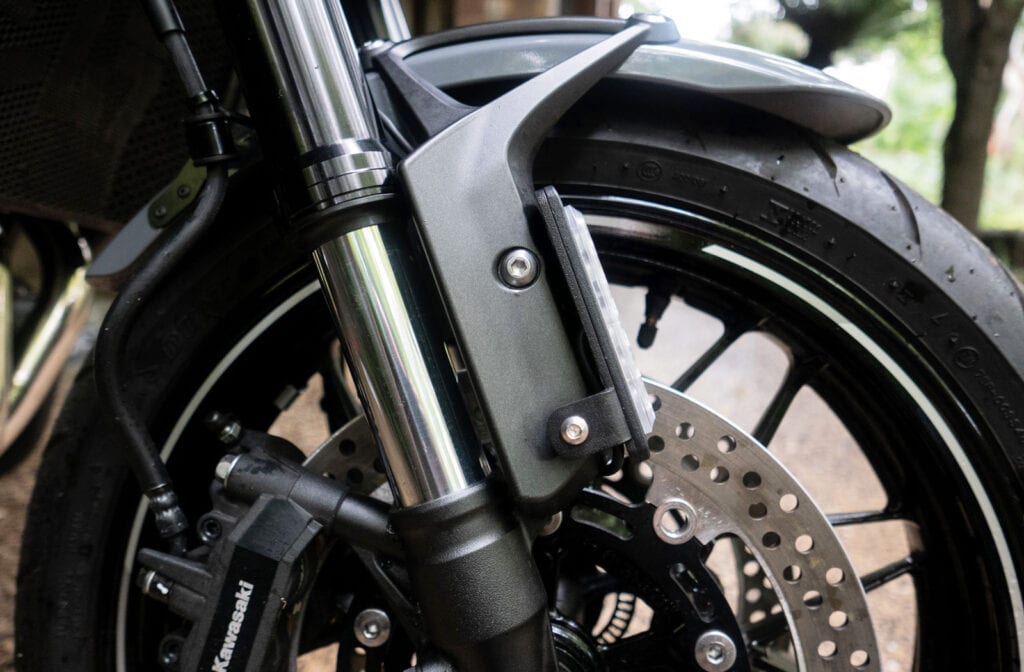
The Denali DRL Fender Mount Kit contains 2 main components. A pair of DRL Visibility Pods (available in either white or amber) and a pair of fender mounting brackets. The DRL Visibility Pods each contain 6 high powered LEDs that offer a 180-degree viewing angle and 870 raws lumens. They’re fully sealed and waterproof, operate off a 12v source and weigh a measly 0.15 lbs each. The fender mounting brackets are slightly heavier than the lights and are finished in a hardwearing black powder-coat. They are designed to be a universal application by mounting directly to your front fender utilising its existing mounting points.
To allow easy instillation across a wide variety of motorcycle makes and models the kit also comes with a plethora of stainless steel fasteners and electrical connectors. Inside the box, you get 6 differently sized bolts, 2 different length spacing collars, 3 Posi-Tap electrical connectors, a wiring splitter, wiring pigtail and a CANsmart wiring adapter.

Installing the Denali DRL lights
The installation process for these daytime running lights was a very straightforward affair. The most time-consuming task was dismantling various parts bike and determining the best route to run the wires. In terms of what needed to be dismantled on the Z900RS the process involved removing the front fender, Cafe cowl and opening up the headlight bucket…so not all that difficult. As for the wiring route, I spent a good 20 minutes looking at my options and checking lengths before I committed to anything.
So as to not detract from the look of Z900RS by adding visible wiring I ran everything as inconspicuously as possible. To do this I had to tap a couple of holes into a hidden part of the fender assembly. Doing this allowed me to run the wiring up the inside of the fender mount. I then ran it behind the base of the upper fork legs and followed the brake lines up to the headlight bucket.
As for the brackets, I fit them using the shorter of the 2 spacing collars in the kit. I then set them on an angle parallel to the fender mount which also positioned the lights on a slightly upward tilt making them even more visible to oncoming traffic. I used a few cable ties to hold all the wiring in place and passed the cables into the back of the headlight bucket.

The complexity of the wiring work comes down to your motorcycle and how you choose to have the lights function. If you’re looking at installing multiple lighting systems the CANsmart plug can be used in conjunction with Denali’s CANsmart controller. In my case, I wanted to connect the DRL lights to the headlight wiring.
The instructions demonstrate exactly how to do this. They also give you the option to have 2 stages of intensity. This can be done simultaneously with the motorcycles high and low beam functionality or by adding an optional switch. I went with the no switch option for a clean and simple install.
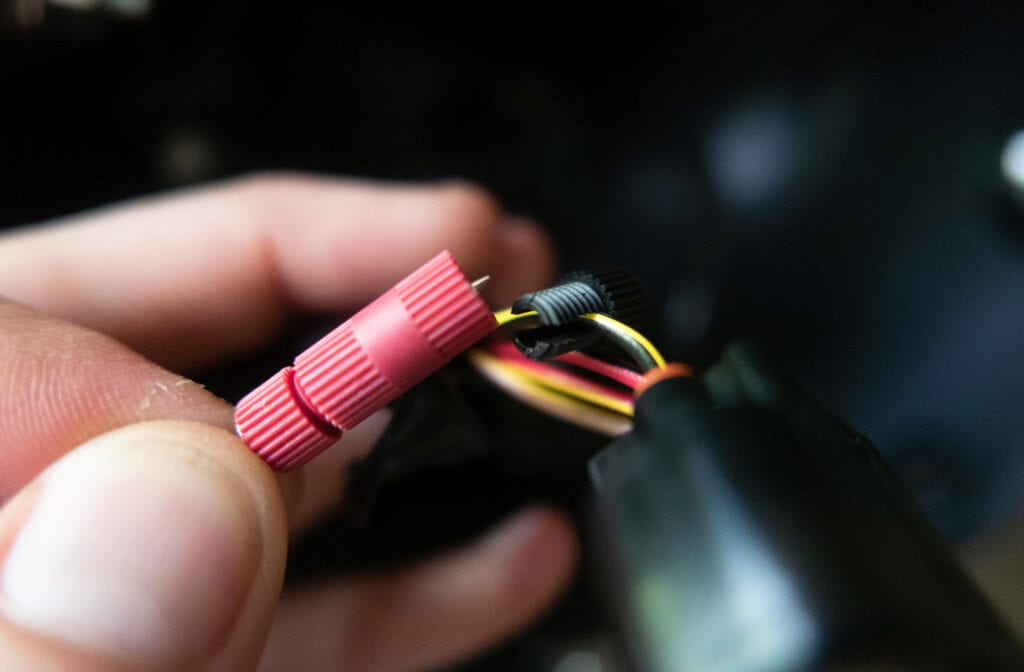
Connecting the lights is simply a matter of plugging each DLR lead into the included wiring splitter. Next, you will need to determine the purpose of each of the wires attached to your headlight. You will need to identify which wire is the ground, which is low beam and which is high beam. I was able to do this using information I found on a Z900RS forum. Another place to find this out is on a wiring diagram which you will find in your motorcycles workshop manual.
Note: Before this next step, it is best practice to disconnect your battery to avoid any damage to your electrics. Using the 3 Posi-Tap connectors in the kit connect the wiring pigtail to your headlight wires. Reconnect the battery and after doing a quick test everything should be functioning correctly.

Low profile, high impact lighting
Along with the huge benefit of now being more visible out on the street, the Denali lights have had very little impact on the look of our Z900RS Cafe. Soon after the install I joined a group ride and received a comment about how good the system looked installed and switched on. Another surprising benefit is how much extra light I get at night. The dual-circuit set up has the lights running at 50% intensity most of the time. However, when I flick on the high beams the units go to 100% intensity and they work well as filler/flood lighting, widening the spread of light beyond what the Z900RS headlight offers.
The DRL Visibility Lighting Kit may not be the cheapest option on the market. But quality like this comes at a price. Everything in the kit is well finished and made using premium materials, right down to the bolts they supply in the kit. The lights are IP67 Waterproof which means they’re impervious to dust and more than capable of completing river crossings (not something I plan to do on the Z900RS any time though!).
With a combined rating of 1740 lumens, these tiny DRL units are hard to ignore and have undoubtedly made me and the Zed much easier to spot. In Australia, they are available to purchase at all good Australian motorcycle shops or online at WhitesMoto. So if you want improved safety without sacrificing the look of your ride we recommend checking them out.
Available from: WhitesMoto (Australia) / Revzilla (USA)