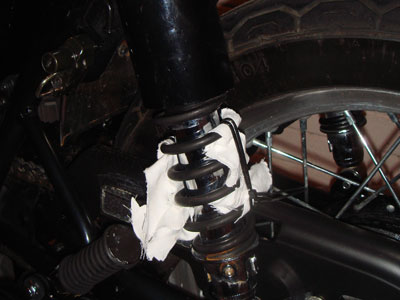
Not to be beaten by my lack of tools I came up with a solution to remove the Ventura rear rack from the bike to allow me to fit the rear indicators. Because the rear springs/shocks are under pressure you need to clamp them before you can remove them from the bike (unless of course you have the strenth to compress them by hand). My solution was to get a friend to sit on the bike to compress the springs slightly (bit of friendly advice: if you’re going to ask someone don’t ask your mates girlfriend and tell her it’s because you need “some weight” on the back of the bike) then while the springs are more compressed use 4 or so cable ties or as I like to call them riot cuffs to clamp the springs. Then when you move the springs away from their position you should have no problem reattaching them later.
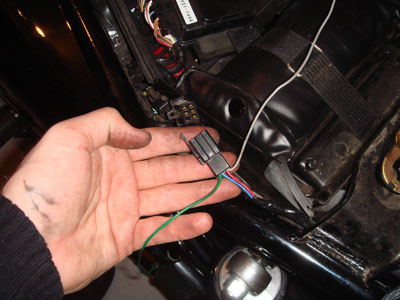
Undo the rear brake light unit from the fender and flip it over. Slice the plastic cover to access the wires and unplug each wire at the connectors. You will have 7 wires sticking out of the rear fender (Take note of where each wire was connected). You need to feed all the wires back to the large connector located under the seat. Start by pushing them back through the hole in the fender. Inside the fender, there are several metal hooks that hold the wires in position. If you push a flat head screwdriver into each one you can open them up enough for the cable to come out. Unplug the wires at the connector and you have the whole rear lighting wiring off the bike.
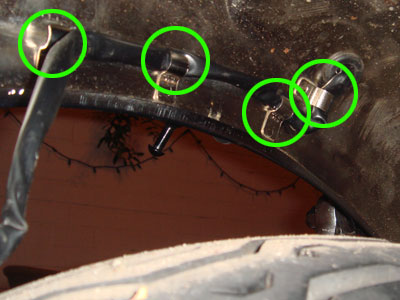
*Clips holding the rear lights wiring in place.
 Now you will need to get the indicator wires out from the wire sleeve as you will be setting the indicator wires along a different route to the stop light wires. Feed the indicator wires back through the wire sleeve one at a time by just pulling them out slowly. The 3 earth wires are actually all running off 1 wire inside the sleeve. Just pull the sleeve back slightly and snip 2 of them off at the connector and cover the exposed wires with some electrical tape. You can now plug the connector back together and return the brake light wires to their original position by feeding them back under the rear fender and out of the stop light hole (ready for attaching to the new brake light unit).
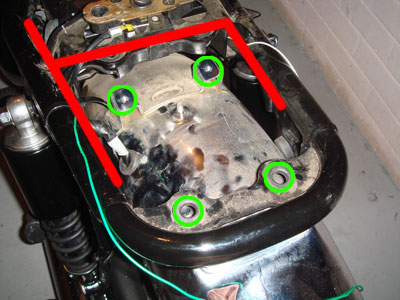 *Red line shows new indicator wiring route. Green circles indicate where to unscrew the fender from the bike frame.

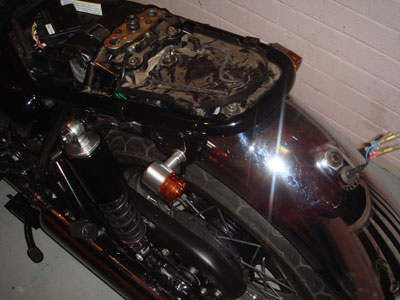
Under the W650’s seat at the rear are some holes perfect for mounting the new indicators. I had to first undo the bolts holding the rear fender in place to allow more access to the holes. Then I simply screwed each of the indicators into place. By leading the indicator wires along the inside of the frame beneath the seat you can get power to the lights. Once again you will need to earth each light for them to function correctly. I did this by pushing the exposed ends of 2 wires into the same hole as the earth in the connector and then running them along the same route as the live wires and attaching them the same way I did the front indicators. It is best to wrap electrical tape around all of your connections and to fasten any loose wires to the bike using cable ties. Test the lights and if all is functioning correctly bolt the fender back into place and the job is done.