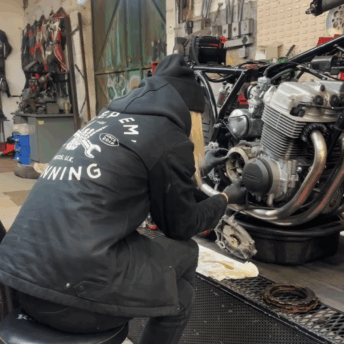
Building a custom motorcycle part from raw materials takes patience, planning, and attention to detail. The process often begins with simple design work, testing ideas on cardboard before moving to stronger materials. From there, patterns are refined, measurements are marked, and the metal is shaped step by step until the desired form starts to take shape.
Workshop setup also plays a key role. Using mobile equipment, choosing the right thickness of steel, and relying on both hand tools and machines help keep the work efficient and precise. Each stage, from forming the wire frame to finishing the seat base, adds up to a project that is both functional and well-crafted.
Key Takeaways
- Careful design and planning guide each step of the build
- The right tools and materials improve accuracy and efficiency
- Small adjustments during shaping lead to a better final result
Designing the Cafe Racer Cowl
Using Cardboard Mockups
He began the process by shaping the design with cardboard. This step allowed him to test different outlines before committing to metal. Several versions were often made until one looked right.
Benefits of cardboard mockups:
- Quick to cut and adjust
- Low cost before moving to steel
- Helps visualize proportions on the bike
| Material | Purpose |
|---|---|
| Cardboard | Test design shapes |
| Paper | Mark shrink points |
| Steel rod | Build wire buck for symmetry |
Pause and Reflect Approach
He often relied on what he called the pause and reflect method. This meant sitting back, looking at the work, and thinking through changes before moving forward.
This step was less about tools and more about patience. By taking time to study the shape, he could spot uneven areas or design flaws early.
Key points of this method:
- Step away from the project to reset perspective
- Look for symmetry and balance
- Avoid rushing into the next stage
Material and Tool Choices
Selecting Sheet Steel
He worked with cold-rolled mild steel in different gauges to shape the cowl. At first, he used 18 gauge (1.1 mm), which proved too heavy for the project. He then switched to 20 gauge (0.95 mm), finding it strong enough while easier to form.
| Gauge | Thickness | Notes |
|---|---|---|
| 18 | 1.1 mm | Very strong, but heavy and harder to shape |
| 20 | 0.95 mm | Lighter, easier to work, still durable |
He cut templates from paper to guide where shrinking was needed, then transferred those marks onto the steel before shaping.
Heat-Formed Plastic for Seat Pans
For the seat base, he used a thermoplastic sheet that softens with heat and shapes directly to the motorcycle frame. Once cooled, it becomes rigid and can be cut and sanded like wood.
- Advantages:
- Conforms perfectly to the bike
- Easy to cut, sand, and finish
- Can be paired with seat clips for a professional fit
This choice simplified the process of making a precise and durable seat foundation.
Key Tools for Shaping Metal
He relied on a mix of powered and hand tools to form the sheet metal.
Basic tools:
- Nylon hammer
- Sandbag
- Center punch for marking reference points
Shaping and finishing tools:
- Power hammer with retractable wheels for mobility
- Shrinker-stretcher for adjusting edges
- Bead roller to round seatpan edges
- English wheel or planishing hammer for smoothing
For those starting out, a shrinking stump, nylon hammer, and sandbag can handle most of the work without advanced machines. Even simple hand planishing against a dolly or fixed surface can achieve clean results with enough time and effort.
Forming the Wire Frame
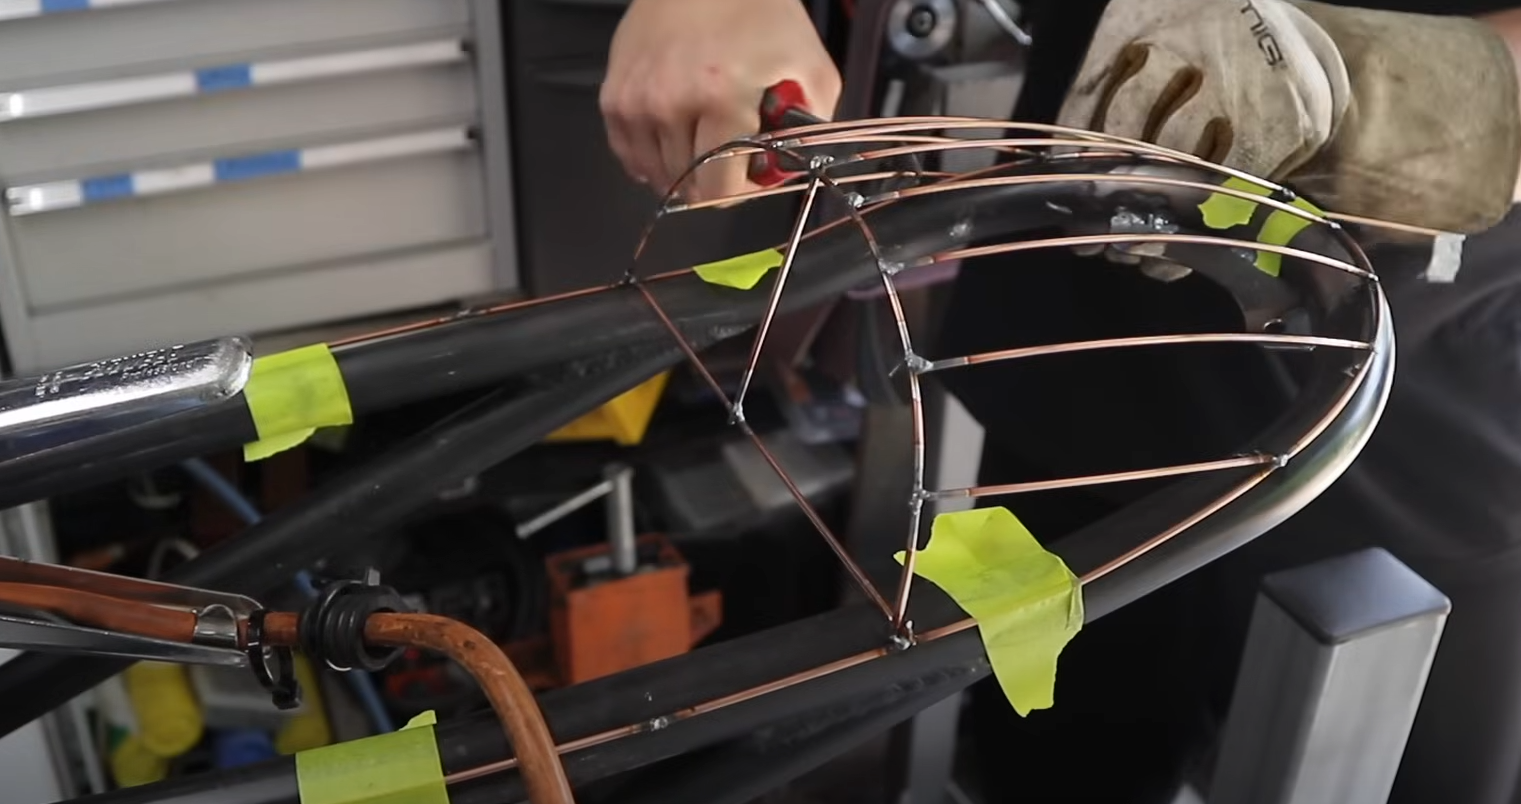
Working with Steel Rods
He shaped the frame using 2.4 mm steel rods normally used for TIG welding. These rods worked well because they were easy to cut, bend, and adjust. As each piece was added, the frame showed where the curves lined up evenly, which made it easier to spot areas that needed correction.
Key points:
- Material: 2.4 mm TIG filler rod
- Purpose: forms the base shape of the hump
- Benefit: easy to cut, bend, and adjust for accuracy
Keeping Both Sides Even
He focused on making sure both sides matched by checking the shape as he built it. The wire frame helped reveal any high or low spots, which he could then adjust until the curves looked balanced. This step ensured that the final metal piece would sit evenly once it was formed.
Simple checks for balance:
- Compare left and right curves often.
- Adjust rods until both sides match.
- Use the frame as a guide before moving on to paper templates.
Transferring Patterns and Setting Reference Marks
Using Paper Patterns
After shaping the wire frame, he moved on to paper to map out the design. The paper helped identify where the metal would need shrinking. He folded the paper wherever the surface would pull in, creating clear guides for later shaping.
To keep track of these adjustments, he outlined the areas directly on the paper. This step ensured that once the steel was cut, the shrinking process could follow the same mapped points.
Key steps he followed:
- Trace the wire frame onto paper
- Fold paper at shrinking points
- Mark areas that need shaping before cutting steel
Marking with a Punch Tool
Since marker lines can fade during shaping, he used a punch to create small, permanent dots in the steel. These marks acted as reference points that stayed visible through hammering and forming.
This method allowed him to return to the exact spots that needed attention, even after several rounds of shaping. It also gave consistency when comparing both sides of the piece.
| Tool | Purpose |
|---|---|
| Marker | Quick layout, temporary guide |
| Punch | Permanent reference marks |
By combining both marking methods, he kept the process accurate and avoided losing track of the key shrinking points.
Metal Shaping Techniques
Reducing and Expanding Metal
He marked the sheet with small punch marks to track where the steel needed shrinking. By controlling these areas, he could pull the metal in and create the curves needed for the cowl. When the metal stretched too far, he switched to a stretcher tool to bring it back into shape.
Tools used:
- Shrinker/Stretcher
- Center punch for reference points
- Marker for layout
Working with a Power Hammer
The power hammer sped up the shaping process by quickly shrinking and forming the steel. He mounted the machine on retractable wheels so it could move around the workshop but stay stable during use. A few minutes of hammering gave the piece its rough shape, which he then refined with hand tools.
Advantages:
- Fast shaping
- Consistent results
- Easier to handle heavy gauge steel
Hand Finishing Techniques
He showed that shaping could also be done by hand with simple tools like a nylon hammer, sandbag, or even a dolly. By striking against a solid surface, he flattened and smoothed out high spots. Although slower than machines, this method still produced accurate results.
Basic hand tools:
- Nylon hammer
- Sandbag
- Dolly or solid surface
Using an English Wheel
For final smoothing, he turned to the English wheel. This tool removed small imperfections and gave the metal a clean, even surface. Smaller wheels worked best for motorcycle parts, and he noted they were affordable for anyone wanting to do more projects.
Key benefits:
- Smooths out hammer marks
- Creates even curves
- Works well for finishing thin sheet metal
Workshop Efficiency and Mobility
Wheel Upgrades and Retractable Design
He placed nearly every machine in his workshop on wheels to make moving equipment easier. The hydraulic lift table received upgraded casters, which improved handling and stability. The power hammer also sits on a wheeled base, but with a retractable system so it stays steady during use and can still be rolled out of the way when needed.
Machines on Wheels:
- Hydraulic lift table (with upgraded wheels)
- Power hammer (with retractable setup)
- Most other workshop tools, except the metal lathe
This setup allows him to adjust the layout quickly, creating more space when required. The retractable design prevents heavy equipment from shifting while in operation.
Tool Storage and Setup
Keeping tools organized helps him work faster and avoid wasted time. He often relies on simple storage solutions that keep hammers, markers, and shaping tools within reach.
Commonly Used Tools:
| Tool | Purpose |
|---|---|
| Nylon hammer | Shaping and stretching metal |
| Sandbag | Backing for hammer work |
| Shrinker/Stretcher | Adjusting seat base fitment |
| Bead roller | Rounding and strengthening edges |
By arranging the workshop with mobility and organization in mind, he maintains a clean, adaptable space that supports both small adjustments and larger fabrication projects.
Seat Base Fabrication
Marking the Frame Center
He located the middle of the motorcycle subframe to ensure the seat base would sit evenly. This step gave him a clear reference point, which helped keep the overall fit accurate. Without this, the seat could shift to one side or sit unevenly.
Rolling the Seatpan Edges
He used a bead roller to curve the edges of the seatpan. This step helped the panel fit more snugly against the bike. However, rolling the edges also caused the panel to flatten slightly, which required further adjustment.
Tools Used:
- Bead roller
- Cut steel seatpan
Adjusting with Shrinker and Stretcher
He corrected the flattened areas by working with a shrinker and stretcher. When the adjustments went too far in one direction, he swapped the tooling to stretch the panel back into place. This back-and-forth process allowed him to refine the shape until the seatpan matched the frame.
Adjustment Process:
- Shrink edges where needed
- Stretch areas that pulled in too far
- Repeat until alignment matched the frame
Final Build and Finishing Details
Strengthening the Front Lip
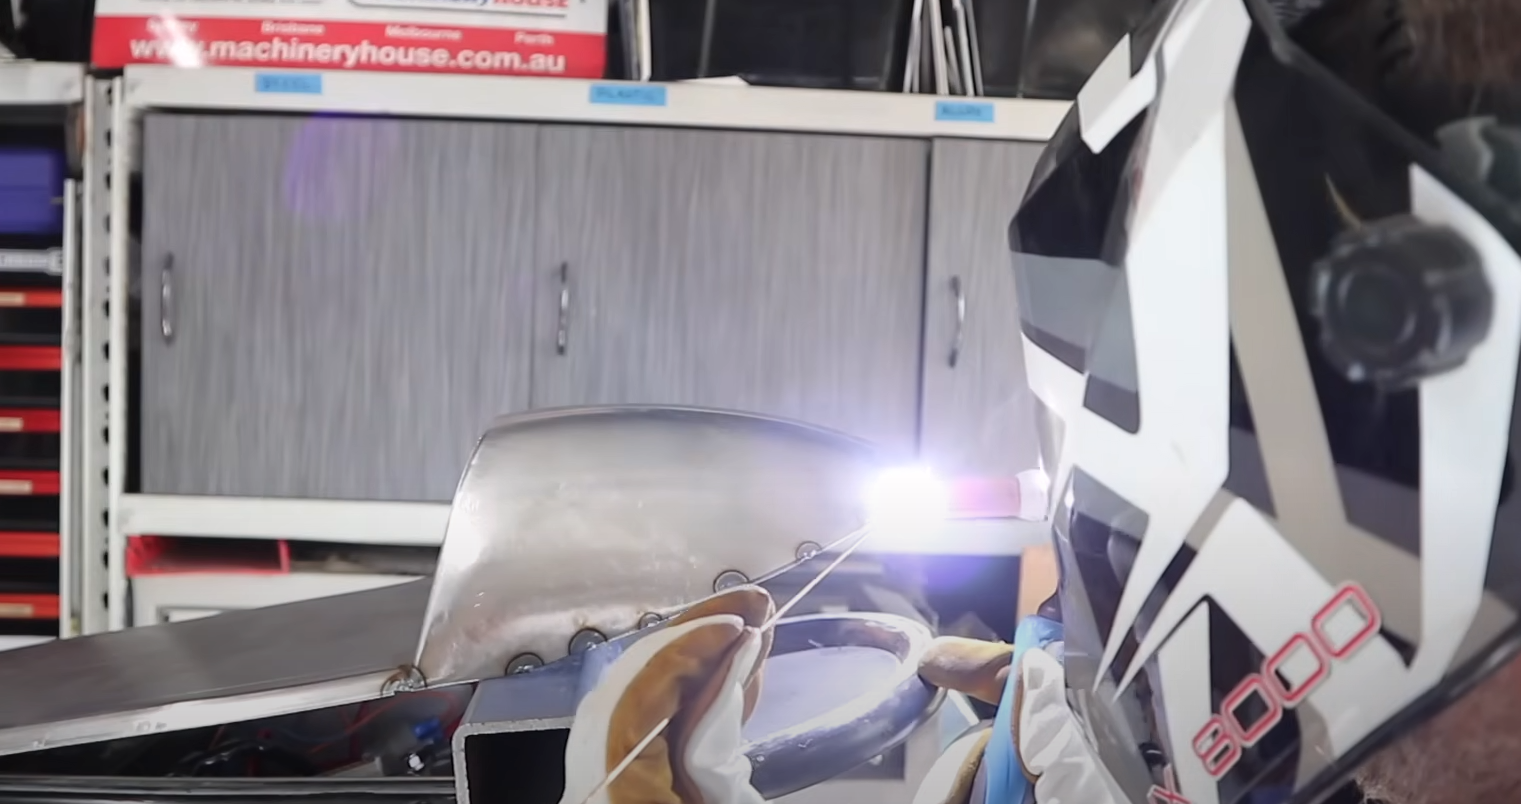
He tipped the front edge of the seat base before attaching the hump. This step added extra strength to the panel and also gave it a cleaner, more professional look. By folding the edge slightly, the piece held its shape better and resisted flexing.
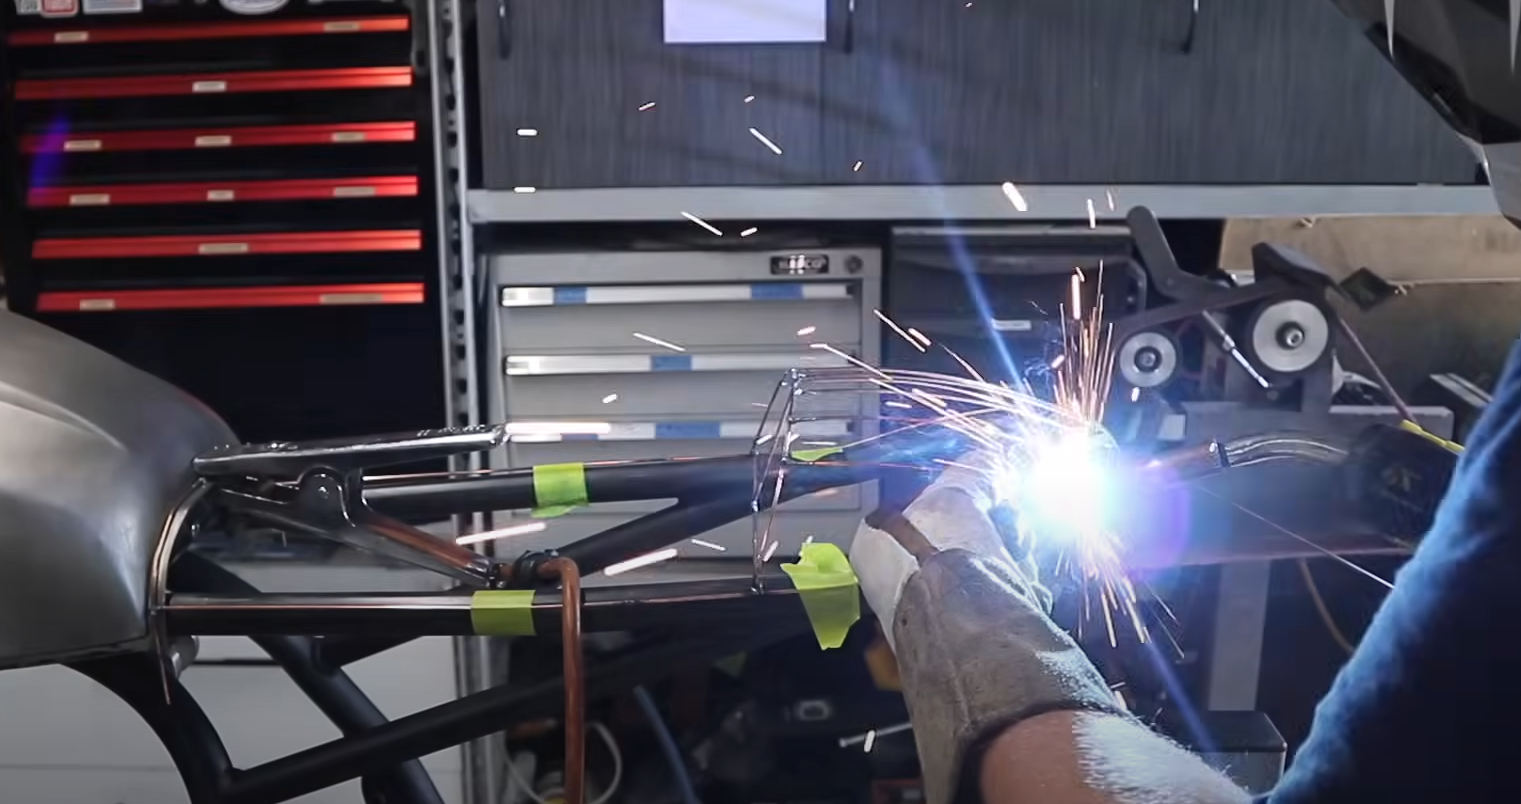
Joining the Hump to the Seat Base
With the front edge prepared, he welded the hump directly onto the seatpan. Careful alignment made sure the two parts sat flush against each other. Small adjustments with tools like the shrinker-stretcher helped correct any distortion before welding.
Clean Fit and Professional Finish
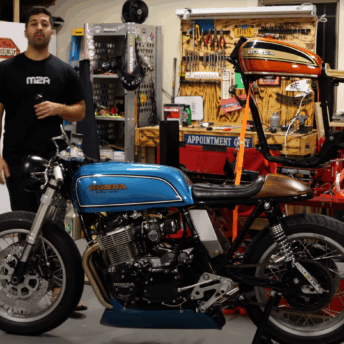
The final assembly came together with a precise fit. The edges lined up smoothly, and the welds blended into the surface. The result was a solid structure with a refined appearance, giving the project a finish that looked factory-made. He even began shaping matching side panels to carry the same level of detail across the build.
Encouragement for Metal Shaping Enthusiasts
Advantages of Working with Metal
Metal shaping allows creators to turn flat sheets into custom forms with precision. It gives them control over symmetry, curves, and details that make each piece unique. The process can feel rewarding because it combines design, problem-solving, and hands-on skill.
Many find the work enjoyable because it develops patience and attention to detail. Even small adjustments, like shrinking or stretching steel, show progress in real time. This makes the craft both practical and motivating.
Starter Tools Worth Considering
Beginners do not need expensive machines to start shaping metal. A few simple tools can go a long way:
| Tool | Purpose | Notes |
|---|---|---|
| Nylon hammer | Forms and smooths metal | Gentle on steel, helps control shaping |
| Sandbag | Supports hammering | Used for shrinking and stretching |
| Shrinking stump | Shapes curves | A wooden block with a bowl cut into it |
| Dolly or vise setup | Hand planishing | Flattens and refines surfaces |
Optional tools like a small English wheel or a hand planishing hammer can speed up finishing work. However, even without them, careful use of basic tools can produce strong, accurate results.
By starting simple and adding tools over time, enthusiasts can build skill and confidence without feeling overwhelmed.